Panasonic WJRT416 WJRT416 User Guide - Page 49
Screenshot 2, Screenshot 3
 |
View all Panasonic WJRT416 manuals
Add to My Manuals
Save this manual to your list of manuals |
Page 49 highlights
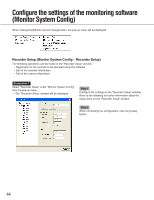
Screenshot 2 The map will be created. Screenshot 3 The "Map Edit" window will be displayed. Step 2 Select the created map displayed in the "Map" column, and then click the [Load] button to apply the background image. For example, a schematic image of inside a bank, a supermarket, etc. The background image should be a bitmap image (bmp) or a jpeg image (jpeg). To cancel the applied background image, click the [Clear] button. Step 3 Click the [Layout] button. Step 4 Locate each of the camera icons onto the actual positions on the background image. Step 5 Click the [OK] button. → The "Map Edit" window will close. Step 6 Click the [Close] button on the "Map Setup" window. 49
-
 1
1 -
2
-
3
-
4
-
5
-
6
-
7
-
8
-
9
-
10
-
11
-
12
-
13
-
14
-
15
-
16
-
17
-
18
-
19
-
20
-
21
-
22
-
23
-
24
-
25
-
26
-
27
-
28
-
29
-
30
-
31
-
32
-
33
-
34
-
35
-
36
-
37
-
38
-
39
-
40
-
41
-
42
-
43
-
 44
44 -
 45
45 -
 46
46 -
 47
47 -
 48
48 -
 49
49 -
 50
50 -
 51
51 -
 52
52 -
 53
53 -
 54
54 -
55
-
56
-
57
-
58
-
59
 |
 |
49
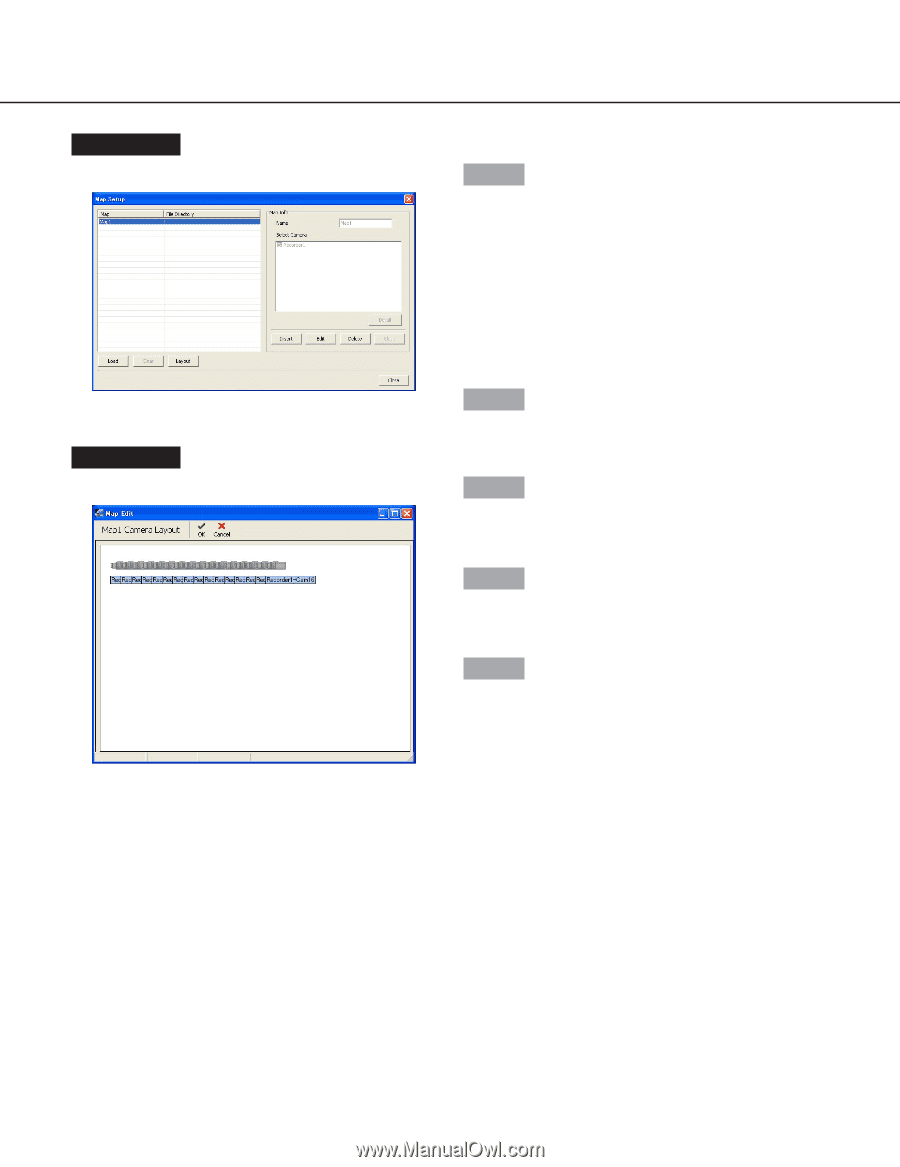
Screenshot 2
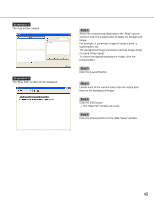
The map will be created.
Step 2
Select the created map displayed in the "Map" column,
and then click the [Load] button to apply the background
image.
For example, a schematic image of inside a bank, a
supermarket, etc.
The background image should be a bitmap image (bmp)
or a jpeg image (jpeg).
To cancel the applied background image, click the
[Clear] button.
Step 3
Click the [Layout] button.
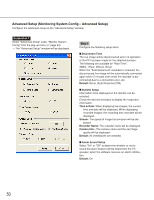
Screenshot 3
The "Map Edit" window will be displayed.
Step 4
Locate each of the camera icons onto the actual posi-
tions on the background image.
Step 5
Click the [OK] button.
→
The "Map Edit" window will close.
Step 6
Click the [Close] button on the "Map Setup" window.