Panasonic WJRT416 WJRT416 User Guide - Page 43
Remote Talk, Important, Step 3
 |
View all Panasonic WJRT416 manuals
Add to My Manuals
Save this manual to your list of manuals |
Page 43 highlights
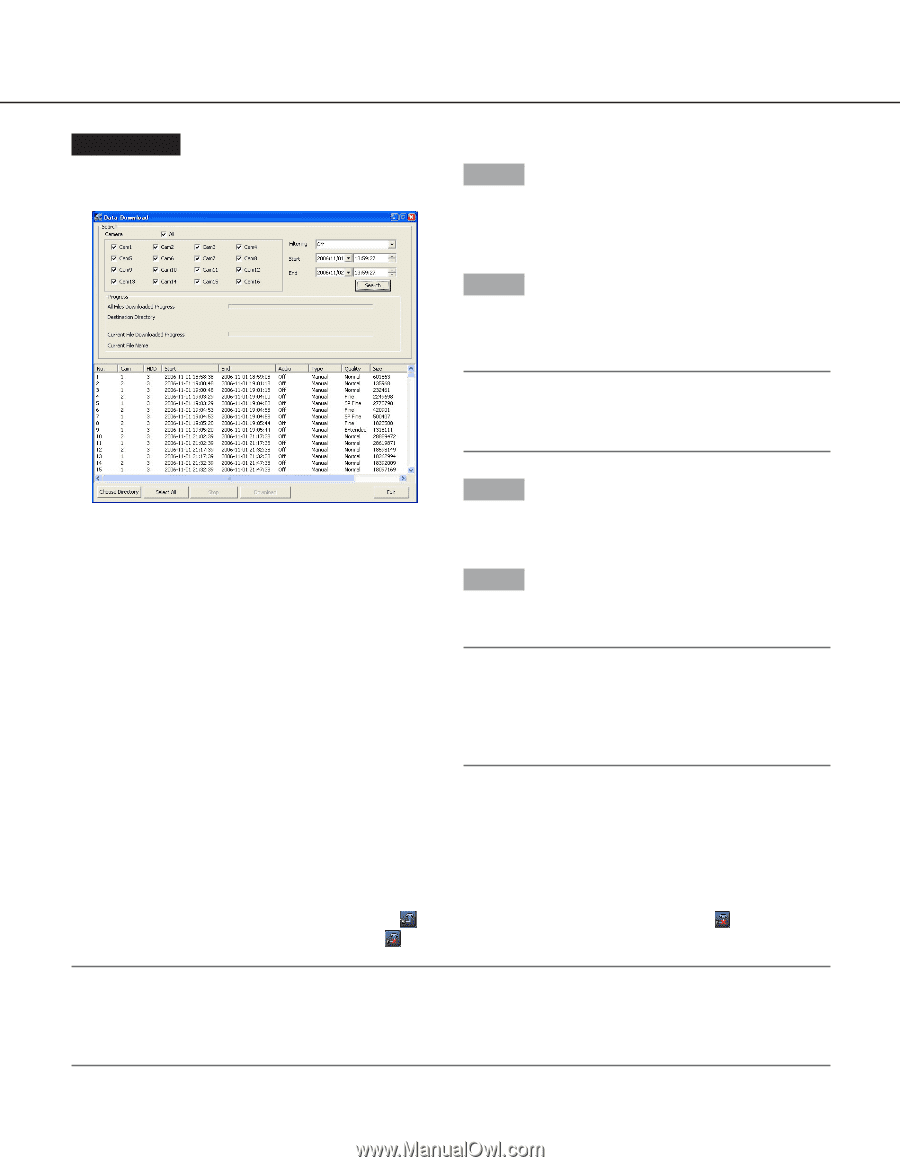
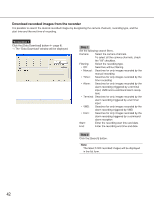
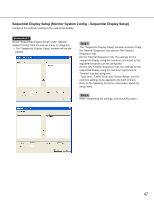
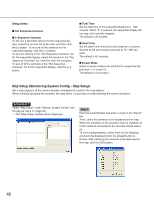
Screenshot 2 The result list will be displayed in the "Data Download" window. Step 3 Click the [Choose Directory] button, and then designate the directory in which recorded images are to be downloaded. Step 4 Select the desired recorded images from the result list. To select all of the listed recorded images, click the [Select All] button. Note: It is possible to select multiple search results by clicking them while pressing the [Ctrl] key on the keyboard. Step 5 Click the [Download] button. → Download will start. Step 6 To close the "Data Download" window, click the [Exit] button. Important: • The file name of the recorded images to be down- loaded cannot be edited. • It is impossible to download recorded images which is currently being played or copied on the recorder or which is currently being played using the software. Remote Talk It is possible to communicate with the login recorder using audio. To communicate using audio, connect a speaker and a microphone to both the recorder and the PC. Click the [Remote Talk] button. → Remote talk will start. When remote talk starts, the [Remote Talk] button will change to the [Stop Remote Talk] button . To stop remote talk, click the [Stop Remote Talk] button . Important: • The volume level of remote talk can be adjusted by the "Sound and Audio Device" control panel of Windows. • When starting the remote talk while playing recorded images on the PC, audio of the remote talk and of playback may be heard simultaneously. Before starting the remote talk, stop playback or mute audio of playback ( page 25). 43
-
 1
1 -
2
-
3
-
4
-
5
-
6
-
7
-
8
-
9
-
10
-
11
-
12
-
13
-
14
-
15
-
16
-
17
-
18
-
19
-
20
-
21
-
22
-
23
-
24
-
25
-
26
-
27
-
28
-
29
-
30
-
31
-
32
-
33
-
34
-
35
-
36
-
37
-
 38
38 -
 39
39 -
 40
40 -
 41
41 -
 42
42 -
 43
43 -
 44
44 -
 45
45 -
 46
46 -
 47
47 -
 48
48 -
49
-
50
-
51
-
52
-
53
-
54
-
55
-
56
-
57
-
58
-
59
 |
 |