Panasonic WJRT416 WJRT416 User Guide - Page 35
Recording/Event Setup (Setup – Recording/Event Setup), Communication Setup (Setup – Communication
 |
View all Panasonic WJRT416 manuals
Add to My Manuals
Save this manual to your list of manuals |
Page 35 highlights
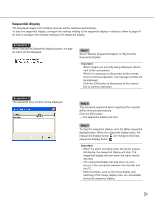
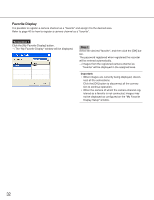
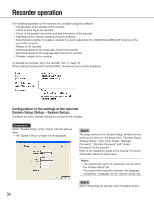
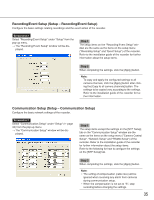
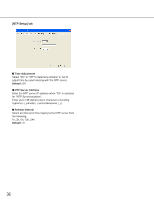
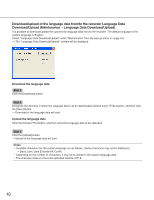
Recording/Event Setup (Setup - Recording/Event Setup) Configure the basic settings relating recordings and the event action of the recorder. Screenshot 1 Select "Recording/Event Setup" under "Setup" from the pop-up menu. → The "Recording/Event Setup" window will be dis- played. Step 1 The setup items on the "Recording/Event Setup" window are the same as the items on the setup menu ("Recording Setup" and "Event Setup") of the recorder. Refer to the installation guide of the recorder for further information about the setup items. Step 2 When completing the settings, click the [Apply] button. Note: To copy and apply the configured settings to all camera channels, click the [Apply] button after clicking the [Copy to all camera channels] button. The settings to be copied vary according to the settings. Refer to the installation guide of the recorder for further information. Communication Setup (Setup - Communication Setup) Configure the basic network settings of the recorder. Screenshot 1 Select "Communication Setup" under "Setup" ( page 34) from the pop-up menu. → The "Communication Setup" window will be dis- played. Step 1 The setup items except the settings on the [NTP Setup] tab on the "Communication Setup" window are the same as the items on the setup menu ("Camera Control Setup", "Network Setup" and "RS485 Setup") of the recorder. Refer to the installation guide of the recorder for further information about the setup items. Refer to the following for how to configure the settings on the [NTP Setup] tab. Step 2 When completing the settings, click the [Apply] button. Note: • The setting of compensation (cable loss) will be ignored when receiving any alarm from cameras during communication setup. • When the compensation is not set to "S", stop recording before changing the settings. 35
-
 1
1 -
2
-
3
-
4
-
5
-
6
-
7
-
8
-
9
-
10
-
11
-
12
-
13
-
14
-
15
-
16
-
17
-
18
-
19
-
20
-
21
-
22
-
23
-
24
-
25
-
26
-
27
-
28
-
29
-
 30
30 -
 31
31 -
 32
32 -
 33
33 -
 34
34 -
 35
35 -
 36
36 -
 37
37 -
 38
38 -
 39
39 -
 40
40 -
41
-
42
-
43
-
44
-
45
-
46
-
47
-
48
-
49
-
50
-
51
-
52
-
53
-
54
-
55
-
56
-
57
-
58
-
59
 |
 |
