Ricoh P C600 User Guide - Page 24
Installing Options, Order of Option Installation, Attaching the 500-sheet Paper Feed Unit
 |
View all Ricoh P C600 manuals
Add to My Manuals
Save this manual to your list of manuals |
Page 24 highlights
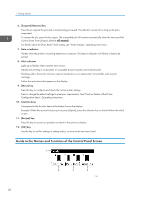
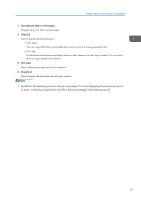
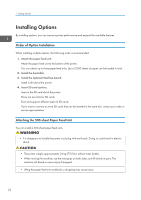
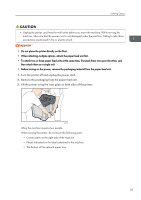
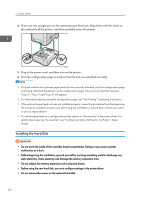
1. Getting Started Installing Options By installing options, you can improve printer performance and expand the available features. Order of Option Installation When installing multiple options, the following order is recommended: 1. Attach the paper feed unit. Attach the paper feed unit to the bottom of the printer. You can attach up to three paper feed units. Up to 2,000 sheets of paper can be loaded in total. 2. Install the hard disk. 3. Install the optional interface board. Install in the slot of the printer. 4. Insert SD card options. Insert in the SD card slot of the printer. There are two slots for SD cards. Each slot supports different types of SD cards. If you want to use two or more SD cards that can be inserted in the same slot, contact your sales or service representative. Attaching the 500-sheet Paper Feed Unit You can install a 500-sheet paper feed units. • It is dangerous to handle the power cord plug with wet hands. Doing so could result in electric shock. • The printer weighs approximately 34 kg (75.0 lb.) without toner bottles. • When moving the machine, use the inset grips on both sides, and lift slowly in pairs. The machine will break or cause injury if dropped. • Lifting the paper feed unit carelessly or dropping may cause injury. 22
-
 1
1 -
2
-
3
-
4
-
5
-
6
-
7
-
8
-
9
-
10
-
11
-
12
-
13
-
14
-
15
-
16
-
17
-
18
-
 19
19 -
 20
20 -
 21
21 -
 22
22 -
 23
23 -
 24
24 -
 25
25 -
 26
26 -
 27
27 -
 28
28 -
 29
29 -
30
-
31
-
32
-
33
-
34
-
35
-
36
-
37
-
38
-
39
-
40
-
41
-
42
-
43
-
44
-
45
-
46
-
47
-
48
-
49
-
50
-
51
-
52
-
53
-
54
-
55
-
56
-
57
-
58
-
59
-
60
-
61
-
62
-
63
-
64
-
65
-
66
-
67
-
68
-
69
-
70
-
71
-
72
-
73
-
74
-
75
-
76
-
77
-
78
-
79
-
80
-
81
-
82
-
83
-
84
-
85
-
86
-
87
-
88
-
89
-
90
-
91
-
92
-
93
-
94
-
95
-
96
-
97
-
98
-
99
-
100
-
101
-
102
-
103
-
104
-
105
-
106
-
107
-
108
-
109
-
110
-
111
-
112
-
113
-
114
-
115
-
116
-
117
-
118
-
119
-
120
-
121
-
122
-
123
-
124
-
125
-
126
-
127
-
128
 |
 |
