Samsung SCX 4826FN User Manual (ENGLISH) - Page 19
Understanding the Status LED, Status, Green, Blinking - toner for
 |
UPC - 635753614824
View all Samsung SCX 4826FN manuals
Add to My Manuals
Save this manual to your list of manuals |
Page 19 highlights
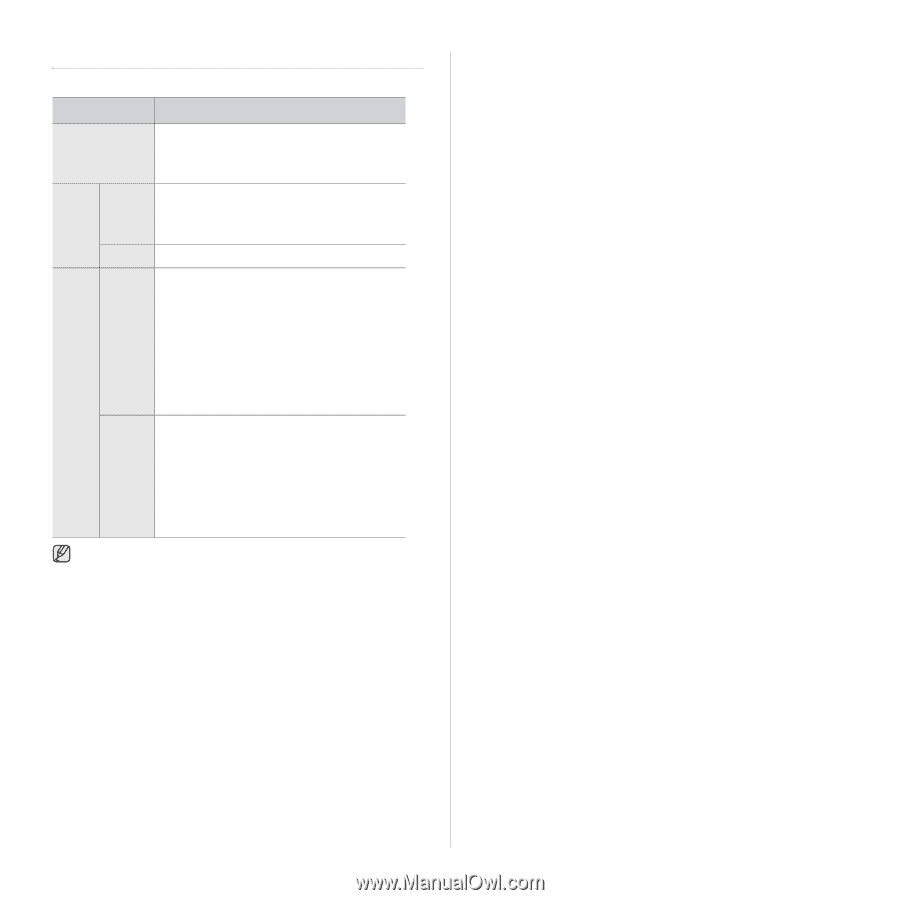
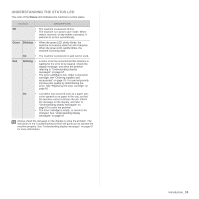
UNDERSTANDING THE STATUS LED The color of the Status LED indicates the machine's current status. STATUS DESCRIPTION Off • The machine is powered off-line. • The machine is in power save mode. When data is received, or any button is pressed, it switches to on-line automatically. Green Blinking • • When the green LED slowly blinks, the machine is receiving data from the computer. When the green LED rapidly blinks, the machine is printing data. On • The machine is powered on and can be used. Red Blinking • A minor error has occurred and the machine is waiting for the error to be cleared. Check the display message, and solve the problem referring to "Understanding display messages" on page 67. • The toner cartridge is low. Order a new toner cartridge, see "Ordering supplies and accessories" on page 78. You can temporarily improve print quality by redistributing the toner. See "Replacing the toner cartridge" on page 60 On • A problem has occurred such as a paper jam, cover opened or no paper in the tray, so that the machine cannot continue the job. Check the message on the display, and refer to "Understanding display messages" on page 67 to solve the problem. • The toner cartridge is empty, or needs to be changed. See "Understanding display messages" on page 67 Always check the message on the display to solve the problem. The instruction in the Troubleshooting section will guide you to operate the machine properly. See "Understanding display messages" on page 67 for more information. Introduction_ 19
-
 1
1 -
2
-
3
-
4
-
5
-
6
-
7
-
8
-
9
-
10
-
11
-
12
-
13
-
 14
14 -
 15
15 -
 16
16 -
 17
17 -
 18
18 -
 19
19 -
 20
20 -
 21
21 -
 22
22 -
 23
23 -
 24
24 -
25
-
26
-
27
-
28
-
29
-
30
-
31
-
32
-
33
-
34
-
35
-
36
-
37
-
38
-
39
-
40
-
41
-
42
-
43
-
44
-
45
-
46
-
47
-
48
-
49
-
50
-
51
-
52
-
53
-
54
-
55
-
56
-
57
-
58
-
59
-
60
-
61
-
62
-
63
-
64
-
65
-
66
-
67
-
68
-
69
-
70
-
71
-
72
-
73
-
74
-
75
-
76
-
77
-
78
-
79
-
80
-
81
-
82
-
83
-
84
-
85
-
86
-
87
-
88
-
89
-
90
-
91
-
92
-
93
-
94
-
95
-
96
-
97
-
98
-
99
-
100
-
101
-
102
-
103
-
104
-
105
-
106
-
107
-
108
-
109
-
110
-
111
-
112
-
113
-
114
-
115
-
116
-
117
-
118
-
119
-
120
-
121
-
122
-
123
-
124
-
125
-
126
-
127
-
128
-
129
-
130
-
131
-
132
-
133
-
134
-
135
-
136
-
137
-
138
 |
 |