Seagate BlackArmor NAS 220 User Guide - Page 22
Connecting a USB Printer to Your BlackArmor Server, Setting Your BlackArmor as a Media Server, Media - driver
 |
View all Seagate BlackArmor NAS 220 manuals
Add to My Manuals
Save this manual to your list of manuals |
Page 22 highlights
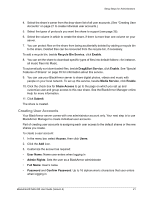
Setup Steps for Administrators See the Global Access user documentation for help granting other people access to your private share. Connecting a USB Printer to Your BlackArmor Server Note: This step is optional. Only BlackArmor administrators can set up a printer. You can make a USB printer available on your local network by connecting it to your server. To connect a printer: 1. Ensure that the printer is powered off. 2. Use a high-quality USB cable to connect the printer to one of the USB ports on the back of your BlackArmor server. 3. Power on the printer and install the driver on your computer (if you haven't already), following the manufacturer's instructions. 4. Have other people on your local network add the USB printer to their list of available printers, following the instructions for their operating system. The printer is now available to all BlackArmor users. The Printer Manager is in the BlackArmor Manager's Network menu. See the online help for more information. Setting Your BlackArmor as a Media Server Note: This step is optional. Only BlackArmor administrators can enable the media server feature. You can use your BlackArmor server to share digital photos, videos and music with people on your local network. The media folders in which you place your files (Our Music, Our Pictures and Our Videos) are available once you enable the Drag&Sort feature using BlackArmor Manager. See the BlackArmor Manager online help for more information. To set up your BlackArmor server as a media server: 1. In the menu bar, select Media, then click Media Service. 2. Beside Service, select Enable. 3. Set the default sorting method for media files, if required, then click Submit. Your BlackArmor server can also function as an iTunes server so that BlackArmor users can stream music directly to a network computer with iTunes installed, or to an iPod® connected to a network computer. 4. Set a recurring time for the server to check for new music. You can set the time from every five minutes to once a day. 5. Click Submit to save the settings. The media service is enabled. BlackArmor® NAS 220 User Guide (Version 2) 24
-
 1
1 -
2
-
3
-
4
-
5
-
6
-
7
-
8
-
9
-
10
-
11
-
12
-
13
-
14
-
15
-
16
-
 17
17 -
 18
18 -
 19
19 -
 20
20 -
 21
21 -
 22
22 -
 23
23 -
 24
24 -
 25
25 -
 26
26 -
 27
27 -
28
-
29
-
30
-
31
-
32
-
33
-
34
-
35
-
36
-
37
-
38
-
39
-
40
-
41
-
42
-
43
-
44
-
45
-
46
-
47
-
48
-
49
-
50
-
51
-
52
-
53
-
54
-
55
-
56
-
57
-
58
-
59
 |
 |
