Seagate BlackArmor NAS 220 User Guide - Page 23
Next Steps for Administrators, Creating Media and Music Folders - reviews
 |
View all Seagate BlackArmor NAS 220 manuals
Add to My Manuals
Save this manual to your list of manuals |
Page 23 highlights
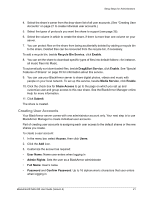
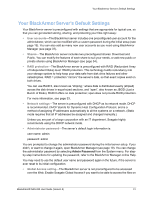
Setup Steps for Administrators Creating Media and Music Folders Follow these steps if you need to create the Media Server folders: 1. Start BlackArmor Discovery. 2. Select the server: • (Windows) Select the server and then click View Drive Details. • (Mac) Select the server in the upper table of the Discovery window and then click Mount Share with the Public share selected in the lower table. 3. Select the Public share and then click View (Windows) or double-click the mounted share (Mac). The share opens. 4. Create the following folders, exactly as shown: "Our Music", "Our Pictures", Our Videos". You can now place your files to share in the appropriate folders. Next Steps for Administrators Before continuing, you should familiarize yourself with the features of your BlackArmor server and software by reviewing this guide. Your BlackArmor server is preconfigured with settings that are appropriate for typical use, so that you can get started storing, sharing, and protecting your files right away (see page 31). You can customize your BlackArmor server as required, using BlackArmor Manager. After the initial setup, you can: • Set up group accounts to make it easier to manage access permissions (see page 37). • Set up the server's volumes and RAID configurations (see page 33). • Set up an on-going archive backup process with a second server on your network (see page 38). • Store all your photos, videos, and music files to the server and use it as a media server so that media players on your network can access your files (see page 39). • Monitor the server locally or remotely (see page 39). The remainder of this guide introduces the server's features and provides some recommendations to help you create a storage system that meets your needs. Note: Don't forget that you are also a BlackArmor user. To begin storing, backing up, and sharing your files, continue with "Getting Started as a BlackArmor User" on page 26. BlackArmor® NAS 220 User Guide (Version 2) 25
-
 1
1 -
2
-
3
-
4
-
5
-
6
-
7
-
8
-
9
-
10
-
11
-
12
-
13
-
14
-
15
-
16
-
17
-
 18
18 -
 19
19 -
 20
20 -
 21
21 -
 22
22 -
 23
23 -
 24
24 -
 25
25 -
 26
26 -
 27
27 -
 28
28 -
29
-
30
-
31
-
32
-
33
-
34
-
35
-
36
-
37
-
38
-
39
-
40
-
41
-
42
-
43
-
44
-
45
-
46
-
47
-
48
-
49
-
50
-
51
-
52
-
53
-
54
-
55
-
56
-
57
-
58
-
59
 |
 |
