Sony VPL CX85 Operating Instructions - Page 23
Projecting
 |
UPC - 027242644274
View all Sony VPL CX85 manuals
Add to My Manuals
Save this manual to your list of manuals |
Page 23 highlights
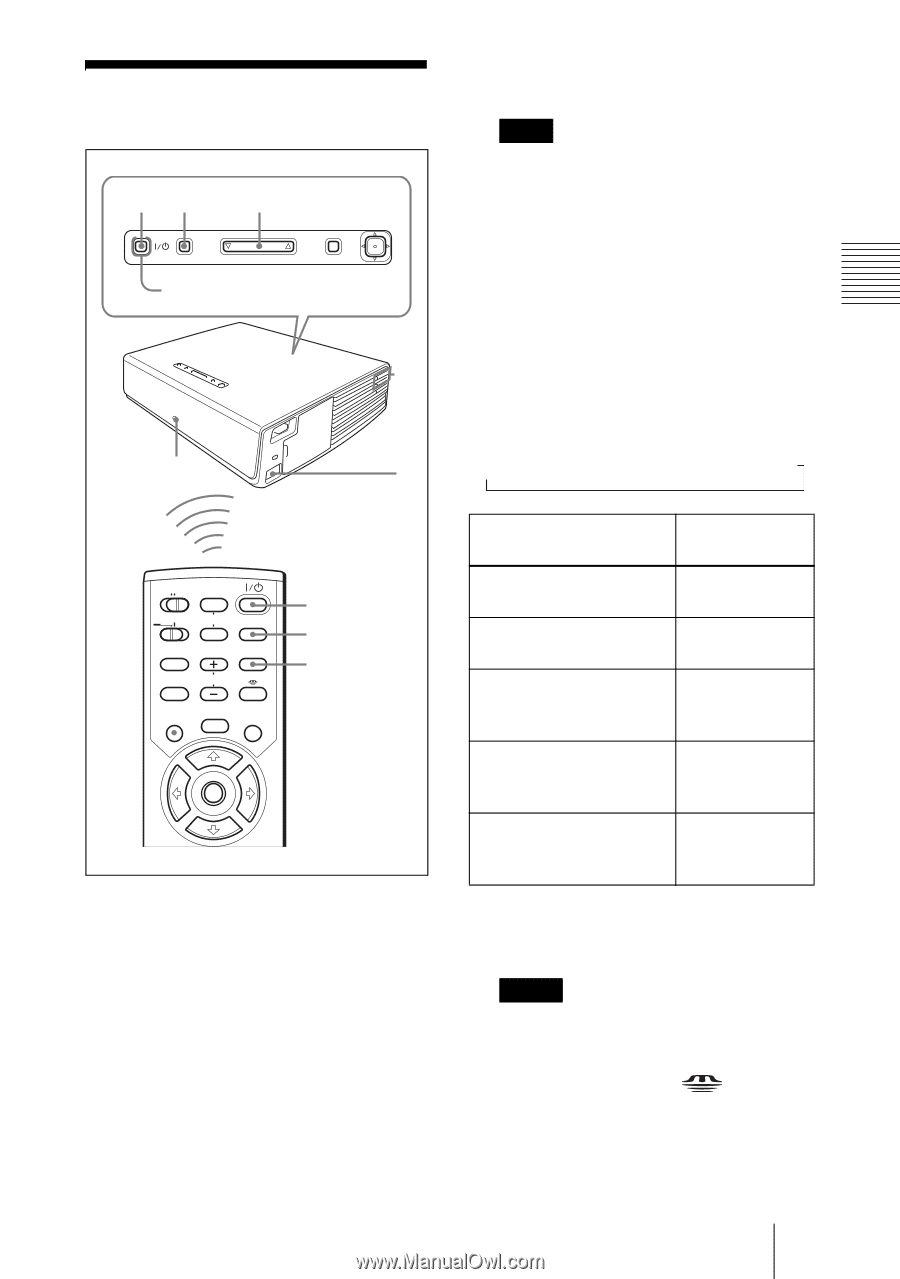
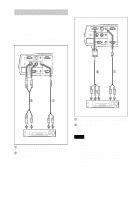
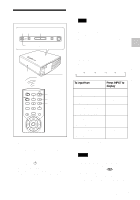
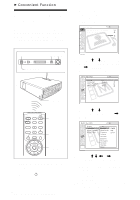
Setting Up and Projecting Projecting 24 5 INPUT TILT MENU PUSH ENTER ON/STANDBY indicators 6 Rear remote control 1 detector COMMAND OFF ON PIC PJ NETWORK MUTING AUDIO INPUT LENS APA TILT/KEYSTONE VOLUME MENU/ TAB AIR SHOT FREEZE 2 4 5 1 Plug the AC power cord into a wall outlet, then connect all equipment. The ON/STANDBY indicator lights in red and the projector goes into standby mode. 2 Press the I / 1 key. The ON/STANDBY indicator lights in green and the Intelligent Auto-setup starts. The lens protector opens, and the powered tilt adjuster rises and stops at the previously adjusted position. Note When the projector is turned on, the Startup screen is projected. For details on the Startup screen, see the attached "Operating Instructions for Memory Stick" stored in the CD-ROM. 3 Turn on the equipment connected to the projector. 4 Press the INPUT key to select the input source. Each time you press the key, the input signal switches as follows: INPUT-A t INPUT-B t INPUT-C t VIDEO t S-VIDEO t To input from Press INPUT to display Computer connected to INPUT-A the INPUT A connector Computer connected to INPUT-B the INPUT B connector Air Shot/Memory Stick (when you use the Air Shot/Memory Stick) INPUT-C Video equipment VIDEO connected to the VIDEO input connector Video equipment S-VIDEO connected to the S VIDEO input connector Smart APA (Auto Pixel Alignment) adjusts the picture of the connected equipment so that it is projected clearly. Notes • For INPUT C, input of the "Air Shot" or "Memory Stick" can be switched by selecting with the INPUT C selection menu, or pressing the key or the AIR SHOT key on the Remote Commander. The Air Shot Home or the Memory Stick Home is displayed on the screen. Projecting 23 GB
-
 1
1 -
2
-
3
-
4
-
5
-
6
-
7
-
8
-
9
-
10
-
11
-
12
-
13
-
14
-
15
-
16
-
17
-
 18
18 -
 19
19 -
 20
20 -
 21
21 -
 22
22 -
 23
23 -
 24
24 -
 25
25 -
 26
26 -
 27
27 -
 28
28 -
29
-
30
-
31
-
32
-
33
-
34
-
35
-
36
-
37
-
38
-
39
-
40
-
41
-
42
-
43
-
44
-
45
-
46
-
47
-
48
-
49
-
50
-
51
-
52
-
53
-
54
-
55
-
56
-
57
-
58
-
59
-
60
-
61
-
62
-
63
-
64
-
65
-
66
-
67
-
68
-
69
-
70
-
71
-
72
-
73
-
74
-
75
-
76
-
77
-
78
-
79
-
80
-
81
-
82
-
83
-
84
-
85
-
86
-
87
-
88
-
89
-
90
-
91
-
92
-
93
-
94
-
95
-
96
-
97
-
98
-
99
-
100
-
101
-
102
-
103
-
104
-
105
-
106
-
107
-
108
-
109
-
110
-
111
-
112
-
113
-
114
-
115
-
116
-
117
-
118
-
119
-
120
-
121
-
122
-
123
-
124
-
125
-
126
-
127
-
128
-
129
-
130
-
131
-
132
-
133
-
134
-
135
-
136
-
137
-
138
-
139
-
140
-
141
-
142
-
143
-
144
-
145
-
146
-
147
-
148
-
149
-
150
-
151
-
152
-
153
-
154
-
155
-
156
-
157
-
158
-
159
-
160
-
161
-
162
-
163
-
164
-
165
-
166
-
167
-
168
-
169
-
170
-
171
-
172
-
173
-
174
-
175
-
176
-
177
-
178
-
179
-
180
-
181
-
182
-
183
-
184
-
185
-
186
-
187
-
188
-
189
-
190
-
191
-
192
 |
 |