Sony VPL CX85 Operating Instructions - Page 37
Auto Input Search, Input-A Signal Sel., Input-C Select, Color System, Speaker, Stand-by Mode
 |
UPC - 027242644274
View all Sony VPL CX85 manuals
Add to My Manuals
Save this manual to your list of manuals |
Page 37 highlights
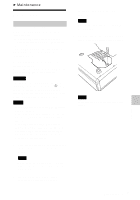
• Adjust the items "Dot Phase," "H Size" and "Shift" in the INPUT SETTING menu when you adjust the picture manually. 1) The APA (Auto Pixel Alignment) automatically adjusts "Dot Phase," "H Size" and "Shift" in the INPUT SETTING menu for the input signal from a computer. Auto Input Search Normally set to "Off." When set to "On," the projector detects input signals in the following order: Input-A/ Input-B/Input-C/Video/S-Video. It indicates the input channel when the power is turned on or the INPUT key is pressed. Input-A Signal Sel. Selects the computer, component or video GBR signal input from the INPUT A connector. Note If the setting is not correct, the color of the picture becomes strange or "Please check Input-A Signal Sel." appears on the screen and the picture is not displayed. Input-C Select Select "Air Shot" or "Memory Stick" as the input source that you want to project in the INPUT C. Color System Selects the color system of the input signal. If you select "Auto," the projector detects the color system of the input signal automatically. If the picture is distorted or colorless, select the color system according to the input signal. When the color system of the input signal is PAL60, select "PAL." If "Auto" is selected, the color system cannot be detected. Speaker Set to "Off" to cut off the sound of the internal speakers. When set to "Off," "Speaker: Off" appears on the screen when you turn on the power. Stand-by Mode You can lower the power consumption in standby mode. Standard: Normally, select this position when you use the Air Shot even in standby mode. Low: Select this position when you do not use the Air Shot, and want to lower the power consumption in standby mode. Power Saving When set to "On," the projector goes into power saving mode if no signal is input for 10 minutes. Although the lamp goes out, the cooling fan keeps running. The power saving mode is canceled when a signal is input or any key is pressed. In power saving mode, any key does not function for the first 60 seconds after the lamp goes out. IR Receiver Selects the remote control detectors (IR receiver) on the front and rear of the projector. Front&Rear: Activates both the front and rear detectors. Front: Activates the front detector only. Rear: Activates the rear detector only. Illumination Selects whether the SONY logo on the top panel of the projector lights when the projector is on. Normally, this setting is "On". If you want complete darkness or if the illuminated logo is a distraction, change this setting to "Off". Panel Key Lock Locks all the control panel keys on the top and side panels of the projector so that the projector can be operated only with the Remote Commander. To lock the control panel keys, set to "On." When it is set to "On," keeping the I/1 key on the control panel pressed for 10 seconds turns the projector on when it is in standby mode, and turns the projector to standby mode when the power is on. If you keep The SET SETTING Menu 37 GB Adjustments and Settings Using the Menu
-
 1
1 -
2
-
3
-
4
-
5
-
6
-
7
-
8
-
9
-
10
-
11
-
12
-
13
-
14
-
15
-
16
-
17
-
18
-
19
-
20
-
21
-
22
-
23
-
24
-
25
-
26
-
27
-
28
-
29
-
30
-
31
-
 32
32 -
 33
33 -
 34
34 -
 35
35 -
 36
36 -
 37
37 -
 38
38 -
 39
39 -
 40
40 -
 41
41 -
 42
42 -
43
-
44
-
45
-
46
-
47
-
48
-
49
-
50
-
51
-
52
-
53
-
54
-
55
-
56
-
57
-
58
-
59
-
60
-
61
-
62
-
63
-
64
-
65
-
66
-
67
-
68
-
69
-
70
-
71
-
72
-
73
-
74
-
75
-
76
-
77
-
78
-
79
-
80
-
81
-
82
-
83
-
84
-
85
-
86
-
87
-
88
-
89
-
90
-
91
-
92
-
93
-
94
-
95
-
96
-
97
-
98
-
99
-
100
-
101
-
102
-
103
-
104
-
105
-
106
-
107
-
108
-
109
-
110
-
111
-
112
-
113
-
114
-
115
-
116
-
117
-
118
-
119
-
120
-
121
-
122
-
123
-
124
-
125
-
126
-
127
-
128
-
129
-
130
-
131
-
132
-
133
-
134
-
135
-
136
-
137
-
138
-
139
-
140
-
141
-
142
-
143
-
144
-
145
-
146
-
147
-
148
-
149
-
150
-
151
-
152
-
153
-
154
-
155
-
156
-
157
-
158
-
159
-
160
-
161
-
162
-
163
-
164
-
165
-
166
-
167
-
168
-
169
-
170
-
171
-
172
-
173
-
174
-
175
-
176
-
177
-
178
-
179
-
180
-
181
-
182
-
183
-
184
-
185
-
186
-
187
-
188
-
189
-
190
-
191
-
192
 |
 |