Toshiba DMF102XKU Owner's Manual - English
Toshiba DMF102XKU - Wireless Digital Media Frame Manual
 |
UPC - 022265003084
View all Toshiba DMF102XKU manuals
Add to My Manuals
Save this manual to your list of manuals |
Toshiba DMF102XKU manual content summary:
- Toshiba DMF102XKU | Owner's Manual - English - Page 1
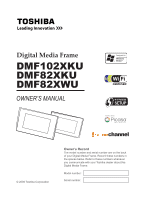
Digital Media Frame DMF102XKU DMF82XKU DMF82XWU OWNER'S MANUAL © 2009 Toshiba Corporation Owner's Record The model number and serial number are on the back of your Digital Media Frame. Record these numbers in the spaces below. Refer to these numbers whenever you communicate with your Toshiba - Toshiba DMF102XKU | Owner's Manual - English - Page 2
- Toshiba DMF102XKU | Owner's Manual - English - Page 3
been tested and found to comply with the limits for a Class B digital device, pursuant to part 15 of the FCC Rules. These limits are Toshiba America Consumer Products, L.L.C. 82 Totowa Rd.; Wayne, N.J.07470 Phone: (800) 631-3811 CAUTION: These servicing instructions are for use by qualified service - Toshiba DMF102XKU | Owner's Manual - English - Page 4
10 carefully to prevent the objects from tip-over. ADDITIONAL SAFETY INSTRUCTIONS 16. When you use headphones, keep the volume at digital media frame, remove the AC adaptor. Continued use in this state might cause fire, electric shock, or burns. For details on repair, consult Toshiba Customer Service - Toshiba DMF102XKU | Owner's Manual - English - Page 5
- DO NOT OPEN". 31. Wireless Communication a) Turn off the digital media frame power in locations where a person instructions given by each airline. f) If any nearby equipment experienced radio interference or any other problem when the digital media frame is used, turn off the digital media frame - Toshiba DMF102XKU | Owner's Manual - English - Page 6
use the digital media frame occasionally. NOTES ON LOCATING ● When you place this digital media frame near a TV, radio, or VCR, the playback picture may become poor Digital Media Frame. WIRELESS LAN INFORMATION Wireless Interoperability This product is designed to be interoperable with any wireless - Toshiba DMF102XKU | Owner's Manual - English - Page 7
standards and recommendations, TOSHIBA believes Wireless LAN is safe for review and interpret the extensive research literature. In some situations or environments, the use of Wireless services is perceived or identified as harmful. If you are uncertain of the policy that applies on the use of wireless - Toshiba DMF102XKU | Owner's Manual - English - Page 8
8 - Toshiba DMF102XKU | Owner's Manual - English - Page 9
3 • Important Safety Instructions 3 • Precautions...5 • Wireless LAN Information 6 MEDIA FRAME OVERVIEW 11 • Accessories ...11 • Front View ...12 • Rear View ...13 • Side View ...14 • Remote Control ...15 • Getting Started ...16 Installing The Stand ...16 Placing The Media Frame 16 Using The - Toshiba DMF102XKU | Owner's Manual - English - Page 10
ONLINE SERVICES 37 • Setting Up A Wireless Network 37 Wi-Fi Settings: Auto Configuration 37 Wi-Fi Settings: Manual Configuration Picasa 44 Registering with Google Picasa 44 Using Google Picasa...45 SETTINGS 47 • Menu Overview ...47 • Modifying Viewing Settings 49 Screen Settings ...49 Photo - Toshiba DMF102XKU | Owner's Manual - English - Page 11
Frame Media, Inc. ▪ Picasa™ and the Picasa Corporation. ▪ xD-Picture Card™ is Toshiba Digital Media Frame. Please check whether all the following items are included in your box. □ Digital Media Frame x 1 □ Stand x 1 □ Rubber Supporter x 1 □ Remote Control (SE-R0351) x 1 □ AC Adaptor x 1 □ Setup Guide - Toshiba DMF102XKU | Owner's Manual - English - Page 12
visible when the picture is viewed from a normal viewing distance ● The brightness of the LCD screen differs slightly depending on the viewing angles. TOUCH CONTROL KEYS The Toshiba Digital Media Frame is designed with touch key technology. You can control the Digital Media Frame by touching the - Toshiba DMF102XKU | Owner's Manual - English - Page 13
REAR VIEW DMF82X Stand Speakers Rubber Supporter MEDIA FRAME OVERVIEW 13 DMF102X Stand Speakers Wall-Mounting Holes Rubber Supporter - Toshiba DMF102XKU | Owner's Manual - English - Page 14
14 MEDIA FRAME OVERVIEW SIDE VIEW Power Button SD/MMC/xD Card Slot MS/ appropriate for the material and strength of the wall. ● Toshiba does not take any responsibility for any accident or damage caused by the failure to hang the Digital Media Frame on a wall properly. - Toshiba DMF102XKU | Owner's Manual - English - Page 15
/STANDBY: Press to turn on/off the Digital Media Frame. (Refer to page 18) SLIDESHOW: Press to start photo slideshow. (Refer to page 23) CLOCK photo. (On the file browser screen, press the button to reduce the size of a thumbnail picture.) (Refer to page 24) ZOOM IN: Press to zoom in a photo. - Toshiba DMF102XKU | Owner's Manual - English - Page 16
the supplied stand as illustrated. Stand NOTE ♦ Do not hold the stand when carrying the Digital Media Frame. Rubber Supporter 2 Make sure the Digital Media Frame is stably placed. NOTE ♦ The Digital Media Frame can be placed vertically. ♦ If this product is placed vertically, the angle of the - Toshiba DMF102XKU | Owner's Manual - English - Page 17
feet) from the front of the remote sensor. Angle: About 22.5° in each direction of the front of the remote sensor. MEDIA FRAME OVERVIEW 17 Do not expose the remote sensor of the Digital Media Frame to a strong light source such as direct sunlight. If you do, you may not be able to operate the - Toshiba DMF102XKU | Owner's Manual - English - Page 18
holder horizontal so that the battery does not fall through. CR202V53 CONNECTING TO POWER 1 Connect one end of the AC adaptor to the Digital Media Frame. 2 Plug the other end of the AC adaptor into the outlet. AC Adaptor CAUTION ♦ Danger of explosion if battery is incorrectly replaced. Replace - Toshiba DMF102XKU | Owner's Manual - English - Page 19
Digital Media Frame. ♦ It takes some time when you turn on the device by pressing the POWER button (on the side of the Digital Media Frame the side of the Digital Media Frame) or the ON/STANDBY (Center) MEDIA FRAME OVERVIEW 19 (on the side of the Digital Media Frame) for several seconds. The - Toshiba DMF102XKU | Owner's Manual - English - Page 20
damage caused by the use of any memory card with this digital media frame. Toshiba will not compensate for any lost data or recording(s) caused by the use of such cards. ♦ For instructions on using your memory card, refer to the owner's manual for your memory card. ♦ Failure to take proper care of - Toshiba DMF102XKU | Owner's Manual - English - Page 21
-port USB hub is not supported by the Digital Media Frame. ♦ Multiple-slot USB card reader is supported by the Digital Media Frame. You can insert up to refer to the owner's manual for the USB memory device. ♦ Do not remove the memory card/USB memory device while the Digital Media Frame is writing or - Toshiba DMF102XKU | Owner's Manual - English - Page 22
Mode menu offers you convenient shortcuts to all major functions of the Digital Media Frame. 1 Press MODE to bring up the Mode menu. 2 Press or back the pre-loaded demo photos. (Refer to page 30) ONLINE SERVICE Select to view photos uploaded to Picasa or FrameChannel albums. (Refer to page 43, 45) - Toshiba DMF102XKU | Owner's Manual - English - Page 23
are shown as snapshots pinned to a bulletin board. 3 If you press ENTER during slideshow playback, the Digital Media Frame will display one photo. ● Press ◄ or ► to switch to the previous or next photo. 2 Press STYLE to change the slideshow effects. You can choose from one of the following styles - Toshiba DMF102XKU | Owner's Manual - English - Page 24
USING THE MEDIA FRAME SINGLE PHOTO MODE 1 Press MODE to bring up the Mode menu. 2 Press or press MODE repeatedly to select 'Single Photo', then press ENTER. The last viewed photo will be displayed. 3 Press THUMBNAIL to bring up the file browser screen. ● Press ROTATE to rotate the photo. In the - Toshiba DMF102XKU | Owner's Manual - English - Page 25
press MODE repeatedly to select 'Video', then press ENTER. USING THE MEDIA FRAME 25 ● Press OPTION to display available applications. - Information On - Information NOTE ♦ The Digital Media Frame supports MPEG-1, MPEG-2, MPEG-4 video files. ♦ The Digital Media Frame will repeatedly play back all video - Toshiba DMF102XKU | Owner's Manual - English - Page 26
start. ● A photo slideshow is displayed on the screen. ● Press OPTION to display available applications. - Repeat One - Repeat All - Copy This File - Delete This File ● Press ▲ or ▼ to control the volume. ● During playback, press ENTER to pause the music. NOTE ♦ The Digital Media Frame supports MP3 - Toshiba DMF102XKU | Owner's Manual - English - Page 27
♦ Press STYLE repeatedly to switch to other clock styles. ♦ If there are no photos in the medium currently used, clock styles which feature photo display will not be applicable. ♦ You can also switch the Digital Media Frame to clock view by pressing the CLOCK/CALENDAR button on the remote control - Toshiba DMF102XKU | Owner's Manual - English - Page 28
STYLE repeatedly to switch to other calendar styles. ♦ If there are no photos in the medium currently used, calendar styles which feature photo display will not be applicable. ♦ You can also switch the Digital Media Frame to calendar view by pressing the CLOCK/CALENDAR button on the remote control - Toshiba DMF102XKU | Owner's Manual - English - Page 29
USING THE MEDIA FRAME 29 CHANGING DISPLAY STYLE 1 Press STYLE. 2 A new presentation style applicable to the previous feature you were viewing will appear on screen. ● If you were viewing a photo slideshow, a new slideshow effect will be applied. ● If you were using the clock mode, a different clock - Toshiba DMF102XKU | Owner's Manual - English - Page 30
30 USING THE MEDIA FRAME NOTE ♦ The number of files listed may vary depending on your can also bring up the file browser screen using the Mode menu. For details, please refer to the section: Media Frame Overview > Mode Menu. (Refer to page 22) VIEWING THE DEMO 1 Press MODE to bring up the Mode menu - Toshiba DMF102XKU | Owner's Manual - English - Page 31
/video/music file(s) from connected memory cards/USB memory devices to the Digital Media Frame (internal memory) and vice versa. COPYING ONE FILE 1 Switch the Digital Media Frame to Photo/Video/Music mode using the Mode menu. 2 Press THUMBNAIL to bring up the file browser screen. ● When copying - Toshiba DMF102XKU | Owner's Manual - English - Page 32
♦ Do not turn the power off or remove the memory card/USB memory device while the Digital Media Frame is copying data. Data saved on the internal memory or memory card/USB memory device may be lost. ♦ Photos, videos and music files will be copied from the connected memory cards/USB memory devices to - Toshiba DMF102XKU | Owner's Manual - English - Page 33
you would like to delete, then press OPTION. 4 Press ▲▼ to select 'Delete This File', then press ENTER. DELETING MULTIPLE FILES 1 Switch the Digital Media Frame to Photo/Video/Music mode using the Mode menu. 2 Press THUMBNAIL to bring up the file browser screen. 3 Press OPTION to display available - Toshiba DMF102XKU | Owner's Manual - English - Page 34
the internal memory of the Digital Media Frame and vice versa. SYSTEM REQUIREMENTS ♦ Operating System (Windows): Windows Vista SP1, Windows XP SP3, Windows 2000 Professional SP4 ♦ Operating System (Macintosh): MacOS X 10.4, 10.4.5, 10.5.2, 10.5.5, 10 - Toshiba DMF102XKU | Owner's Manual - English - Page 35
You can copy photo/video/music file(s) from a computer to the Digital Media Frame (internal memory) and vice versa. 1 Connect to a computer using a USB cable as illustrated. USING THE MEDIA FRAME 35 5 Select the file(s) you wish to copy, then copy the file(s) to the Digital Media Frame. NOTE ♦ Do - Toshiba DMF102XKU | Owner's Manual - English - Page 36
36 USING THE MEDIA FRAME - Toshiba DMF102XKU | Owner's Manual - English - Page 37
, please check whether your wireless AP/router supports WPS before you start. Wi-Fi support of the Digital Media Frame can be used to connect to FrameChannel and Google Picasa only. Some types of wireless LAN environment may not be available. Wireless antenna for the wireless LAN operates best in - Toshiba DMF102XKU | Owner's Manual - English - Page 38
ONLINE SERVICES 5 Press ▲▼ to select 'One Touch Configuration (PBC for WPS)', then press ENTER. PBC (Push Button Configuration) WPS (Wi-Fi Protected Setup) 6 Follow the on-screen instructions. Press the WPS button on the wireless AP/router, then press the WPS button on the Digital Media Frame - Toshiba DMF102XKU | Owner's Manual - English - Page 39
'Wi-Fi Settings', then press ENTER. 4 Press ▲▼ to select 'Manual Configuration', then press ENTER. 5 Press ▲▼ to select 'Select Wireless AP', then press ENTER. 6 The Digital Media Frame will start scanning for available wireless networks. 7 A list of available networks will appear on screen. Press - Toshiba DMF102XKU | Owner's Manual - English - Page 40
then select 'OK' to confirm. SSID (Service Set Identifier) 9 The configuration process will start -Fi connection established" is displayed. 10 Press ENTER to confirm the highlighted Settings', then press ENTER. 4 Press ▲▼ to select 'Manual Configuration', then press ENTER. 5 Press ▲▼ to select ' - Toshiba DMF102XKU | Owner's Manual - English - Page 41
FI SETTINGS: IP SETTINGS Set up the IP Address, when the wireless AP/router does not support DHCP. 1 Press MENU to bring up the (Dynamic Host Configuration Protocol) USING ONLINE SERVICES 41 6 If you have selected the 'DHCP' mode, a set of IP address is always assigned to your device automatically - Toshiba DMF102XKU | Owner's Manual - English - Page 42
collection of contents delivered directly to your Digital Media Frame. To use the service, you would need to create an account on the FrameChannel website. For further details, please go to www.framechannel. com. Terms and availability of the online service may subject to change without prior notice - Toshiba DMF102XKU | Owner's Manual - English - Page 43
management page. If you choose not to modify your selection now, you will see a preset collection of channels when returning to the Digital Media Frame. NOTE ♦ During connection, an online service connectivity icon and a connection signal icon will appear on the top right corner of the screen. ♦ If - Toshiba DMF102XKU | Owner's Manual - English - Page 44
44 USING ONLINE SERVICES USING Google® Picasa™ By registering the account information in the Digital Media Frame, you will be able to display photos uploaded to the online albums associated with the specified Google accounts. You can show not only your own photos but also pictures shared by your - Toshiba DMF102XKU | Owner's Manual - English - Page 45
menu. 2 Press or press MODE repeatedly to select 'Online Service', then press ENTER. 3 Press ▲▼ to select a desired Picasa account, then press ENTER. 4 A slideshow of photos will then start. NOTE ♦ During connection, an online service connectivity icon and a connection signal icon will appear on - Toshiba DMF102XKU | Owner's Manual - English - Page 46
46 USING ONLINE SERVICES - Toshiba DMF102XKU | Owner's Manual - English - Page 47
MENU OVERVIEW VIEWING SETTINGS Screen Settings Select this option to adjust the setup of LCD screen. Photo Display Select this option to set the Order photo viewing sequence. Slideshow Settings Select this option to set the photo slideshow mode. Display Mode Select this option to set the - Toshiba DMF102XKU | Owner's Manual - English - Page 48
USB memory device(s). NETWORK SETTINGS Wi-Fi Settings Select this option to set up the Wi-Fi connection. Online Service Settings Select this option to manage corresponding online service accounts. • Auto Configuration • Manual Configuration • IP Settings • Picasa 1 • Picasa 2 • Picasa 3 - Toshiba DMF102XKU | Owner's Manual - English - Page 49
press ENTER. Follow the on-screen instructions to modify the settings. PHOTO DISPLAY ORDER • By Date/Time (Newest First): Photos are displayed according to the photo shooting date/time, starting with the photo taken most recently. • By File Name: Photos are displayed according to file name. • By - Toshiba DMF102XKU | Owner's Manual - English - Page 50
Secs., 2 Mins., 10 Mins., 1 Hour, 3 Hours, 12 Hours, 24 Hours) • Shuffle: On/Off. If the function is set to 'ON', photos are selected randomly for display. DISPLAY MODE • Fit Screen: Photo may be scaled to a desired option, then press ENTER. Follow the on-screen instructions to modify the settings. - Toshiba DMF102XKU | Owner's Manual - English - Page 51
the alarm goes off, you can press any button (except the POWER button) to turn it off and return to the previous screen. ♦ If the Digital Media Frame is set to the Standby or Power-Off mode, the device will be automatically activated one minute prior to the scheduled time. The alarm will - Toshiba DMF102XKU | Owner's Manual - English - Page 52
• Information: System status is displayed. (Memory Capacity, Remaining Capacity, MAC Address, Version) While connecting to a network, the IP Address etc. is also displayed. • Upgrade: Yes/No. Select 'Yes' to update the system firmware. This is a potential feature for the upgrade of system. • Restore - Toshiba DMF102XKU | Owner's Manual - English - Page 53
hub is not supported by the Digital Media Frame. ♦ Multiple-slot USB card reader is supported by the Digital Media Frame. You can digital media frame does not recognize USB memory devices during an online service. When you select USB memory devices, stop an online service. 4 The Digital Media Frame - Toshiba DMF102XKU | Owner's Manual - English - Page 54
'Static', you need to enter the details of the network IP address. ONLINE SERVICE SETTINGS • Picasa 1 • Picasa 2 • Picasa 3 Follow on-screen instructions to enter Picasa account details. After the details are completed, the 'Picasa 1 (2/3) ' tab will be replaced by the account name you entered - Toshiba DMF102XKU | Owner's Manual - English - Page 55
mm (excluding stand) Mass DMF102X: Approx. 1120g (including stand) DMF82X: Approx. 870g (including stand) Panel Size DMF102X: 10.1 inches (TFT active matrix) DMF82X: 8.0 inches (TFT active matrix) Resolution 800 (H) x 480 (V) pixels Brightness 250 cd/m2 DMF102X: 15:9 Aspect Ratio DMF82X: 16 - Toshiba DMF102XKU | Owner's Manual - English - Page 56
-Picture Card (up to 2GB) Memory Stick (MS up to 128MB, MS PRO up to 16GB) Memory Stick Duo (MS PRO Duo up to 16GB, MS PRO-HG Duo up to 4GB) USB Memory Device NOTE ♦ You need a memory card adapter if you use the miniSD and microSD cards. ♦ The Digital Media Frame cannot support - Toshiba DMF102XKU | Owner's Manual - English - Page 57
and a working Internet connection. To receive FrameChannel® or Picasa™ services on your Digital Media Frame, you need a working Wi-Fi connection. These services may be limited or unavailable based on conditions, factors, or events outside Toshiba's control, such as your Internet provider contract - Toshiba DMF102XKU | Owner's Manual - English - Page 58
58 SPECIFICATIONS - Toshiba DMF102XKU | Owner's Manual - English - Page 59
If you experience problems while using the Digital Media Frame, please consult the following troubleshooting guide first, as it may offer immediate solutions to the condition occurred. Should the problem remain, contact a Toshiba service point near you. CONDITION SOLUTIONS Nothing displayed - Toshiba DMF102XKU | Owner's Manual - English - Page 60
TROUBLESHOOTING Cannot play music files ● Check whether there are music files stored in the memory card/USB memory device inserted. ● Check whether the format of the music files is supported by the Digital Media Frame card. ● Check your wireless AP/router connection via a computer. ● Check - Toshiba DMF102XKU | Owner's Manual - English - Page 61
TROUBLESHOOTING 61 Cannot show photos uploaded to the web galleries (FrameChannel and Google Picasa) ● service in your account management page. (www.framechannel.com) The remote control does not work properly. ● The remote control is not pointed at the remote sensor of the Digital Media Frame - Toshiba DMF102XKU | Owner's Manual - English - Page 62
62 TROUBLESHOOTING - Toshiba DMF102XKU | Owner's Manual - English - Page 63
INCLUDING, WITHOUT LIMITATION, CANADA AND MEXICO, ARE NOT Owner's Manual and Product Registration Card Read this owner's manual thoroughly before operating this DAV Product. Complete and mail the enclosed product registration card or register your DAV Product on-line at www. tacp.toshiba.com/service - Toshiba DMF102XKU | Owner's Manual - English - Page 64
Services If, after following all of the operating instructions in this manual and checking the section "Troubleshooting" you find that service is needed: (1) For instructions on how to obtain warranty service information, visit TACP's website: www.tacp.toshiba.com ALL WARRANTIES IMPLIED BY THE LAW OF - Toshiba DMF102XKU | Owner's Manual - English - Page 65
the Software Used in the TOSHIBA Digital Media Frame The software pre-installed in the TOSHIBA Digital Media Frame consists of multiple, independent software components. Each software component is copyrighted by TOSHIBA or a third party. The TOSHIBA Digital Media Frame uses software components that - Toshiba DMF102XKU | Owner's Manual - English - Page 66
we are referring to freedom, not price. Our General Public Licenses are designed to software (and charge for this service if you wish), that you is not the original, so that any problems introduced by others will not reflect on modification".) Each licensee is addressed as "you". Activities other - Toshiba DMF102XKU | Owner's Manual - English - Page 67
APPENDIX 67 redistribute the program under these conditions, and telling the user how to view a copy of this License. (Exception: if the Program itself is interactive but does not normally print such an announcement, your work based on the Program is not required to print an announcement.) These - Toshiba DMF102XKU | Owner's Manual - English - Page 68
but may differ in detail to address new problems or concerns. Each version is given by the Free Software Foundation. 10. If you wish to incorporate parts this. Our decision will be guided by the two goals of preserving YOU ASSUME THE COST OF ALL NECESSARY SERVICING, REPAIR OR CORRECTION. 12. IN NO - Toshiba DMF102XKU | Owner's Manual - English - Page 69
APPENDIX 69 LOSSES SUSTAINED BY YOU OR THIRD PARTIES OR A FAILURE OF THE PROGRAM TO OPERATE WITH ANY OTHER PROGRAMS), EVEN IF SUCH HOLDER OR OTHER PARTY HAS BEEN ADVISED OF THE POSSIBILITY OF SUCH DAMAGES. END OF TERMS AND CONDITIONS How to Apply These Terms to Your New Programs If you develop a - Toshiba DMF102XKU | Owner's Manual - English - Page 70
70 APPENDIX GNU General Public License. However the source code for this file must still be made available in accordance with section (3) of the GNU General Public License v2. This exception does not invalidate any other reasons why a work based on this file might be covered by the GNU General Public - Toshiba DMF102XKU | Owner's Manual - English - Page 71
Public License from time to time. Such new versions will be similar in spirit to the present version, but may differ in detail to address new problems or concerns. Each version is given a distinguishing version number. If the Library as you received it specifies that a certain numbered version of the - Toshiba DMF102XKU | Owner's Manual - English - Page 72
72 APPENDIX If the Library as you received it specifies that a proxy can decide whether future versions of the GNU Lesser General Public License shall apply, that proxy's public statement of acceptance of any version is permanent authorization for you to choose that version for the Library. ■ FFMPEG - Toshiba DMF102XKU | Owner's Manual - English - Page 73
GIF files. To avoid entanglement with the Unisys LZW patent, GIF reading support has been removed altogether, and the GIF writer has been simplified to the copyrighted property of CompuServe Incorporated. GIF(sm) is a service mark property of CompuServe Incorporated. As this package existed before - Toshiba DMF102XKU | Owner's Manual - English - Page 74
source distribution. The Contributing Authors and Group 42, Inc. specifically permit, without fee, and encourage the use of this source code as a component to supporting the PNG file format in commercial products. If you use this - Toshiba DMF102XKU | Owner's Manual - English - Page 75
APPENDIX 75 source code in a product, acknowledgment is not required but would be appreciated. A "png_get_copyright" function is available, for convenient use in "about" boxes and the like: printf("%s",png_get_copyright(NULL)); Also, the PNG logo (in PNG format, of course) is supplied in the files " - Toshiba DMF102XKU | Owner's Manual - English - Page 76
76 APPENDIX The above copyright notice and this permission notice shall be included in all copies or substantial portions of the Software. THE SOFTWARE IS PROVIDED "AS IS", WITHOUT WARRANTY OF ANY KIND, EXPRESS OR IMPLIED, INCLUDING BUT NOT LIMITED TO THE WARRANTIES OF MERCHANTABILITY, FITNESS FOR A - Toshiba DMF102XKU | Owner's Manual - English - Page 77
- Toshiba DMF102XKU | Owner's Manual - English - Page 78
-
 1
1 -
 2
2 -
 3
3 -
 4
4 -
 5
5 -
 6
6 -
 7
7 -
8
-
9
-
10
-
11
-
12
-
13
-
14
-
15
-
16
-
17
-
18
-
19
-
20
-
21
-
22
-
23
-
24
-
25
-
26
-
27
-
28
-
29
-
30
-
31
-
32
-
33
-
34
-
35
-
36
-
37
-
38
-
39
-
40
-
41
-
42
-
43
-
44
-
45
-
46
-
47
-
48
-
49
-
50
-
51
-
52
-
53
-
54
-
55
-
56
-
57
-
58
-
59
-
60
-
61
-
62
-
63
-
64
-
65
-
66
-
67
-
68
-
69
-
70
-
71
-
72
-
73
-
74
-
75
-
76
-
77
-
78
 |
 |
Digital Media Frame
OWNER’S MANUAL
Owner’s Record
The model number and serial number are on the back
of your Digital Media Frame. Record these numbers in
the spaces below. Refer to these numbers whenever
you communicate with your Toshiba dealer about this
Digital Media Frame.
© 2009 Toshiba Corporation
Model number:
Serial number:
DMF102XKU
DMF82XKU
DMF82XWU