Yamaha MOXF8 Owner's Manual - Page 36
Recording in the Performance mode, Song and Pattern, Recording the melody
 |
View all Yamaha MOXF8 manuals
Add to My Manuals
Save this manual to your list of manuals |
Page 36 highlights
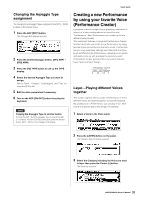
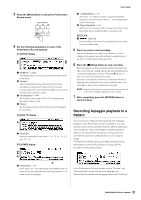
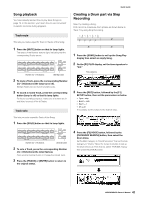
Quick Guide HINT You can use the following operation to adjust the volume and pan settings of Parts 1 - 4: 1 Press the Knob Function 1 button (at the left of Knobs 1 - 4) and Knob Function 2 button (at the left of Knobs 5 - 8) simultaneously. The six lamps light and the KNOB FUNCTION pop-up window will appear. 2 Turn the desired Knob to adjust the setting. Turning one of Knobs 1 - 4 changes the volume of Parts 1 - 4, respectively. Turning one of Knobs 5 - 8 changes the pan of Parts 1 - 4, respectively. 3 After completing editing, press the [EXIT] button to return to the Performance Play display. Knob Function 1 button Knob 1 Knob 2 Knob 3 Knob 4 Volume for Parts 1 - 4 Knob 5 Knob 6 Knob 7 Knob 8 Pan for Parts 1 - 4 Knob Function 2 button Recording in the Performance mode While experimenting and playing around with Arpeggios in the Performance mode, you may find some rhythm patterns and phrases that you like, and you may want to store them for future recall. The best and easiest way to capture these is to record your keyboard playing to a Song or Pattern. Song and Pattern Songs and Patterns are MIDI sequence data consisting of up to 16 Tracks. * Song A Song on this instrument is effectively the same as a song on a MIDI sequencer, and playback automatically stops at the end of the recorded data. * Pattern In this instrument, the term "Pattern" refers to a relatively short musical or rhythmic phrase - 1 to 256 measures - which is used for looped playback. Therefore, once Pattern playback starts, it continues until you press the [J] (Stop) button. HINT You can use the following operation to adjust the pitch of Parts 1 - 4: 1 Press the [EDIT] button in the Performance mode. 2 Press the Number [1] - [4] button corresponding to the Part you wish to edit. 3 Press the [F4] TONE button. 4 Press the [SF1] TUNE button. 5 Change the NoteShift value to adjust the pitch. 6 After completing editing, press the [EXIT] button to return to the Performance Play display. Recording the melody and Arpeggio playback to the Song When a Song is selected as the destination of Performance recording, you can record your keyboard playing with the Arpeggio without having to worry about measure limits or running out of recording space. It is a good idea, for example, to record your keyboard playing, freely calling up various Arpeggio types, then editing the Song later as necessary. You may even want to keep the recorder 'running' as you improvise, then listen back later and pick out the best parts to create your final Song. Try recording as shown in the instructions below. 1 In the Performance Play mode, select a Performance for recording. 2 Press the ARP [ON/OFF] button so that the lamp lights. 36 MOXF6/MOXF8 Owner's Manual
-
 1
1 -
2
-
3
-
4
-
5
-
6
-
7
-
8
-
9
-
10
-
11
-
12
-
13
-
14
-
15
-
16
-
17
-
18
-
19
-
20
-
21
-
22
-
23
-
24
-
25
-
26
-
27
-
28
-
29
-
30
-
 31
31 -
 32
32 -
 33
33 -
 34
34 -
 35
35 -
 36
36 -
 37
37 -
 38
38 -
 39
39 -
 40
40 -
 41
41 -
42
-
43
-
44
-
45
-
46
-
47
-
48
-
49
-
50
-
51
-
52
-
53
-
54
-
55
-
56
-
57
-
58
-
59
-
60
-
61
-
62
-
63
-
64
-
65
-
66
-
67
-
68
-
69
-
70
-
71
-
72
-
73
-
74
-
75
-
76
-
77
-
78
-
79
-
80
 |
 |
