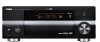
Yamaha RX V1700 MCXSP10 Manual
Yamaha RX V1700 - AV Receiver Manual
 |
UPC - 027108926186
View all Yamaha RX V1700 manuals
Add to My Manuals
Save this manual to your list of manuals |
Yamaha RX V1700 manual content summary:
- Yamaha RX V1700 | MCXSP10 Manual - Page 1
U RX-V1700 AV Receiver OWNER'S MANUAL - Yamaha RX V1700 | MCXSP10 Manual - Page 2
IMPORTANT SAFETY INSTRUCTIONS IMPORTANT SAFETY INSTRUCTIONS CAUTION RISK OF ELECTRIC SHOCK DO NOT OPEN CAUTION: TO REDUCE THE RISK OF ELECTRIC SHOCK, DO NOT REMOVE COVER (OR BACK). NO USER-SERVICEABLE PARTS INSIDE. REFER SERVICING TO QUALIFIED SERVICE PERSONNEL. • Explanation of Graphical Symbols - Yamaha RX V1700 | MCXSP10 Manual - Page 3
SECTION 810-21) GROUND CLAMPS POWER SERVICE GROUNDING ELECTRODE SYSTEM (NEC ART 250. PART H) FCC INFORMATION (for US customers) 1 IMPORTANT NOTICE: DO NOT MODIFY THIS UNIT! This product, when installed as indicated in the instructions contained in this manual, meets FCC requirements. Modifications - Yamaha RX V1700 | MCXSP10 Manual - Page 4
power cord and outdoor antennas disconnected from a wall outlet or the unit during a lightning storm. 14 Do not attempt to modify or fix this unit. Contact qualified YAMAHA service personnel when any service the rear of the unit. Retain this Owner's Manual in a safe place for future reference. iii - Yamaha RX V1700 | MCXSP10 Manual - Page 5
117 Using ADVANCED SETUP 117 Setting remote control ID 119 ADDITIONAL INFORMATION TROUBLESHOOTING 122 RESETTING THE SYSTEM 130 GLOSSARY 131 SOUND FIELD PROGRAM INFORMATION 134 PARAMETRIC EQUALIZER INFORMATION 135 SPECIFICATIONS 136 APPENDIX (at the end of this manual) • SOUND OUTPUT IN EACH - Yamaha RX V1700 | MCXSP10 Manual - Page 6
monitor out iPod controlling capability ◆ DOCK terminal to connect a YAMAHA iPod universal dock (such as the YDS-10, sold separately), which supports iPod (Click and Wheel), iPod nano, and iPod mini Other features ◆ YPAO (YAMAHA Parametric Room Acoustic Optimizer) for automatic speaker setup ◆ 192 - Yamaha RX V1700 | MCXSP10 Manual - Page 7
Check that you received all of the following parts. Remote control POWER TV POWER AV STANDBY POWER XM AUDIO SEL remote control, the button name on the remote control is given in parentheses. • This manual is printed prior to production. Design and specifications are subject to change in part - Yamaha RX V1700 | MCXSP10 Manual - Page 8
a small amount of power in order to receive infrared signals from the remote control. • When you HDMI", "COAX/OPT" and "ANALOG" when one component is connected to two or more input jacks (see page 40). 5 TONE CONTROL Adjusts the bass/treble balance of the front left, front right and center channels - Yamaha RX V1700 | MCXSP10 Manual - Page 9
52). 0 Remote control sensor Receives signals from the remote control (see page channels. y This does not affect the AUDIO OUT (REC) level. ■ Opening and closing the front panel door When you want to use the controls behind the front panel door, open the door by gently pressing on the lower part - Yamaha RX V1700 | MCXSP10 Manual - Page 10
selected input source name appears in the display window on the remote control showing which source is currently operational. 4 Display window Shows the name of the selected input source that you can control. 5 LEVEL Selects the speaker channel to be adjusted and sets the output level (see page 51 - Yamaha RX V1700 | MCXSP10 Manual - Page 11
POWER channel sources (see pages 80 and 82). Q ENHANCER Turns on or off the Compressed Music Enhancer mode (see page 52). R NIGHT Turns on or off the night listening modes (see page 53). S RENAME Changes the name of the input source in the display window (see page 106). T CLEAR Clears remote control - Yamaha RX V1700 | MCXSP10 Manual - Page 12
2 ZONE 3 2 NUMBER 7 1 Input selector buttons Select the desired input source of Zone 2 or Zone 3. 2 ID1/ID2 switch Switches the remote control ID between ID1 and ID2 (see page 104). 3 POWER Turns on Zone 2 or Zone 3. Note This button is operational only when MASTER ON/OFF on the front panel is - Yamaha RX V1700 | MCXSP10 Manual - Page 13
Preparing the remote control ■ Installing batteries in the remote control 2 1 3 1 Press the part and slide remote control The remote control transmits a directional infrared ray. Be sure to aim the remote control directly at the remote control sensor on this unit during operation. Remote control - Yamaha RX V1700 | MCXSP10 Manual - Page 14
MULTI CH TUNER XM DOCK neural VIRTUAL HiFi DSP YPAO ENHANCER SILENT DSD PCM DIGITAL CINEMA PL x EX MATRIX TEST" in "SOUND MENU" is set to "ON" (see page 92). y You can make settings for the presence and surround back speakers automatically by running "AUTO SETUP" (see page 32) or manually - Yamaha RX V1700 | MCXSP10 Manual - Page 15
page 49). C YPAO indicator Lights up when you run "AUTO SETUP" and when the speaker settings set in " Surround left DSP sound field Listening position Surround right DSP sound field Surround back DSP sound field CONTROLS the EON data service is being received. PTY HOLD Lights up while searching for the - Yamaha RX V1700 | MCXSP10 Manual - Page 16
VIDEO ANTENNA GND AM PB PB PR REMOTE PR IN OUT HDMI IN 2 GND PHONO CD L CD-R IN (PLAY) OUT (REC) MD/ TAPE L R CENTER FRONT(6CH) SURROUND CENTER FRONT SURROUND SINGLE(SB) ZONE 2 ZONE 3 VIDEO R+ SP1 PRESENCE SPEAKERS +L + SURROUND BACK/ BI-AMP + CENTER SINGLE WRENCH HOLDER - Yamaha RX V1700 | MCXSP10 Manual - Page 17
the front speakers, facing slightly inward, and about 1.8 m (6 ft) above the floor. Subwoofer (SW) The use of a subwoofer with a built-in amplifier, such as the YAMAHA Active Servo Processing Subwoofer System, is effective not only for reinforcing bass frequencies from any or all channels, but also - Yamaha RX V1700 | MCXSP10 Manual - Page 18
are directed to the speakers selected in "LFE/BASS OUT" (see page 87). • You can connect both surround back and presence speakers to this unit, however they do not output sound simultaneously. You can set to prioritize either set of speakers using the "PRIORITY" parameter in "MANUAL SETUP" (see page - Yamaha RX V1700 | MCXSP10 Manual - Page 19
When you use a surround back speaker, connect the speaker to the left SURROUND BACK terminal (SINGLE). PRESENCE terminals Connect presence left and right speakers to these terminals. SUBWOOFER jack Connect a subwoofer with a built-in amplifier (such as the YAMAHA Active Servo Processing Subwoofer - Yamaha RX V1700 | MCXSP10 Manual - Page 20
connector into the end of the corresponding terminal. 3 Close the tab to secure the wire. y You can also use the banana plug with the SP2 speaker terminals. Open the tab and then insert one banana plug into the hole on the terminal. Do not close the tab after connecting the banana - Yamaha RX V1700 | MCXSP10 Manual - Page 21
wire connections that allow bi-amplification to enhance the performance of the speaker system. This unit allows you to make biamplification connection to one speaker system. Check if your speakers support bi-amplification. As these speakers are shipped to you, you will note shorting bars or bridges - Yamaha RX V1700 | MCXSP10 Manual - Page 22
CONNECTIONS Information on jacks and cable plugs Audio jacks and cable plugs AUDIO L R DIGITAL COAXIAL DIGITAL OPTICAL Video jacks and cable plugs VIDEO S VIDEO COMPONENT VIDEO Y PB PR (White) (Red) (Orange) (Yellow) (Green) (Blue) (Red) L R C O V S Y PB PR Left and right - Yamaha RX V1700 | MCXSP10 Manual - Page 23
HDMI interface is based on the following standards: • HDMI Version 1.2a (High-Definition Multimedia Interface Specification Version 1.2a) licensed by HDMI disconnect or connect the cable or turn off the power of the HDMI components connected to the HDMI OUT jack of this unit while data is being - Yamaha RX V1700 | MCXSP10 Manual - Page 24
channel as well as multi-channel PCM, Dolby Digital and DTS signals input at the HDMI IN 1 or HDMI IN 2 jack can be output at the HDMI OUT jack only when "SUPPORT I/P to ON in MANUAL SETUP to activate this feature (see page 98). • Digital video signals input at the HDMI IN 1 or HDMI IN 2 jack cannot - Yamaha RX V1700 | MCXSP10 Manual - Page 25
until all connections between components are complete. y You can select to play back HDMI audio signals on this unit or on another HDMI component connected to the HDMI OUT jack on the rear panel of this unit. Use the "SUPPORT AUDIO" parameter in "SOUND MENU" to select the component to play back - Yamaha RX V1700 | MCXSP10 Manual - Page 26
Do not connect this unit or other components to the AC power supply until all connections between components are complete. Notes • When 576p, 720p, 1080i or 1080p resolutions are input and output at the VIDEO or S VIDEO MONITOR OUT jack. ■ Connecting a DVD player HDMI out DVD player Optical out - Yamaha RX V1700 | MCXSP10 Manual - Page 27
in Audio in Audio out Video out S-video out Coaxial out DVD recorder, PVR or VCR ■ Connecting set-top boxes HDTV decoder Satellite receiver, cable TV receiver HDMI out Component out Optical out PR PB Y O RL VS S V LR O PR PB Y Audio out Video out S-video out S-video out Video out - Yamaha RX V1700 | MCXSP10 Manual - Page 28
CONNECTIONS ■ Connecting audio components Notes • To make a digital connection to a component other than the default component assigned to each the DIGITAL INPUT jack or the DIGITAL OUTPUT jack, select the corresponding setting for "OPTICAL OUT", "OPTICAL IN", or "COAXIAL IN" in "I/O ASSIGNMENT" ( - Yamaha RX V1700 | MCXSP10 Manual - Page 29
for "SPEAKER SET" (see page 87) and "LFE/BASS OUT" (see page 87). 1234 CENTER FRONT SURROUND SINGLE(SB) L R SUB WOOFER 5 PRE OUT SUR.BACK/ PRESENCE 1 CENTER PRE OUT jack Center channel output jack. 2 FRONT PRE OUT jacks Front channel output jacks. 3 SURROUND PRE OUT jacks Surround channel - Yamaha RX V1700 | MCXSP10 Manual - Page 30
input at the MULTI CH INPUT jacks to accommodate for missing speakers. We recommend that you connect at least a 5.1-channel speaker system before using this feature. For 6-channel input For 8-channel input CENTER FRONT(6CH) SURROUND L R SUB WOOFER SB(8CH) MULTI CH INPUT () ( C) MD/ TAPE - Yamaha RX V1700 | MCXSP10 Manual - Page 31
remote control. Connect a YAMAHA iPod universal dock (such as the YDS-10, sold separately) to the DOCK terminal on the rear panel of this unit using its dedicated cable. CAUTION Do not connect this unit to the AC power SELECT TONE CONTROL A/B/C/D/E CATEGORY STRAIGHT EFFECT YPAO PRESET/TUNING/ - Yamaha RX V1700 | MCXSP10 Manual - Page 32
provides clearer reception than an indoor one. If you experience poor reception quality, install an outdoor antenna. Consult the nearest authorized YAMAHA dealer or service center about outdoor antennas. 3 Insert one of the AM loop antenna lead wires into the AM ANT terminal. Indoor FM antenna - Yamaha RX V1700 | MCXSP10 Manual - Page 33
to these outlet(s) is cut off when this unit is turned off. For information on the maximum power or the total power consumption of the components that can be connected to these outlet(s), see "SPECIFICATIONS" on page 136. Memory back-up The memory back-up circuit prevents the stored data from being - Yamaha RX V1700 | MCXSP10 Manual - Page 34
. 4 ohm speakers can be also used as the front speakers. (U.S.A. model) 4 Press STRAIGHT on the front panel repeatedly to select "6ΩMIN". The following display appears in the front panel display. STRAIGHT EFFECT MAIN ZONE ON/OFF ON OFF MASTER INPUT AUDIO SELECT TONE CONTROL A/B/C/D/E CATEGORY - Yamaha RX V1700 | MCXSP10 Manual - Page 35
(U.S.A. model) POWER TV POWER AV STANDBY POWER XM AUDIO SEL SLEEP PHONO TUNER CD MULTI CH IN STANDBY POWER MASTER ON/OFF on the front panel (or POWER on the remote control) to turn on the main zone. MAIN ZONE ON/OFF or POWER Front panel Remote control ■ Set the main zone - Yamaha RX V1700 | MCXSP10 Manual - Page 36
YPAO (YAMAHA Parametric Room Acoustic Optimizer) technology which lets you avoid troublesome listening-based speaker in the front panel display. This manual uses the OSD illustrations to explain AUTO SETUP" section in "TROUBLESHOOTING" on pages 128 and CONTROL A/B/C/D/E CATEGORY STRAIGHT EFFECT YPAO - Yamaha RX V1700 | MCXSP10 Manual - Page 37
MODE SET MENU . ;AUTO SETUP ;MANUAL SETUP . ;SIGNAL INFO [ ]/[ ]: Speaker wiring WIRING Checks which speakers are connected and the polarity of each speaker. Speaker distance DISTANCE Checks the distance of each speaker from the listening position and adjusts the timing of each channel. Speaker - Yamaha RX V1700 | MCXSP10 Manual - Page 38
. 8 Press n to select "START" and then press ENTER to start the setup procedure. This unit starts the auto setup procedure. Loud test tones are output from each speaker during the auto setup procedure. Once all items are set, the "RESULT:EXIT" display appears in the OSD. PRESET/CH PRESET/CH - Yamaha RX V1700 | MCXSP10 Manual - Page 39
output level y If you are not satisfied with the results or want to manually adjust each parameter, run "MANUAL SETUP" (see page 84). Notes • If you change speakers, speaker positions, or the layout of your listening environment, run "AUTO SETUP" again to recalibrate your system. • The distances - Yamaha RX V1700 | MCXSP10 Manual - Page 40
the OSD. PRESET/CH A-E/CAT. ENTER p p SET MENU . ;AUTO SETUP ;MANUAL SETUP . ;SIGNAL INFO [ ]/[ ]:Up/Down [ENTER]:Enter ■ If an error screen ENTER. The following display is an example where "E-9:USER CANCEL" appears in the OSD. ERROR E-9:USER CANCEL . Don't operate any function. . [RETRY - Yamaha RX V1700 | MCXSP10 Manual - Page 41
< OUT OF PHASE > Reverse Channel FL -- CENTER PL PR SL SR SBL SBR [p]/[[] : Select [ENTER] : Enter y • For details about each warning message, see the "AUTO SETUP" section in "TROUBLESHOOTING" on page 128. • When the corresponding warning message is not applicable to a speaker, "- -" is - Yamaha RX V1700 | MCXSP10 Manual - Page 42
FM/AM MAN'L/AUTO FM MODE DISPLAY ZONE ON/OFF ZONE CONTROLS ZONE 2 ZONE 3 SILENT CINEMA S VIDEO VIDEO L AUDIO R OPTICAL ENHANCER NIGHT PROGRAM OPTIMIZER MIC PHONES VIDEO AUX VOLUME INPUT 25 4 POWER TV POWER AV STANDBY POWER XM AUDIO SEL SLEEP PHONO TUNER CD MULTI CH IN V-AUX - Yamaha RX V1700 | MCXSP10 Manual - Page 43
about XM Satellite Radio tuning instructions. 4 Rotate VOLUME on the front panel (or press VOLUME +/- on the remote control) to adjust the volume to the desired output level. VOLUME + or VOLUME - Front panel Remote control y See page 51 to adjust the level of each speaker. 5 Rotate the PROGRAM - Yamaha RX V1700 | MCXSP10 Manual - Page 44
on the front panel (or AUDIO SEL on the remote control) repeatedly to select the desired Audio input jack select setting. AUDIO SELECT AUDIO SEL or AUTO HDMI COAX/OPT ANALOG Automatically selects input signals in the following order: (1) HDMI (2) Digital signals (3) Analog signals Selects only - Yamaha RX V1700 | MCXSP10 Manual - Page 45
INPUT AUDIO SELECT TONE CONTROL A/B/C/D/E CATEGORY STRAIGHT EFFECT YPAO PRESET/TUNING/CH PRESET/ headphones, no signals are output at the speaker terminals. • When the component connected to and right headphone channels. Muting the audio output Press MUTE on the remote control to mute the - Yamaha RX V1700 | MCXSP10 Manual - Page 46
the operation mode selector to AMP and then press SET MENU on the remote control. The top "SET MENU" display appears in the OSD. AMP SOURCE TV SET MENU MENU SRCH MODE p p SET MENU . ;AUTO SETUP ;MANUAL SETUP . ;SIGNAL INFO [ ]/[ ]:Up/Down [ENTER]:Enter 2 Press n repeatedly to select "SIGNAL - Yamaha RX V1700 | MCXSP10 Manual - Page 47
. See page 54 for details about tuning instructions. SLEEP OFF Disappears The SLEEP indicator turns off, and "SLEEP OFF" disappears from the front panel display after a few seconds. y The sleep timer setting can also be canceled by pressing STANDBY on the remote control (or MAIN ZONE ON/OFF on the - Yamaha RX V1700 | MCXSP10 Manual - Page 48
modes are compatible with all Dolby Digital, DTS, and Dolby Surround sources. • The YAMAHA HiFi DSP sound field programs recreate real-world acoustic environments made from precise measurements taken in actual concert halls, music venues, movie theaters, etc. Thus, you may notice variations in the - Yamaha RX V1700 | MCXSP10 Manual - Page 49
on the name of the program, etc. Remote control button Category of the program Name of the program the "STRAIGHT" mode (see page 49) or surround decode mode (see page 80). CELNATSESRITCAAINL 13 CLASSICAL Hall box type concert hall with approximately 1700 seats. Pillars and ornate carvings - Yamaha RX V1700 | MCXSP10 Manual - Page 50
LIVE/CLUB 2 LIVE/CLUB Cellar Club HiFi DSP This program simulates a live house with a low ceiling and homey atmosphere. A realistic, live sound field features powerful sound as if the listener is in a row in front of a small stage. DSP LEVEL INIT. DLY ROOM SIZE LIVENESS DIALG.LIFT LIVE/CLUB - Yamaha RX V1700 | MCXSP10 Manual - Page 51
channel in order to offer a powerful 3D feeling of the field during play, while offering movie-like surround in a hot live space This program controls the channel audio such as Dolby Digital and DTS. It has been designed with the concept of "an ideal movie theater", in which the audience is surrounded - Yamaha RX V1700 | MCXSP10 Manual - Page 52
5 STEREO 7ch STEREO HiFi DSP Use this program to output sound from all speakers. When you play back multi-channel sources, this unit downmixes the source to 2 channels, and then output the sound from all speakers. This program creates a larger sound field and is ideal for background music at - Yamaha RX V1700 | MCXSP10 Manual - Page 53
the CINEMA DSP programs without surround speakers. It creates virtual speakers to reproduce the natural sound speakers. Multi-channel sources are decoded straight into the appropriate channels without any additional effect processing. Press STRAIGHT on the front panel (or on the remote control - Yamaha RX V1700 | MCXSP10 Manual - Page 54
or PURE DIRECT Front panel Remote control Notes • When you play back the multi-channel PCM sources (less than 192 kHz), this unit downmixes the multi-channel signals according to the "SPEAKER SET" in "BASIC MENU" (see page 87). • When the component connected to the HDMI IN jacks is selected as - Yamaha RX V1700 | MCXSP10 Manual - Page 55
in 2-channel stereo. 1 Set the operation mode to AMP and then press STEREO on the remote control repeatedly to select "2ch Stereo". AMP SOURCE TV STEREO 5 2ch Stereo Display Adjusted speaker FRONT L Front left speaker CENTER Center speaker FRONT R Front right speaker SUR. R Surround right - Yamaha RX V1700 | MCXSP10 Manual - Page 56
in 7-channel stereo. • Select "Off" to turn off the Compressed Music Enhancer mode. Note When you select "Off", this unit returns to the previously selected sound field program. ■ Changing the parameter of the Compressed Music Enhancer mode Press PARAMETER and then l / h on the remote control to - Yamaha RX V1700 | MCXSP10 Manual - Page 57
or set the operation mode selector to AMP and then press NIGHT on the remote control) repeatedly to select "NIGHT:CINEMA" or "NIGHT:MUSIC". NIGHT AMP or modes may vary in effectiveness depending on the input source and surround sound settings you use. BASIC OPERATION Choices: NIGHT:CINEMA, NIGHT - Yamaha RX V1700 | MCXSP10 Manual - Page 58
controls and functions ■ Front panel functions 1 23 45 6 7 INPUT AUDIO SELECT TONE CONTROL A/B/C/D/E CATEGORY STRAIGHT EFFECT YPAO manual tuning (the AUTO indicator is turned off) (see page 55). ■ Remote control to SOURCE 3 5 5 (U.S.A. model) XM POWER TUNER CD 1 2 CD-R 3 STANDBY DTV - Yamaha RX V1700 | MCXSP10 Manual - Page 59
OFF ON OFF MASTER INPUT AUDIO SELECT TONE CONTROL A/B/C/D/E CATEGORY STRAIGHT EFFECT YPAO PRESET/TUNING/CH PRESET/ TUNING EDIT SEARCH is tuned into a station, the TUNED indicator lights up and the frequency of the received station is shown in the front panel display. • Press h to tune into - Yamaha RX V1700 | MCXSP10 Manual - Page 60
AM TUNING Manual tuning If the signal received from the station you want to select is weak, tune into it manually. Note Manually tuning into ON OFF MASTER INPUT (U.S.A. model) AUDIO SELECT TONE CONTROL A/B/C/D/E CATEGORY STRAIGHT EFFECT YPAO PRESET/TUNING/CH PRESET/ TUNING EDIT SEARCH MODE - Yamaha RX V1700 | MCXSP10 Manual - Page 61
MASTER INPUT AUDIO SELECT TONE CONTROL A/B/C/D/E CATEGORY STRAIGHT EFFECT YPAO PRESET/TUNING/CH PRESET/ TUNING same preset station number. • If the number of received stations does not reach 40 (E8), automatic preset manually and store it as described in "Manual preset tuning" on page 58. 57 En - Yamaha RX V1700 | MCXSP10 Manual - Page 62
ZONE ON/OFF ZONE CONTROLS ZONE 2 ZONE 3 SILENT CINEMA S VIDEO VIDEO L AUDIO R OPTICAL ENHANCER NIGHT PROGRAM OPTIMIZER MIC PHONES VIDEO AUX PURE DIRECT VOLUME 3 4 2,5 1 Tune into a station automatically or manually. See pages 55 and 56 for tuning instructions. 2 Press MEMORY. The MEMORY - Yamaha RX V1700 | MCXSP10 Manual - Page 63
ON/OFF ON OFF MASTER INPUT AUDIO SELECT TONE CONTROL A/B/C/D/E CATEGORY STRAIGHT EFFECT YPAO PRESET/TUNING/CH PRESET/ TUNING EDIT SEARCH MODE mode selector to SOURCE and then press A-E/CAT. l / h on the remote control) to select the desired preset station group (A to E). The preset station - Yamaha RX V1700 | MCXSP10 Manual - Page 64
the procedure to exchange preset station "E1" with "A5". (U.S.A. model) MAIN ZONE ON/OFF ON OFF MASTER INPUT AUDIO SELECT TONE CONTROL A/B/C/D/E CATEGORY STRAIGHT EFFECT YPAO PRESET/TUNING/CH PRESET/ TUNING EDIT SEARCH MODE MULTI ZONE MEMORY TUNING FM/AM MAN'L/AUTO FM MODE DISPLAY ZONE ON - Yamaha RX V1700 | MCXSP10 Manual - Page 65
For details, see the operating instructions provided with XM Passport System. XM (U.S.A. model) ■ Information from XM Satellite Radio Inc. XM monthly service subscription sold separately. XM Passport and XM Passport Home Dock required to receive XM service (sold separately). Installation costs and - Yamaha RX V1700 | MCXSP10 Manual - Page 66
mode selector to SOURCE and then press XM on the remote control) to select "XM" as the input source. ■ Front panel functions ■ Remote control functions 1 INPUT 2 3 4 56 AUDIO SELECT TONE CONTROL A/B/C/D/E CATEGORY STRAIGHT EFFECT YPAO PRESET/TUNING/CH PRESET/ TUNING EDIT SEARCH MODE MULTI - Yamaha RX V1700 | MCXSP10 Manual - Page 67
ENT Confirms an entered channel number in the Direct Number Access mode (see page 69). 0 ALL Selects the All Channel Search mode (see page sign up for an account with the XM Satellite Radio service, an XM Satellite Radio ID number is required. Follow GET-XMSR (1-877-438-9677) BASIC OPERATION 63 En - Yamaha RX V1700 | MCXSP10 Manual - Page 68
CONTROLS ZONE 2 ZONE 3 SILENT CINEMA S VIDEO VIDEO L AUDIO R OPTICAL ENHANCER NIGHT PROGRAM OPTIMIZER MIC PHONES VIDEO AUX PURE DIRECT VOLUME 1 3 1 POWER TV POWER AV STANDBY POWER Remote control Front panel Remote control Note You cannot select channel "0" if the All Channel - Yamaha RX V1700 | MCXSP10 Manual - Page 69
button POWER TV POWER AV STANDBY POWER XM AUDIO SEL SLEEP PHONO TUNER CD MULTI CH IN V-AUX/DOCK CBL/SAT MD/TAPE CD-R DTV VCR 1 DVR/VCR 2 DVD SELECT ++ TV VOL CH -- + VOLUME - AMP SOURCE TV Set to SOURCE (U.S.A. model) Front panel AMP SOURCE or XM TV Remote control Lights - Yamaha RX V1700 | MCXSP10 Manual - Page 70
MODE Front panel or SET MENU MENU SRCH MODE Remote control Front panel Remote control 3 Press PRESET/TUNING/CH l / h on the front panel (or PRESET/CH k / n on the remote control) repeatedly to search for a channel within all channels. PRESET/CH PRESET/TUNING/CH or ENTER A-E/CAT. Front - Yamaha RX V1700 | MCXSP10 Manual - Page 71
CONTROL A/B/C/D/E CATEGORY STRAIGHT EFFECT YPAO PRESET/TUNING/CH PRESET/ TUNING EDIT SEARCH MODE MULTI ZONE MEMORY TUNING FM/AM MAN'L/AUTO FM MODE DISPLAY ZONE ON/OFF ZONE CONTROLS MENU SRCH MODE Remote control Front panel Remote control y You can search for a channel quickly by pressing - Yamaha RX V1700 | MCXSP10 Manual - Page 72
VOLUME 2 31 2 Press CATEGORY on the front panel (or A-E/CAT. l / h on the remote control) repeatedly to change the preset channel group (A to E). PRESET/CH A/B/C/D/E CATEGORY or ENTER A-E/CAT. Front panel Remote control 3 Press PRESET/TUNING/CH l / h on the front panel (or PRESET/CH k / n on - Yamaha RX V1700 | MCXSP10 Manual - Page 73
repeatedly to select "ALL CH SEARCH" or "CAT SEARCH". SET MENU MENU SRCH MODE Remote control XM SATELLITE RADIO TUNING 2 Press the numeric buttons on the remote control to enter the desired three-digit channel number. For example, to enter the number 123, press the numeric buttons as shown below - Yamaha RX V1700 | MCXSP10 Manual - Page 74
MEMORY Remote control MAIN ZONE ON/OFF ON OFF MASTER INPUT AUDIO SELECT TONE CONTROL A/B/C/D/E CATEGORY STRAIGHT EFFECT YPAO PRESET/ h on the remote control) repeatedly to select a preset channel group (A to E) while the MEMORY indicator is flashing. The preset channel group letter appears - Yamaha RX V1700 | MCXSP10 Manual - Page 75
title) for the currently selected channel in the front panel display or in the OSD. (U.S.A. model) PRESET/TUNING/CH Front panel or ENTER A-E/CAT. Remote control MAIN ZONE ON/OFF ON OFF MASTER INPUT AUDIO SELECT TONE CONTROL A/B/C/D/E CATEGORY STRAIGHT EFFECT YPAO PRESET/TUNING/CH PRESET - Yamaha RX V1700 | MCXSP10 Manual - Page 76
displayed in the OSD. • The XM Satellite Radio information screen on hold is released if you press ENTER on the remote control again or if you change the XM Satellite Radio channel. • This unit can save up to two XM Satellite Radio information screens for future reference. To view the previous two - Yamaha RX V1700 | MCXSP10 Manual - Page 77
remote control functions used to control your iPod, see the "iPod" column in "Controlling other components" on page 102. • For a complete list of status messages that appear in the front panel display and in the OSD, see the "iPod" section in "TROUBLESHOOTING stationed in a YAMAHA iPod universal - Yamaha RX V1700 | MCXSP10 Manual - Page 78
in the OSD. AMP SOURCE TV PARAMETER DISPLAY iPod Top Playlists > Artists > Albums > Songs > Genres > Composers > Settings > 2 Press k / n / l / h on the remote control to navigate the iPod menu and then press ENTER to begin playback of the selected song. PRESET/CH PRESET/CH - Yamaha RX V1700 | MCXSP10 Manual - Page 79
its operating instructions to make CONTROL (see page 50), VOLUME, the speaker channel. a test recording remote control) to select the source component you want to record from. INPUT or PHONO TUNER CD V-AUX/DOCK CBL/SAT MD/TAPE CD-R DTV VCR 1 DVR/VCR 2 DVD 2 POWER TV POWER AV STANDBY POWER - Yamaha RX V1700 | MCXSP10 Manual - Page 80
CAT. ENTER 1 Turn on the video monitor connected to this unit. 2 Set the operation mode selector to AMP and then press PARAMETER on the remote control. The following display is shown in the OSD. AMP SOURCE TV PARAMETER DISPLAY Sound field program category Cursor MOVIE Sci-fi . < PRO LOGIC - Yamaha RX V1700 | MCXSP10 Manual - Page 81
, you may want to increase or decrease the DSP effect level relative to the level of the direct sound. Control range: -6 dB to +3 dB Initial delay. Presence, surround, and surround back initial delay. Changes the apparent distance from the source sound by adjusting the delay between the direct sound - Yamaha RX V1700 | MCXSP10 Manual - Page 82
Small value = 0.1 Large value = 2.0 Liveness. Surround and surround back liveness. Adjusts the reflectivity of the virtual walls in decay rate and thus the "liveness" of the room. Control range: 0 to 10 Source sound Live Dead Level Level Level Time Time Time Small reflected sound Small - Yamaha RX V1700 | MCXSP10 Manual - Page 83
environment over an extremely wide range. Set a longer reverberation time for "dead" sources and listening room environments, and a shorter time for "live" sources and listening room environments. Control range: 1.0 to 5.0 s Reverberation 60 dB Source sound Reverberation Early reflections 60 - Yamaha RX V1700 | MCXSP10 Manual - Page 84
"SMALL" (see page 88) and "LFE/BASS OUT" is set to "SWFR" (see page 87). 7-channel stereo center, surround left, surround right, surround back, presence left and presence right levels. Adjusts the volume level of each channel in the 7-channel stereo mode. Control range: 0 to 100% Selecting decoders - Yamaha RX V1700 | MCXSP10 Manual - Page 85
SOUND CONFIGURATIONS Remote control button Category of the program Name of the program SUR.DECODE 6 PL IIx Music SURROUND DECODE PL Surround-incompatible signals are being input while the Neural Surround decoder is selected, multichannel sources are decoded straight into the appropriate channels - Yamaha RX V1700 | MCXSP10 Manual - Page 86
surround speakers as well as the front speakers channel output completely towards the center speaker or towards the front left and right speakers. A larger value moves the center channel output towards the front left and right speakers. Control range: 0 (center channel the remote control repeatedly - Yamaha RX V1700 | MCXSP10 Manual - Page 87
If you connected surround back speakers, use this feature to enjoy 6.1/7.1-channel playback for multi-channel sources using the Dolby Pro Logic IIx, Dolby Digital EX or DTS-ES decoders. 1 Set the operation mode selector to AMP and then press EXTD SUR. on the remote control repeatedly to switch - Yamaha RX V1700 | MCXSP10 Manual - Page 88
manually adjust basic system parameters. Parameter A)SPEAKER SET B)SP LEVEL C)SP DISTANCE D)TEST TONE Features Selects the size of each speaker, the speakers AUDIO SET E)HDMI SET Features Adjusts the tonal quality of the center speaker. Adjusts the output level of the LFE channel for Dolby Digital - Yamaha RX V1700 | MCXSP10 Manual - Page 89
Input menu 3 INPUT MENU Use this menu to manually reassign the input/output jacks, select the input mode . E)MULTI CH SET Adjusts the direction of the signals input into the center, subwoofer, and surround channels when a source component is connected to the MULTI CH INPUT jacks. Page 94 95 96 96 - Yamaha RX V1700 | MCXSP10 Manual - Page 90
MANUAL SETUP) Using SET MENU Use the remote control MANUAL SETUP". PRESET/CH A-E/CAT. ENTER p p SET MENU ;AUTO SETUP . ;MANUAL SETUP . ;SIGNAL INFO [ ]/[ ]:Up/Down [ENTER]:Enter 3 Press ENTER to enter "MANUAL SETUP". The "MANUAL p SET MENU . ;AUTO SETUP ;MANUAL SETUP . ;SIGNAL INFO [ ]/[ - Yamaha RX V1700 | MCXSP10 Manual - Page 91
Speaker settings A)SPEAKER SET Use this feature to manually adjust any speaker settings. y • If you are not satisfied with the bass sounds from your speakers channels, and the lowfrequency signals of other speakers set to "SML" (or "SMALL") are all directed to the front left and right speakers - Yamaha RX V1700 | MCXSP10 Manual - Page 92
The low-frequency signals of the surround left and right channels are directed to the speakers selected in "LFE/BASS OUT". • Select "LRG" (large) if you have large surround left and right speakers that reproduce low-frequency signals effectively. All the surround channel signals are directed to the - Yamaha RX V1700 | MCXSP10 Manual - Page 93
the surround back left and right channel signals are directed to the surround back left and right speakers. Presence speakers PRESENCE SP Use this feature if you want to use the presence speakers connected to this unit. Choices: NONE, YES PRESENCE SP CUSTOMIZING THIS UNIT (MANUAL SETUP) Bass cross - Yamaha RX V1700 | MCXSP10 Manual - Page 94
CUSTOMIZING THIS UNIT (MANUAL SETUP) ■ Speaker level B)SP LEVEL Use this feature to manually balance the speaker levels between the front left or surround left speakers and each speaker selected in "SPEAKER SET" (see page 87). Control range: -10.0 to +10.0 dB Control step: 0.5 dB Initial setting: FR - Yamaha RX V1700 | MCXSP10 Manual - Page 95
Test tone D)TEST TONE Turns the test tone output on or off for the SPEAKER SET, SP LEVEL and SP DISTANCE settings. Choices: ON, OFF 2 SOUND MENU Use to manually adjust speaker ]:Enter 2 SOUND MENU 2/2 . E)HDMI SET [ ]/[ ]:Up/Down [ENTER]:Enter ) ) D)TEST TONE TEST TONE;;;;OFF [ ]/[ )]:Select y - Yamaha RX V1700 | MCXSP10 Manual - Page 96
the center, surround L/R and surround back L/R, surround back, presence L/R speakers and the subwoofer with that of the front L/R speakers. You can adjust 7 frequency bands (63Hz, 160Hz, 400Hz, 1kHz, 2.5kHz, 6.3kHz, 16kHz). Choices: -6.0 to +6.0 dB Control step: 0.5 dB A)EQUALIZER . CHANNEL;;FRONT - Yamaha RX V1700 | MCXSP10 Manual - Page 97
bypass the tone control circuitry. Support audio SUPPORT AUDIO Use to select whether to play back HDMI audio signals on this unit or on another HDMI component connected to the HDMI OUT jack on the rear panel of this unit. Choices: RX-V1700, OTHER • Select "RX-V1700" to play back HDMI audio signals - Yamaha RX V1700 | MCXSP10 Manual - Page 98
CUSTOMIZING THIS UNIT (MANUAL SETUP) 3 INPUT MENU Use this menu to reassign the input/output jacks, using the INPUT selector on the front panel (or the input selector buttons on the remote control). y The input source name in parentheses indicates the default assigned input source. For COMPONENT - Yamaha RX V1700 | MCXSP10 Manual - Page 99
(MANUAL SETUP) 1 Press one of the input selector buttons on the remote control to remote control to place the "_" (underscore) under the space or the character you want to edit. Notes • You cannot select a specific to the next space. PRESET/CH PRESET/CH p HDMI IN . [IN1];;; DVD ( DVD ) [IN2];;; - Yamaha RX V1700 | MCXSP10 Manual - Page 100
MANUAL AUX, DOCK, MULTI CH Control range: -6.0 to +6.0 dB Control step: 0.5 dB Initial setting digital input jacks for specific audio signals (DTS, etc surround back speakers even if you select "8CH". In this case, select "6CH" and set the output setting of the external component to 6 channels - Yamaha RX V1700 | MCXSP10 Manual - Page 101
■ Display settings A)DISPLAY SET Note Use the "V-RESET" in "ADVANCED SETUP" to set the parameters Control step: 1 Initial setting: 0 • Press l to raise the position of the OSD. • Press h to lower the position of the OSD. CUSTOMIZING THIS UNIT (MANUAL component video signals to HDMI video signals. • - Yamaha RX V1700 | MCXSP10 Manual - Page 102
MANUAL support analog video signals with 480p/576p of resolution, the SET MENU items may not be displayed on your video monitor when "CMPNT I/P" is set to "ON". Use "V-RESET or 1080p resolutions are input - When HDMI title or channel name) MENU" items - all speaker levels Note When "MEMORY GUARD" is - Yamaha RX V1700 | MCXSP10 Manual - Page 103
to the DIGITAL INPUT jacks when you turn on the power of this unit. Choices: AUTO, LAST C)AUDIO SELECT EXTD SUR. button on the remote control. p CUSTOMIZING THIS UNIT (MANUAL SETUP) ■ Parameter initialization E) SURROUND DECODE E)PARAM. INI CLASSICAL *LIVE/CLUB ENTERTAINMENT *MOVIE STEREO SURROUND - Yamaha RX V1700 | MCXSP10 Manual - Page 104
surround speakers and the surround back speakers in the main zone. • When you use internal amplifiers for Zone 2 or Zone 3, some surround field programs may not work The "XM ANTENNA" parameter cannot be adjusted by using the remote control. Instead, you need to adjust the orientation of the XM - Yamaha RX V1700 | MCXSP10 Manual - Page 105
selector to TV to control your TV. To control your TV, you must set the appropriate remote control code for DTV or PHONO (see page 103). When you set the remote control codes for both DTV and PHONO, priority is given to the one set for DTV. POWER TV POWER AV STANDBY POWER XM AUDIO SEL SLEEP - Yamaha RX V1700 | MCXSP10 Manual - Page 106
some buttons may not correctly operate the selected component. y The remote control has 14 modes (input areas) to control components so that the remote control can operate up to 14 different components. 1 POWER TV POWER AV STANDBY POWER XM AUDIO SEL SLEEP PHONO TUNER CD MULTI CH IN V-AUX - Yamaha RX V1700 | MCXSP10 Manual - Page 107
CD-R TV VCR DVR DVD Manufacturer YAMAHA YAMAHA - YAMAHA YAMAHA YAMAHA YAMAHA - YAMAHA YAMAHA - - YAMAHA YAMAHA Default code 2604 2607 - 2602 2300 2100 2606 - 2500 2400 - - 2807 2100 Note You may not be able to operate your YAMAHA component even if a YAMAHA remote control code is preset as listed - Yamaha RX V1700 | MCXSP10 Manual - Page 108
remote control code for the component you want to use. For a complete list of available remote control codes, refer to "LIST OF REMOTE CONTROL CODES" at the end of this manual p or AV POWER to confirm whether you can control your component using the remote control. POWER or AV y If operation - Yamaha RX V1700 | MCXSP10 Manual - Page 109
control transmits infrared rays. If the other remote control also uses infrared rays, this remote control can learn most of its functions. However, you may not be able to program some special signals or extremely long transmissions. Refer to the operating instructions for the other remote control - Yamaha RX V1700 | MCXSP10 Manual - Page 110
want to program on the other remote control until "OK" appears in the display window on the remote control. "NG" appears in the display window on the remote control if learning was unsuccessful. In this case, start over from step 4. POWER TV XM PHONO TUNER POWER AV V-AUX/DOCK CBL/SAT MD/TAPE - Yamaha RX V1700 | MCXSP10 Manual - Page 111
(see page 109). ■ MACRO operations Macro buttons (U.S.A. model) POWER TV POWER AV STANDBY POWER XM AUDIO SEL SLEEP PHONO TUNER CD MULTI CH IN V-AUX CLEAR RENAME Note "ERROR" appears in the display window on the remote control if you press a button not indicated in the respective step, - Yamaha RX V1700 | MCXSP10 Manual - Page 112
YAMAHA components) connected to this unit by connecting them to the AC OUTLETS on the rear panel of this unit. Power control may not be synchronized with this unit depending on the component. For details, refer to the operating instructions for the connected component. *2 When the remote control - Yamaha RX V1700 | MCXSP10 Manual - Page 113
, "FULL" appears and the remote control automatically exits the macro mode. The following example is for programming the following procedure: Step 1 ("MCR 1"): Press DVD. Step 2 ("MCR 2"): Press AV POWER. Step 3 ("MCR 3"): Press SLEEP. POWER TV POWER AV STANDBY POWER XM 2AUDIO SEL SLEEP PHONO - Yamaha RX V1700 | MCXSP10 Manual - Page 114
Clearing configurations You can clear all changes made in each function set, such as learned functions, macros, renamed input area names and setup remote control ID. ■ Clearing function sets 1 Set the operation mode selector to AMP or SOURCE and then press CLEAR by using a ballpoint pen or similar - Yamaha RX V1700 | MCXSP10 Manual - Page 115
more than one button simultaneously. Notes • Do not press and hold LEARN. If you hold it down for more than 3 seconds, the remote control enters the remote control code setting mode. • If you do not complete each of the following steps within 30 seconds, the learning mode will be automatically - Yamaha RX V1700 | MCXSP10 Manual - Page 116
operation mode selector to AMP or SOURCE and then press MACRO using a ballpoint pen or similar object. "MCR ?" appears in the display window on the remote control. AMP SOURCE TV or AMP SOURCE TV MACRO Note If you do not complete each of the following steps within 30 seconds, the macro programming - Yamaha RX V1700 | MCXSP10 Manual - Page 117
consult with your nearest authorized YAMAHA dealer or service center for the Zone 2 and Zone 3 connections that best meet your requirements. REMOTE IN REMOTE OUT IN REMOTE OUT IN REMOTE OUT Infrared signal receiver This unit YAMAHA component YAMAHA component ■ Using external amplifiers To - Yamaha RX V1700 | MCXSP10 Manual - Page 118
low impedance load resulting in amplifier damage. See this owner's manual for correct usage. Compliance with minimum speaker impedance information for all channels must be maintained at all times. This information is found on the back panel of your Receiver. If you want to use one internal amplifier - Yamaha RX V1700 | MCXSP10 Manual - Page 119
remote control POWER and STANDBY on the remote control work differently depending on the selected zone that appears in the display window on the remote control volume level of Zone 2 or Zone 3", "Adjusting the balance of the speaker level in Zone 2 or Zone 3" or "Adjusting the tonal quality of Zone - Yamaha RX V1700 | MCXSP10 Manual - Page 120
50. Note Check that "ZONE 2" or "ZONE 3" is displayed in the display window of the remote control before you adjust the tonal quality of the corresponding zone (see page 115). y Press MUTE on the remote control to mute the sound output to the selected zone. Note When you use the external amplifiers - Yamaha RX V1700 | MCXSP10 Manual - Page 121
OFF ON OFF MASTER INPUT AUDIO SELECT TONE CONTROL A/B/C/D/E CATEGORY STRAIGHT EFFECT YPAO PRESET/TUNING/CH PRESET/ TUNING EDIT SEARCH MODE to turn off this unit. Currently selected parameter Currently selected parameter setting SPEAKER IMP. 8 MIN MASTER 2 Press and hold STRAIGHT on the - Yamaha RX V1700 | MCXSP10 Manual - Page 122
must be 8 Ω or higher. Front The impedance of each speaker must be 4 Ω or higher. 6ΩMIN Center Surround Surround back The impedance of each speaker must be 6 Ω or higher. ■ User presets USER PRESET Use this feature to reset all the parameters of this unit to the initial factory settings - Yamaha RX V1700 | MCXSP10 Manual - Page 123
SURROUND BACK terminals cannot be used to connect surround back speakers in that the SURROUND BACK terminals are already used for the bi-AMP connection (see page 17). ■ Video reset VIDEO RESET 97). ADVANCED SETUP Setting remote control ID When using multiple YAMAHA receivers/amplifiers, you may be - Yamaha RX V1700 | MCXSP10 Manual - Page 124
SOURCE and then press TUNER or XM on the remote control to select the tuner or XM to change the remote control ID. AMP SOURCE TV TUNER or or AMP or "L;TUN" and "XM" alternately appear in the display window on the remote control. PRESET/CH LEARN A-E/CAT. ENTER Notes • Be sure to press and - Yamaha RX V1700 | MCXSP10 Manual - Page 125
. In this case, start over from step 1. PRESET/CH A-E/CAT. ENTER 6 Press LEARN again to exit from the setup mode. LEARN XM library code (remote control setting) Function 2604 To operate this unit using the (initial setting) default code. 2605 To operate this unit using an alternative code - Yamaha RX V1700 | MCXSP10 Manual - Page 126
TROUBLESHOOTING Refer to the table below when this unit does not function properly. If the problem you are experiencing is not listed below or if the instruction below does not help, turn off this unit, disconnect the power cable, and contact the nearest authorized YAMAHA dealer or service - Yamaha RX V1700 | MCXSP10 Manual - Page 127
+/- on the remote control to resume audio output. Incorrect cable connections. Connect the cables properly. If the problem persists, the CINEMA DSP program, the source signal is directed to the center channel, and the front and surround speakers output effect sounds. "CENTER SP" in "SET MENU" is - Yamaha RX V1700 | MCXSP10 Manual - Page 128
TROUBLESHOOTING Problem Cause Remedy No sound is heard from the surround back speakers. "SUR. L/R Make an appropriate setting following the operating instructions for your component. Set Audio input of this unit is turned off. Turn on the power of the component. The sound effect cannot be recorded. - Yamaha RX V1700 | MCXSP10 Manual - Page 129
TROUBLESHOOTING Problem Cause Remedy This unit does not operate properly. The internal microcomputer has been frozen by an external electric shock (such as lightning or excessive static electricity) or by a power supply with low voltage. Disconnect the power . Use the manual tuning method. - Yamaha RX V1700 | MCXSP10 Manual - Page 130
to the XM jack of this unit or do not work properly. Check XM Passport and XM Passport Home Dock connections and orient for the best reception level. The XM user encryption code is being updated. Wait until the encryption code is updated. The signal is too weak. Adjust the orientation of the - Yamaha RX V1700 | MCXSP10 Manual - Page 131
■ Remote control TROUBLESHOOTING Problem The remote control does not work or function properly. The remote control does not learn new functions. Cause Remedy See page Wrong distance or angle. The remote control will function within a maximum range of 6 m (20 ft) and no more than 30 degrees - Yamaha RX V1700 | MCXSP10 Manual - Page 132
problem with the signal path from your iPod to this unit. Turn off this unit and reconnect the YAMAHA iPod universal dock to the DOCK terminal of this unit. Try resetting your iPod. Unknown type iPod connected Disconnected Unable to play The iPod being used is not supported ! Unplug HP! Cause - Yamaha RX V1700 | MCXSP10 Manual - Page 133
During AUTO SETUP TROUBLESHOOTING Error message Cause Remedy E-1:NO FRONT SP E-2:NO SURR.SP E-3:NO PRNS. SP E-4:SBR->SBL E-5:NOISY E-6:CHECK SUR. E-7:NO MIC E-8:NO SIGNAL E-9:USER CANCEL E-10:INTERNAL ERROR Front L/R channel signals are not detected. A surround channel signal is not detected. - Yamaha RX V1700 | MCXSP10 Manual - Page 134
INPUT (U.S.A. model) AUDIO SELECT TONE CONTROL A/B/C/D/E CATEGORY STRAIGHT EFFECT YPAO PRESET/TUNING/CH PRESET/ TUNING EDIT USER PRESET CANCEL 4 Press STRAIGHT on the front panel repeatedly to select "RESET". STRAIGHT EFFECT STRAIGHT EFFECT While holding down MASTER USER PRESET RESET - Yamaha RX V1700 | MCXSP10 Manual - Page 135
Digital provides 5 full-range audio channels. With an additional channel especially for bass effects, called LFE (Low Frequency Effect), the system has a total of 5.1-channels (LFE is counted as 0.1 channel). By using 2-channel stereo for the surround speakers, more accurate moving sound effects - Yamaha RX V1700 | MCXSP10 Manual - Page 136
by adding the surround back channel to the existing 5.1-channel format. ■ HDMI HDMI (High-Definition Multimedia Interface) is the first industry-supported, uncompressed, all-digital audio/video interface. Providing an interface between any source (such as a set-top box or AV receiver) and an audio - Yamaha RX V1700 | MCXSP10 Manual - Page 137
■ Sampling frequency and number of quantized bits When digitizing an analog audio signal, the number of times the signal is sampled per second is called the sampling frequency, while the degree of fineness when converting the sound level into a numeric value is called the number of quantized bits. - Yamaha RX V1700 | MCXSP10 Manual - Page 138
is exactly what YAMAHA has done with the digital sound field processor. ■ CINEMA DSP Since the Dolby Surround and DTS systems were originally designed for use in movie theaters, their effect is best felt in a theater having many speakers designed for acoustic effects. Since home conditions, such as - Yamaha RX V1700 | MCXSP10 Manual - Page 139
PARAMETRIC EQUALIZER INFORMATION This unit employs YAMAHA Parametric Room Acoustic Optimizer (YPAO) technology, together with the this unit's parametric equalizer. This unit has 7 equalizer bands for each channel. The use of multiple equalizer bands enables more precise adjustments of frequency - Yamaha RX V1700 | MCXSP10 Manual - Page 140
SPECIFICATIONS SPECIFICATIONS AUDIO SECTION • Minimum RMS Output Power for Front, Center, Surround, Surround back 20 Hz to 20 kHz, 0.04% THD, 8 130 W • Dynamic Power (IHF) 8/6/4/2 160/195/255/335 W • Maximum Useful Output Power Channel Control (Front L/R) BASS Boost/Cut 6 dB/50 Hz BASS - Yamaha RX V1700 | MCXSP10 Manual - Page 141
33 W or less [Other models 0.1 W or less • Maximum Power Consumption [General model only] 6ch, 10% THD 1100 W • AC Specifications are subject to change without notice. We Want You Listening For A Lifetime YAMAHA and the Electronic Industries Association's Consumer Electronics Group want you to get - Yamaha RX V1700 | MCXSP10 Manual - Page 142
IN EACH SOUND FIELD PROGRAM L Front left speaker C Center speaker R Front right speaker SL Surround left speaker SR Surround right speaker SBL Surround back left speaker SBR Surround back right speaker PL Presence left speaker PR Presence right speaker Speaker from which sound is being output - Yamaha RX V1700 | MCXSP10 Manual - Page 143
Program MOVIE STANDARD (PLII Movie) (PLIIx Movie) (Neo:6 Cinema) 2-channel audio 2-channel audio (monaural) (stereo) Input source 5.1/6.1-channel audio *1 5.1/6.1-channel audio *2 5.1/6.1-channel audio *3 PL PR C L R PL PR C L R PL PR C L R PL PR C L R PL PR C L R SL - Yamaha RX V1700 | MCXSP10 Manual - Page 144
Program 2-channel audio (monaural) SURROUND DECODE PRO LOGIC PL PR C L R 2-channel audio (stereo) PL PR C L R Input source 5.1/6.1-channel audio *1 PL PR C L R 5.1/6.1-channel audio *2 PL PR C L R 5.1/6.1-channel audio *3 PL PR C L R SL SR SBL SBR SL SR SBL SBR - Yamaha RX V1700 | MCXSP10 Manual - Page 145
Program 2-channel audio (monaural) SURROUND DECODE Neo:6 Cinema PL PR Neo:6 Music C L R 2-channel audio (stereo) PL PR C L R Input source 5.1/6.1-channel audio *1 PL PR C L R 5.1/6.1-channel audio *2 PL PR C L R 5.1/6.1-channel audio *3 PL PR C L R SL SR SBL SBR - Yamaha RX V1700 | MCXSP10 Manual - Page 146
LIST OF REMOTE CONTROL CODES 0184 DENON 0900 DYNAMIC BASS 0206 EMERSON 0332 FISHER 0206 GENEXXA 0059, 0332 GOODMANS 0332 GRUNDIG 0184 HARMAN/KARDON 0228 TELEFUNKEN 0086 YAMAHA 2200 MD RECORDER KENWOOD ONKYO SHARP SONY YAMAHA 0708 0895 0888 0517 2500, 2501, 2502 RECEIVER (TUNER) - Yamaha RX V1700 | MCXSP10 Manual - Page 147
1280 SAMSUNG 1044, 1136, 1303, 1319 SAT CONTROL 1327 SATSTATION 1110 SCHWAIGER 1138 SEEMANN 0423 SIEMENS TAPE DECK AIWA 0056 CARVER 0056 GRUNDIG 0056 HARMAN/KARDON 0056 MAGNAVOX 0056 SANSUI 0056 SONY 0270 THORENS 0056 WARDS 0054 YAMAHA 2700,2701 TV AGB 0543 AOC 0036, 0057 - Yamaha RX V1700 | MCXSP10 Manual - Page 148
, 0205, 0404 GOODMANS 0064, 0398, 0401, 0661 GOREMJE 0397 GRADIENTE 0080, 0197 GRAETZ 0190, 0388 GRANADA 0064, 0235, 0366, 0543 GRANDIN 0637 GRUNDIG 0064, 0222, 0514, 0583, 0614 GRUNPY 0207 HCM 0036, 0439 HALLMARK 0205 HANKOOK 0057, 0205, 0207 HANSEATIC 0064, 0347, 0388, 0455, 0583 - Yamaha RX V1700 | MCXSP10 Manual - Page 149
WATSON 0064, 0347 WAYCON 0183 WHITE WESTINGHOUSE 0064, 0347, 0490, 0650 YAMAHA 0057, 0172, 0677, 0796, 0860, 2900 (projector), 2901 (projector GRAETZ 0068, 0131, 0267 GRANADA 0108, 0131 GRANDIN 0027, 0064, 0099 GRUNDIG 0099, 0108, 0253, 0374 HCM 0099 HI-Q 0074 HANSEATIC 0064 HARLEY - Yamaha RX V1700 | MCXSP10 Manual - Page 150
0072 VIDEOMAGIC 0064 VIDEOSONIC 0267 VILLAIN 0027 WARDS 0027, 0062, 0069, 0074, 0075, 0087, 0099, 0108, 0267 WHITE WESTINGHOUSE 0099 XR-1000 0027, 0062, 0099 YAMAHA 0068 YAMISHI 0099 YOKAN 0099 YOKO 0267 ZENITH 0027, 0060, 0066, 1506 APPENDIX-ix - Yamaha RX V1700 | MCXSP10 Manual - Page 151
- Yamaha RX V1700 | MCXSP10 Manual - Page 152
ELECTRONIQUE FRANCE S.A. RUE AMBROISE CROIZAT BP70 CROISSY-BEAUBOURG 77312 MARNE-LA-VALLEE CEDEX02, FRANCE YAMAHA ELECTRONICS (UK) LTD. YAMAHA HOUSE, 200 RICKMANSWORTH ROAD WATFORD, HERTS WD18 7GQ, ENGLAND YAMAHA SCANDINAVIA A.B. J A WETTERGRENS GATA 1, BOX 30053, 400 43 VÄSTRA FRÖLUNDA, SWEDEN
-
 1
1 -
 2
2 -
 3
3 -
 4
4 -
 5
5 -
 6
6 -
 7
7 -
8
-
9
-
10
-
11
-
12
-
13
-
14
-
15
-
16
-
17
-
18
-
19
-
20
-
21
-
22
-
23
-
24
-
25
-
26
-
27
-
28
-
29
-
30
-
31
-
32
-
33
-
34
-
35
-
36
-
37
-
38
-
39
-
40
-
41
-
42
-
43
-
44
-
45
-
46
-
47
-
48
-
49
-
50
-
51
-
52
-
53
-
54
-
55
-
56
-
57
-
58
-
59
-
60
-
61
-
62
-
63
-
64
-
65
-
66
-
67
-
68
-
69
-
70
-
71
-
72
-
73
-
74
-
75
-
76
-
77
-
78
-
79
-
80
-
81
-
82
-
83
-
84
-
85
-
86
-
87
-
88
-
89
-
90
-
91
-
92
-
93
-
94
-
95
-
96
-
97
-
98
-
99
-
100
-
101
-
102
-
103
-
104
-
105
-
106
-
107
-
108
-
109
-
110
-
111
-
112
-
113
-
114
-
115
-
116
-
117
-
118
-
119
-
120
-
121
-
122
-
123
-
124
-
125
-
126
-
127
-
128
-
129
-
130
-
131
-
132
-
133
-
134
-
135
-
136
-
137
-
138
-
139
-
140
-
141
-
142
-
143
-
144
-
145
-
146
-
147
-
148
-
149
-
150
-
151
-
152
 |
 |

RX-V1700
AV Receiver
OWNER’S MANUAL
U