Yamaha RX V1700 MCXSP10 Manual - Page 9
Opening and closing the front panel, VIDEO AUX jacks - side console
 |
UPC - 027108926186
View all Yamaha RX V1700 manuals
Add to My Manuals
Save this manual to your list of manuals |
Page 9 highlights
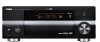
INTRODUCTION 7 MULTI ZONE buttons ZONE 2 ON/OFF Turns on Zone 2 only or sets it to the standby mode. See page 114 for details. ZONE 3 ON/OFF Turns on Zone 3 only or sets it to the standby mode. See page 114 for details. Note These buttons are operational only when MASTER ON/OFF is pressed inward to the ON position. ZONE CONTROLS Switches the zone you want to control between the main zone, Zone 2 and Zone 3. See page 114 for details. y After you press ZONE CONTROLS, the indicator for the currently selected zone flashes in the front panel display for approximately 5 seconds. While the indicator is flashing, perform the desired operation. 8 Front panel display Shows information about the operational status of this unit (see page 10). 9 ENHANCER Turns on or off the Compressed Music Enhancer mode (see page 52). 0 Remote control sensor Receives signals from the remote control (see page 9). A NIGHT Turns on or off the night listening modes (see page 53). B PURE DIRECT Turns on or off the Pure Direct mode (see page 50). CONTROLS AND FUNCTIONS C PROGRAM selector • Selects sound field programs (see page 44). • Adjusts the bass/treble balance in conjunction with TONE CONTROL (see page 50). D OPTIMIZER MIC jack Use to connect and input audio signals from the supplied optimizer microphone in the "AUTO SETUP" procedure (see page 32). E PHONES jack Outputs audio signals for private listening with headphones (see page 41). F VIDEO AUX jacks Input audio and video signals from a portable external source such as a game console or a video camera (see page 27). y To reproduce the source signals input at these jacks, select "V-AUX" as the input source. Note The audio signals input at the DOCK terminal on the rear panel take priority over the ones input at the VIDEO AUX jacks. G VOLUME Controls the output level of all audio channels. y This does not affect the AUDIO OUT (REC) level. ■ Opening and closing the front panel door When you want to use the controls behind the front panel door, open the door by gently pressing on the lower part of the panel. Keep the door closed when not using these controls. To open, press gently on the lower part of the panel. 5 En
-
 1
1 -
2
-
3
-
 4
4 -
 5
5 -
 6
6 -
 7
7 -
 8
8 -
 9
9 -
 10
10 -
 11
11 -
 12
12 -
 13
13 -
 14
14 -
15
-
16
-
17
-
18
-
19
-
20
-
21
-
22
-
23
-
24
-
25
-
26
-
27
-
28
-
29
-
30
-
31
-
32
-
33
-
34
-
35
-
36
-
37
-
38
-
39
-
40
-
41
-
42
-
43
-
44
-
45
-
46
-
47
-
48
-
49
-
50
-
51
-
52
-
53
-
54
-
55
-
56
-
57
-
58
-
59
-
60
-
61
-
62
-
63
-
64
-
65
-
66
-
67
-
68
-
69
-
70
-
71
-
72
-
73
-
74
-
75
-
76
-
77
-
78
-
79
-
80
-
81
-
82
-
83
-
84
-
85
-
86
-
87
-
88
-
89
-
90
-
91
-
92
-
93
-
94
-
95
-
96
-
97
-
98
-
99
-
100
-
101
-
102
-
103
-
104
-
105
-
106
-
107
-
108
-
109
-
110
-
111
-
112
-
113
-
114
-
115
-
116
-
117
-
118
-
119
-
120
-
121
-
122
-
123
-
124
-
125
-
126
-
127
-
128
-
129
-
130
-
131
-
132
-
133
-
134
-
135
-
136
-
137
-
138
-
139
-
140
-
141
-
142
-
143
-
144
-
145
-
146
-
147
-
148
-
149
-
150
-
151
-
152
 |
 |
