3Com 3C10200 NBX Installation Guide - Page 100
Powering Your NBX System, V3001R System Status LEDs - S1 and S2,
 |
View all 3Com 3C10200 manuals
Add to My Manuals
Save this manual to your list of manuals |
Page 100 highlights
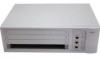
100 CHAPTER 2: INSTALLING SYSTEM HARDWARE COMPONENTS Figure 29 V3001R with One Disk and Face Panel Removed 2 1 6 Slide the new disk into the empty disk drive bay until you feel it contact the rear connector. Press firmly until you feel the disk drive seat into the connector. Attach the disk drive locking bracket. 7 Turn on power to both power supplies, and then install the front cover. Disk synchronization begins automatically and finishes in approximately 20 hours. The system is operational during the disk synchronization. If you reboot the system during the synchronization, the system continues the operation after the reboot. The status lights on the front of the V3001R indicate disk status. For detailed information, see "V3001R System Status LEDs - S1 and S2" on page 29. Powering Your NBX To turn on power to the NBX system and the optional NBX chassis, follow System these steps: 1 Attach a power cord to each unit. For an NBX 100, a V5000, or a chassis, attaching the power cord applies power to the unit. For a V3000, you must also press the power button on the back of the unit to the ON position. For a V3001R, the power buttons on the two power supplies are located on the front of the unit, behind the face panel. 2 Allow approximately 3 minutes for the system to complete the boot process. Examine the status lights (LEDs) on the front panel to ensure that the system is running properly. For status light descriptions, see: ■ V3000 Analog - Figure 1 on page 22. ■ V3000 BRI - Figure 2 on page 24. ■ V3001R - Figure 3 on page 26.
-
 1
1 -
2
-
3
-
4
-
5
-
6
-
7
-
8
-
9
-
10
-
11
-
12
-
13
-
14
-
15
-
16
-
17
-
18
-
19
-
20
-
21
-
22
-
23
-
24
-
25
-
26
-
27
-
28
-
29
-
30
-
31
-
32
-
33
-
34
-
35
-
36
-
37
-
38
-
39
-
40
-
41
-
42
-
43
-
44
-
45
-
46
-
47
-
48
-
49
-
50
-
51
-
52
-
53
-
54
-
55
-
56
-
57
-
58
-
59
-
60
-
61
-
62
-
63
-
64
-
65
-
66
-
67
-
68
-
69
-
70
-
71
-
72
-
73
-
74
-
75
-
76
-
77
-
78
-
79
-
80
-
81
-
82
-
83
-
84
-
85
-
86
-
87
-
88
-
89
-
90
-
91
-
92
-
93
-
94
-
 95
95 -
 96
96 -
 97
97 -
 98
98 -
 99
99 -
 100
100 -
 101
101 -
 102
102 -
 103
103 -
 104
104 -
 105
105 -
106
-
107
-
108
-
109
-
110
-
111
-
112
-
113
-
114
-
115
-
116
-
117
-
118
-
119
-
120
-
121
-
122
-
123
-
124
-
125
-
126
-
127
-
128
-
129
-
130
-
131
-
132
-
133
-
134
-
135
-
136
-
137
-
138
-
139
-
140
-
141
-
142
-
143
-
144
-
145
-
146
-
147
-
148
-
149
-
150
-
151
-
152
-
153
-
154
-
155
-
156
-
157
-
158
-
159
-
160
-
161
-
162
-
163
-
164
-
165
-
166
-
167
-
168
-
169
-
170
-
171
-
172
-
173
-
174
-
175
-
176
-
177
-
178
-
179
-
180
-
181
-
182
-
183
-
184
-
185
-
186
-
187
-
188
-
189
-
190
-
191
-
192
-
193
-
194
-
195
-
196
-
197
-
198
-
199
-
200
-
201
-
202
-
203
-
204
-
205
-
206
-
207
-
208
-
209
-
210
-
211
-
212
-
213
-
214
-
215
-
216
-
217
-
218
-
219
-
220
-
221
-
222
-
223
-
224
-
225
-
226
-
227
-
228
-
229
-
230
-
231
-
232
-
233
-
234
-
235
-
236
-
237
-
238
-
239
-
240
-
241
-
242
-
243
-
244
-
245
-
246
-
247
-
248
 |
 |
