3Com 3C10200 NBX Installation Guide - Page 156
Verifying an E1 Digital Line Card, Using the NBX NetSet Utility, Using the Status Lights, Utility
 |
View all 3Com 3C10200 manuals
Add to My Manuals
Save this manual to your list of manuals |
Page 156 highlights
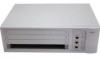
156 CHAPTER 7: E1 ISDN PRI DIGITAL LINE CARD Verifying an E1 Digital Line Card After the Auto Discover process is completed, you can verify that the E1 Digital Line Card has been properly discovered by using the NBX NetSet utility, described next, and by examining the status light on the Digital Line Card, described on page 156. Using the NBX NetSet To verify the that the E1 Digital Line Card has been properly discovered Utility you can use the NBX NetSet Utility. 1 Log in to the NBX NetSet utility using the administrator username and password. 2 Click PSTN Gateway Configuration > Digital Line Cards. 3 Verify that the E1 Digital Line Card appears in the T1/ISDN Board List. To help identify the board, use the E1 board MAC address that you wrote down. The Status column should contain Ready. 4 Click the MAC address of the card to view its Channel List. 5 Scroll through the channel list to verify that 30 channels appear. Use the MAC addresses of the channels to identify the ones associated with the E1 Digital Line Card. The MAC addresses of the channels follow in sequential order from the MAC address of the E1 Digital Line Card. Using the Status You can use the E1 Digital Line Card status lights to verify that the E1 card Lights was properly discovered. 3C10165C - After the Auto Discover process has completed, and before you connect the E1 Digital Line Card to the telephone company's E1 line, the CF (Carrier Fail) light should appear solid green. 3C10165D - After the Auto Discover process has completed, and before you connect the E1 Digital Line Card to the telephone company's E1 line, the POST (Power On Self Test) light and the NCP light should both be solid green. For a complete description of all the status lights on the front of the E1 card, see "E1 Digital Line Card" on page 39. You are now ready to configure the E1 Digital Line Card. See the NBX Administrator's Guide for instructions.
-
 1
1 -
2
-
3
-
4
-
5
-
6
-
7
-
8
-
9
-
10
-
11
-
12
-
13
-
14
-
15
-
16
-
17
-
18
-
19
-
20
-
21
-
22
-
23
-
24
-
25
-
26
-
27
-
28
-
29
-
30
-
31
-
32
-
33
-
34
-
35
-
36
-
37
-
38
-
39
-
40
-
41
-
42
-
43
-
44
-
45
-
46
-
47
-
48
-
49
-
50
-
51
-
52
-
53
-
54
-
55
-
56
-
57
-
58
-
59
-
60
-
61
-
62
-
63
-
64
-
65
-
66
-
67
-
68
-
69
-
70
-
71
-
72
-
73
-
74
-
75
-
76
-
77
-
78
-
79
-
80
-
81
-
82
-
83
-
84
-
85
-
86
-
87
-
88
-
89
-
90
-
91
-
92
-
93
-
94
-
95
-
96
-
97
-
98
-
99
-
100
-
101
-
102
-
103
-
104
-
105
-
106
-
107
-
108
-
109
-
110
-
111
-
112
-
113
-
114
-
115
-
116
-
117
-
118
-
119
-
120
-
121
-
122
-
123
-
124
-
125
-
126
-
127
-
128
-
129
-
130
-
131
-
132
-
133
-
134
-
135
-
136
-
137
-
138
-
139
-
140
-
141
-
142
-
143
-
144
-
145
-
146
-
147
-
148
-
149
-
150
-
 151
151 -
 152
152 -
 153
153 -
 154
154 -
 155
155 -
 156
156 -
 157
157 -
 158
158 -
 159
159 -
 160
160 -
 161
161 -
162
-
163
-
164
-
165
-
166
-
167
-
168
-
169
-
170
-
171
-
172
-
173
-
174
-
175
-
176
-
177
-
178
-
179
-
180
-
181
-
182
-
183
-
184
-
185
-
186
-
187
-
188
-
189
-
190
-
191
-
192
-
193
-
194
-
195
-
196
-
197
-
198
-
199
-
200
-
201
-
202
-
203
-
204
-
205
-
206
-
207
-
208
-
209
-
210
-
211
-
212
-
213
-
214
-
215
-
216
-
217
-
218
-
219
-
220
-
221
-
222
-
223
-
224
-
225
-
226
-
227
-
228
-
229
-
230
-
231
-
232
-
233
-
234
-
235
-
236
-
237
-
238
-
239
-
240
-
241
-
242
-
243
-
244
-
245
-
246
-
247
-
248
 |
 |
