3Com 3C10200 NBX Installation Guide - Page 145
Verifying Analog Terminal Card Ports, Using the NBX NetSet Utility, Adding an Analog Terminal
 |
View all 3Com 3C10200 manuals
Add to My Manuals
Save this manual to your list of manuals |
Page 145 highlights
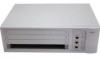
Verifying Analog Terminal Card Ports 145 4 Insert the card into the slot. Slide the card into the chassis until you feel it touch the connectors. To seat the card into the connectors, apply firm pressure to both the left and right sides of the front of the card. CAUTION: If you cannot seat the card with light pressure, remove it and check for obstructions. 5 Tighten the left and right screws on the front of the card to secure it to the chassis. Wait at least 2 minutes for the Analog Terminal Card to initialize and for the system to update its database. Verifying Analog Terminal Card Ports After you have used the Auto Discover feature to add an Analog Terminal Card, you can verify that the card is properly installed by using the NBX NetSet utility, described next, and by examining the status lights on the front of the card, which are described on page 46. Using the NBX NetSet To verify the proper installation of an Analog Terminal Card using the NBX Utility NetSet utility: 1 Log in to the NBX NetSet utility using the administrator username and password. 2 Click Telephone Configuration > ATA. 3 Compare the MAC addresses or port numbers that appear in the list to the MAC address and port numbers you recorded before you inserted this card. The four ports of an Analog Terminal Card appear in the list of ATAs, along with the ports of any previously discovered Analog Terminal Cards, and any Analog Terminal Adapters (ATAs) and the ATA port on an NBX V3000. Adding an Analog Terminal Adapter (ATA) To add an Analog Terminal Adapter (ATA) to your NBX system you must first enable the Auto Discover feature. You Auto Discover an Analog Terminal Adapter (ATA) in the same way that you discover 3Com telephones and Analog Terminal Cards. See "3Com Telephones" on page 52 for information on system software and licensing requirements for an ATA.
-
 1
1 -
2
-
3
-
4
-
5
-
6
-
7
-
8
-
9
-
10
-
11
-
12
-
13
-
14
-
15
-
16
-
17
-
18
-
19
-
20
-
21
-
22
-
23
-
24
-
25
-
26
-
27
-
28
-
29
-
30
-
31
-
32
-
33
-
34
-
35
-
36
-
37
-
38
-
39
-
40
-
41
-
42
-
43
-
44
-
45
-
46
-
47
-
48
-
49
-
50
-
51
-
52
-
53
-
54
-
55
-
56
-
57
-
58
-
59
-
60
-
61
-
62
-
63
-
64
-
65
-
66
-
67
-
68
-
69
-
70
-
71
-
72
-
73
-
74
-
75
-
76
-
77
-
78
-
79
-
80
-
81
-
82
-
83
-
84
-
85
-
86
-
87
-
88
-
89
-
90
-
91
-
92
-
93
-
94
-
95
-
96
-
97
-
98
-
99
-
100
-
101
-
102
-
103
-
104
-
105
-
106
-
107
-
108
-
109
-
110
-
111
-
112
-
113
-
114
-
115
-
116
-
117
-
118
-
119
-
120
-
121
-
122
-
123
-
124
-
125
-
126
-
127
-
128
-
129
-
130
-
131
-
132
-
133
-
134
-
135
-
136
-
137
-
138
-
139
-
 140
140 -
 141
141 -
 142
142 -
 143
143 -
 144
144 -
 145
145 -
 146
146 -
 147
147 -
 148
148 -
 149
149 -
 150
150 -
151
-
152
-
153
-
154
-
155
-
156
-
157
-
158
-
159
-
160
-
161
-
162
-
163
-
164
-
165
-
166
-
167
-
168
-
169
-
170
-
171
-
172
-
173
-
174
-
175
-
176
-
177
-
178
-
179
-
180
-
181
-
182
-
183
-
184
-
185
-
186
-
187
-
188
-
189
-
190
-
191
-
192
-
193
-
194
-
195
-
196
-
197
-
198
-
199
-
200
-
201
-
202
-
203
-
204
-
205
-
206
-
207
-
208
-
209
-
210
-
211
-
212
-
213
-
214
-
215
-
216
-
217
-
218
-
219
-
220
-
221
-
222
-
223
-
224
-
225
-
226
-
227
-
228
-
229
-
230
-
231
-
232
-
233
-
234
-
235
-
236
-
237
-
238
-
239
-
240
-
241
-
242
-
243
-
244
-
245
-
246
-
247
-
248
 |
 |
