3Com 3C10200 NBX Installation Guide - Page 137
Verifying Extension Assignments on an Attendant Console, Attendant Console Labels, Telephone
 |
View all 3Com 3C10200 manuals
Add to My Manuals
Save this manual to your list of manuals |
Page 137 highlights
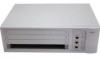
Adding a 3Com Attendant Console 137 To associate an Attendant Console with a specific telephone: 1 Login to the NBX NetSet utility as administrator and click Telephone Configuration > Attendant Console. 2 Click the extension number of an Attendant Console in the list to open the Modify page and then select a telephone from the list. Verifying Extension After you Auto Discover an Attendant Console, you can verify which Assignments on an telephone extensions have been mapped to the Attendant Console Attendant Console buttons. To verify the extension assignments: 1 Login to the NBX NetSet utility as administrator and click Telephone Configuration > Attendant Console. 2 Click the extension number of an Attendant Console in the list to open the Modify page. 3 Make sure the correct extension is selected and then and then click the Button Mapping tab. For more about button mappings on an Attendant Console, see Chapter 3, "Device Configuration," in the NBX Administrator's Guide. Attendant Console You can create and print Attendant Console labels using the NBX Labels LabelMaker utility. To download the LabelMaker utility: 1 Log into NBX NetSet as an administrator. 2 Click Downloads > LabelMaker. After you print the labels and then cut them out, remove the plastic cover from the Attendant Console and install the labels. On the 3Com 3105 Attendant Console, remove the cover by pulling up on the two tabs at the top of the Attendant Console until the top of the cover pops off.
-
 1
1 -
2
-
3
-
4
-
5
-
6
-
7
-
8
-
9
-
10
-
11
-
12
-
13
-
14
-
15
-
16
-
17
-
18
-
19
-
20
-
21
-
22
-
23
-
24
-
25
-
26
-
27
-
28
-
29
-
30
-
31
-
32
-
33
-
34
-
35
-
36
-
37
-
38
-
39
-
40
-
41
-
42
-
43
-
44
-
45
-
46
-
47
-
48
-
49
-
50
-
51
-
52
-
53
-
54
-
55
-
56
-
57
-
58
-
59
-
60
-
61
-
62
-
63
-
64
-
65
-
66
-
67
-
68
-
69
-
70
-
71
-
72
-
73
-
74
-
75
-
76
-
77
-
78
-
79
-
80
-
81
-
82
-
83
-
84
-
85
-
86
-
87
-
88
-
89
-
90
-
91
-
92
-
93
-
94
-
95
-
96
-
97
-
98
-
99
-
100
-
101
-
102
-
103
-
104
-
105
-
106
-
107
-
108
-
109
-
110
-
111
-
112
-
113
-
114
-
115
-
116
-
117
-
118
-
119
-
120
-
121
-
122
-
123
-
124
-
125
-
126
-
127
-
128
-
129
-
130
-
131
-
 132
132 -
 133
133 -
 134
134 -
 135
135 -
 136
136 -
 137
137 -
 138
138 -
 139
139 -
 140
140 -
 141
141 -
 142
142 -
143
-
144
-
145
-
146
-
147
-
148
-
149
-
150
-
151
-
152
-
153
-
154
-
155
-
156
-
157
-
158
-
159
-
160
-
161
-
162
-
163
-
164
-
165
-
166
-
167
-
168
-
169
-
170
-
171
-
172
-
173
-
174
-
175
-
176
-
177
-
178
-
179
-
180
-
181
-
182
-
183
-
184
-
185
-
186
-
187
-
188
-
189
-
190
-
191
-
192
-
193
-
194
-
195
-
196
-
197
-
198
-
199
-
200
-
201
-
202
-
203
-
204
-
205
-
206
-
207
-
208
-
209
-
210
-
211
-
212
-
213
-
214
-
215
-
216
-
217
-
218
-
219
-
220
-
221
-
222
-
223
-
224
-
225
-
226
-
227
-
228
-
229
-
230
-
231
-
232
-
233
-
234
-
235
-
236
-
237
-
238
-
239
-
240
-
241
-
242
-
243
-
244
-
245
-
246
-
247
-
248
 |
 |
