3Com 3C780 User Guide - Page 53
Avoid contact with any of the module's components.
 |
UPC - 662705029917
View all 3Com 3C780 manuals
Add to My Manuals
Save this manual to your list of manuals |
Page 53 highlights
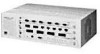
Installing the Hub 2-13 To install the management module and the media modules for the first time, follow these steps: 1. Remove all jewelry from your hands and wrists. 2. If you are installing modules in slots 2 or 3, remove the blanking plates from those slots. Keep the removed blanking plates in a safe place for possible future use. CAUTION: Each module is packed in an antistatic bag to protect it during shipment. To avoid damaging any highly static-sensitive components on the module or the hub, be sure to reduce any static electricity on your person. One way to do this is to touch the metal part of the hub. You can maintain grounding by wearing a wrist strap attached to the hub. 3. Remove the module from its antistatic bag. Prepare a clean, level work area nearby on which to place the module. Avoid contact with any of the module's components. 4. Insert the module slowly into its slot. The printing on the module's front panel indicates its correct horizontal orientation. 5. Gently align and push the module's bus connector into its slot in the backplane of the hub. 6. When the module is completely seated, tighten the captive thumb screws on each end of the module. 7. To turn on the hub, plug one end of the ac power cord into the back of the hub and the other end into an electrical outlet. The PWR LED turns green, indicating the hub is on and ready for configuration.
-
 1
1 -
2
-
3
-
4
-
5
-
6
-
7
-
8
-
9
-
10
-
11
-
12
-
13
-
14
-
15
-
16
-
17
-
18
-
19
-
20
-
21
-
22
-
23
-
24
-
25
-
26
-
27
-
28
-
29
-
30
-
31
-
32
-
33
-
34
-
35
-
36
-
37
-
38
-
39
-
40
-
41
-
42
-
43
-
44
-
45
-
46
-
47
-
 48
48 -
 49
49 -
 50
50 -
 51
51 -
 52
52 -
 53
53 -
 54
54 -
 55
55 -
 56
56 -
 57
57 -
 58
58 -
59
-
60
-
61
-
62
-
63
-
64
-
65
-
66
-
67
-
68
-
69
-
70
-
71
-
72
-
73
-
74
-
75
-
76
-
77
-
78
-
79
-
80
-
81
-
82
-
83
-
84
-
85
-
86
-
87
-
88
-
89
-
90
-
91
-
92
-
93
-
94
-
95
-
96
-
97
-
98
-
99
-
100
-
101
-
102
-
103
-
104
-
105
-
106
-
107
-
108
-
109
-
110
-
111
-
112
-
113
-
114
-
115
-
116
-
117
-
118
-
119
-
120
-
121
-
122
-
123
-
124
-
125
-
126
-
127
-
128
-
129
-
130
-
131
-
132
-
133
-
134
-
135
-
136
-
137
-
138
-
139
-
140
-
141
-
142
-
143
-
144
-
145
-
146
-
147
-
148
-
149
-
150
-
151
-
152
-
153
-
154
-
155
-
156
-
157
-
158
-
159
-
160
-
161
-
162
-
163
-
164
-
165
-
166
-
167
-
168
-
169
-
170
-
171
-
172
-
173
-
174
-
175
-
176
 |
 |
