3Com 3CBLSF50 User Guide - Page 32
Running the 3Com Switch Detect Application, Once installed - setup
 |
UPC - 662705529103
View all 3Com 3CBLSF50 manuals
Add to My Manuals
Save this manual to your list of manuals |
Page 32 highlights
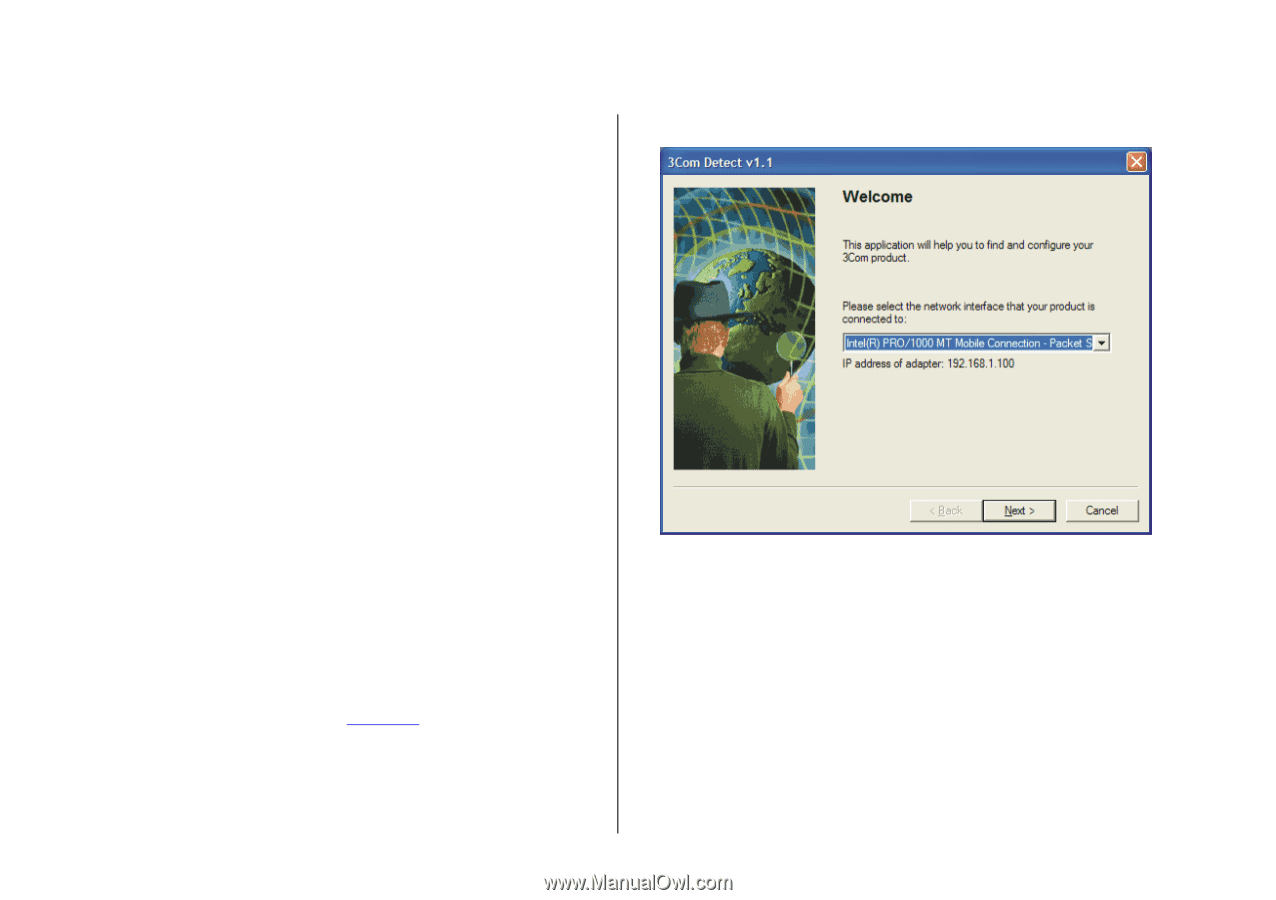
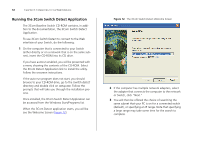
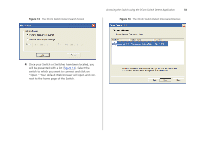
32 CHAPTER 3: CONNECTING TO THE WEB INTERFACE Running the 3Com Switch Detect Application The 3Com Baseline Switch CD-ROM contains, in addition to the documentation, the 3Com Switch Detect Application. To use 3Com Switch Detect to connect to the Web interface of your Switch, do the following: 1 On the computer that is connected to your Switch (either directly or on a network that is on the same subnet), insert the CD-ROM into its CD drive. If you have autorun enabled, you will be presented with a menu showing the contents of the CD-ROM. Select the 3Com Detect Application link to install the utility. Follow the onscreen instructions. If the auto-run program does not start, you should browse to your CD-ROM drive, go to the /switch detect directory and double click on setup.exe. Follow the prompts that will take you through the installation process. Once installed, the 3Com Switch Detect Application can be accessed from the Windows Start/Programs list. When the 3Com Detect application starts, you will be see the Welcome Screen (Figure 12). Figure 12 The 3Com Switch Detect Welcome Screen 2 If the computer has multiple network adapters, select the adapter that connects the computer to the network or Switch, click "Next." 3 You will then be offered the choice of searching the same subnet that your PC is on for a connected switch (default), or specifying an IP range. Note that specifying a large range may take some time for the search to complete.
-
 1
1 -
2
-
3
-
4
-
5
-
6
-
7
-
8
-
9
-
10
-
11
-
12
-
13
-
14
-
15
-
16
-
17
-
18
-
19
-
20
-
21
-
22
-
23
-
24
-
25
-
26
-
 27
27 -
 28
28 -
 29
29 -
 30
30 -
 31
31 -
 32
32 -
 33
33 -
 34
34 -
 35
35 -
 36
36 -
 37
37 -
38
-
39
-
40
-
41
-
42
-
43
-
44
-
45
-
46
-
47
-
48
-
49
-
50
-
51
-
52
-
53
-
54
-
55
-
56
-
57
-
58
-
59
-
60
-
61
-
62
-
63
-
64
-
65
-
66
-
67
-
68
-
69
-
70
-
71
-
72
-
73
-
74
-
75
-
76
-
77
-
78
-
79
-
80
-
81
-
82
-
83
-
84
-
85
-
86
-
87
-
88
-
89
-
90
-
91
-
92
-
93
-
94
-
95
-
96
-
97
-
98
-
99
-
100
-
101
-
102
-
103
-
104
-
105
-
106
-
107
-
108
 |
 |