Asus RAMPAGE V EXTREME User Guide - Page 90
setup, program
 |
View all Asus RAMPAGE V EXTREME manuals
Add to My Manuals
Save this manual to your list of manuals |
Page 90 highlights
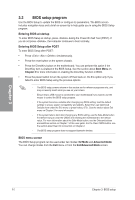
3.2 BIOS setup program Use the BIOS Setup to update the BIOS or configure its parameters. The BIOS screen includes navigation keys and a brief on-screen tip to help guide you in using the BIOS Setup program. Entering BIOS at startup To enter BIOS Setup at startup, press during the Power-On Self Test (POST). If you do not press , the computer continues to boot normally. Entering BIOS Setup after POST To enter BIOS Setup after POST: • Press ++ simultaneously. • Press the reset button on the system chassis. • Press the DirectKey button on the motherboard. You can perform this option if the DirectKey item is enabled in the BIOS Setup. See the section about Boot Menu on Chapter 3 for more information in enabling the DirectKey function in BIOS. • Press the power button to turn the system off then back on. Do this option only if you failed to enter BIOS Setup using the previous options. The BIOS setup screens shown in this section are for reference purposes only, and Ci1 may not exactly match what you see on your screen. Ensure that a USB mouse is connected to your motherboard if you want to use the mouse to control the BIOS setup program. - If the system becomes unstable after changing any BIOS setting, load the default settings to ensure system compatibility and stability. Select the Load Optimized Defaults item under the Exit menu or press hotkey . See the section about Exit menu on Chapter 3 for more information. If the system fails to boot after changing any BIOS setting, use the Safe-Mode button first before trying to clear the CMOS and resetting the motherboard to the default value. For more information about the Safe-Mode button, see the Onboard buttons and switches section on Chapter 1 of this user guide. For the Clear CMOS button. see the section about Rear I/O Connection on Chapter 2. The BIOS setup program does not support bluetooth devices. BIOS menu screen The BIOS Setup program can be used under two modes: EZ Mode and Advanced Mode. You can change modes from the Exit menu or from the Exit/Advanced Mode screen. 3-2 Chapter 3: BIOS setup
-
 1
1 -
2
-
3
-
4
-
5
-
6
-
7
-
8
-
9
-
10
-
11
-
12
-
13
-
14
-
15
-
16
-
17
-
18
-
19
-
20
-
21
-
22
-
23
-
24
-
25
-
26
-
27
-
28
-
29
-
30
-
31
-
32
-
33
-
34
-
35
-
36
-
37
-
38
-
39
-
40
-
41
-
42
-
43
-
44
-
45
-
46
-
47
-
48
-
49
-
50
-
51
-
52
-
53
-
54
-
55
-
56
-
57
-
58
-
59
-
60
-
61
-
62
-
63
-
64
-
65
-
66
-
67
-
68
-
69
-
70
-
71
-
72
-
73
-
74
-
75
-
76
-
77
-
78
-
79
-
80
-
81
-
82
-
83
-
84
-
 85
85 -
 86
86 -
 87
87 -
 88
88 -
 89
89 -
 90
90 -
 91
91 -
 92
92 -
 93
93 -
 94
94 -
 95
95 -
96
-
97
-
98
-
99
-
100
-
101
-
102
-
103
-
104
-
105
-
106
-
107
-
108
-
109
-
110
-
111
-
112
-
113
-
114
-
115
-
116
-
117
-
118
-
119
-
120
-
121
-
122
-
123
-
124
-
125
-
126
-
127
-
128
-
129
-
130
-
131
-
132
-
133
-
134
-
135
-
136
-
137
-
138
-
139
-
140
-
141
-
142
-
143
-
144
-
145
-
146
-
147
-
148
-
149
-
150
-
151
-
152
-
153
-
154
-
155
-
156
-
157
-
158
-
159
-
160
-
161
-
162
-
163
-
164
-
165
-
166
-
167
-
168
-
169
-
170
-
171
-
172
-
173
-
174
-
175
-
176
-
177
-
178
-
179
-
180
-
181
-
182
-
183
-
184
-
185
-
186
-
187
-
188
-
189
-
190
-
191
-
192
-
193
-
194
-
195
-
196
-
197
-
198
-
199
-
200
-
201
-
202
-
203
-
204
-
205
-
206
-
207
-
208
-
209
-
210
-
211
-
212
-
213
-
214
-
215
-
216
-
217
-
218
-
219
-
220
-
221
-
222
-
223
-
224
-
225
-
226
-
227
-
228
-
229
-
230
 |
 |
