Asus S82A S86A S82/S86 User Manual (English version) - Page 26
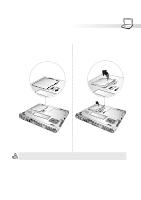
Powering ON The Notebook PC
 |
View all Asus S82A S86A manuals
Add to My Manuals
Save this manual to your list of manuals |
Page 26 highlights
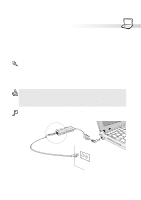
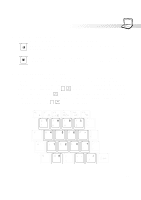
3. Getting Started Powering ON The Notebook PC The Notebook PC's power-ON message appears on the screen followed by a short beep when you turn it ON. If necessary, you may adjust the brightness by using the hot keys. If you need to run the BIOS Setup to set or modify the system configuration, press [F2] upon bootup to enter the BIOS Setup. If you press the [Esc] button during the splash screen, standard boot information such as the BIOS version can be seen. You will also be presented with a boot menu that allows you to select bootup from "Removable Devices", "Hard Drive", "ATAPI CD-ROM Drive", or enter BIOS setup. Use the up and down cursors to make your selection and press [Enter] to execute. WARNING! Never turn OFF or reset your Notebook PC while the hard disk or floppy disk is in use and the activity LED is lit; doing so can result in loss or destruction of your data. To protect the hard disk drive, always wait at least 5 seconds after turning OFF your Notebook PC before turning it back ON. NOTE: Before bootup, the display panel flashes when the power is turned ON. This is part of the Notebook PC's test routine and is not a problem with the display. The Power-On Self Test (POST) When you turn ON the Notebook PC, it will first run through a series of software-controlled diagnostic tests called the Power-On Self Test (POST). The software that controls the POST is installed as a permanent part of the Notebook PC's architecture. The POST includes a record of the Notebook PC's hardware configuration, which is used to make a diagnostic check of the system. This record is created by using the BIOS Setup program. If the POST discovers a difference between the record and the existing hardware, it will display a message on the screen prompting you to correct the conflict by running BIOS Setup. In most cases the record should be correct when you receive the Notebook PC. When the test is finished, you may get a message reporting "No operating system found" if the hard disk was not pre-loaded with an operating system. This indicates that the hard disk is correctly detected and ready for the installation of a new operating system. The S.M.A.R.T. (Self Monitoring and Reporting Technology) checks the hard disk drive during POST and gives a warning message if the hard disk drive requires servicing. If any critical hard disk drive warning is given during bootup, backup your data immediately and run Windows disk checking program. To run Window's disk checking program: (1) right-click any hard disk drive icon in "My Computer", (2) choose Properties, (3) click the Tools tab, (4) click Check Now, (5) select a hard disk drive, (6) select Thorough to also check for physical damages, and (7) click Start. Third party disk utilities such as Symantec's Norton Disk Doctor can also perform the same functions but with greater ease and more features. WARNING! If warnings are still given during bootup after running a software disk checking utility, you should take your Notebook PC in for servicing. Continued use may result in data loss. 26
-
 1
1 -
2
-
3
-
4
-
5
-
6
-
7
-
8
-
9
-
10
-
11
-
12
-
13
-
14
-
15
-
16
-
17
-
18
-
19
-
20
-
 21
21 -
 22
22 -
 23
23 -
 24
24 -
 25
25 -
 26
26 -
 27
27 -
 28
28 -
 29
29 -
 30
30 -
 31
31 -
32
-
33
-
34
-
35
-
36
-
37
-
38
-
39
-
40
-
41
-
42
-
43
-
44
-
45
-
46
-
47
-
48
-
49
-
50
-
51
-
52
-
53
-
54
-
55
-
56
-
57
-
58
-
59
-
60
-
61
-
62
-
63
-
64
-
65
-
66
-
67
-
68
-
69
-
70
-
71
-
72
-
73
-
74
-
75
-
76
-
77
-
78
-
79
-
80
-
81
-
82
-
83
-
84
-
85
-
86
-
87
-
88
-
89
-
90
-
91
-
92
 |
 |