Behringer DEEPMIND 12D Manual - Page 146
Rack Mount Bracket Installation
 |
View all Behringer DEEPMIND 12D manuals
Add to My Manuals
Save this manual to your list of manuals |
Page 146 highlights
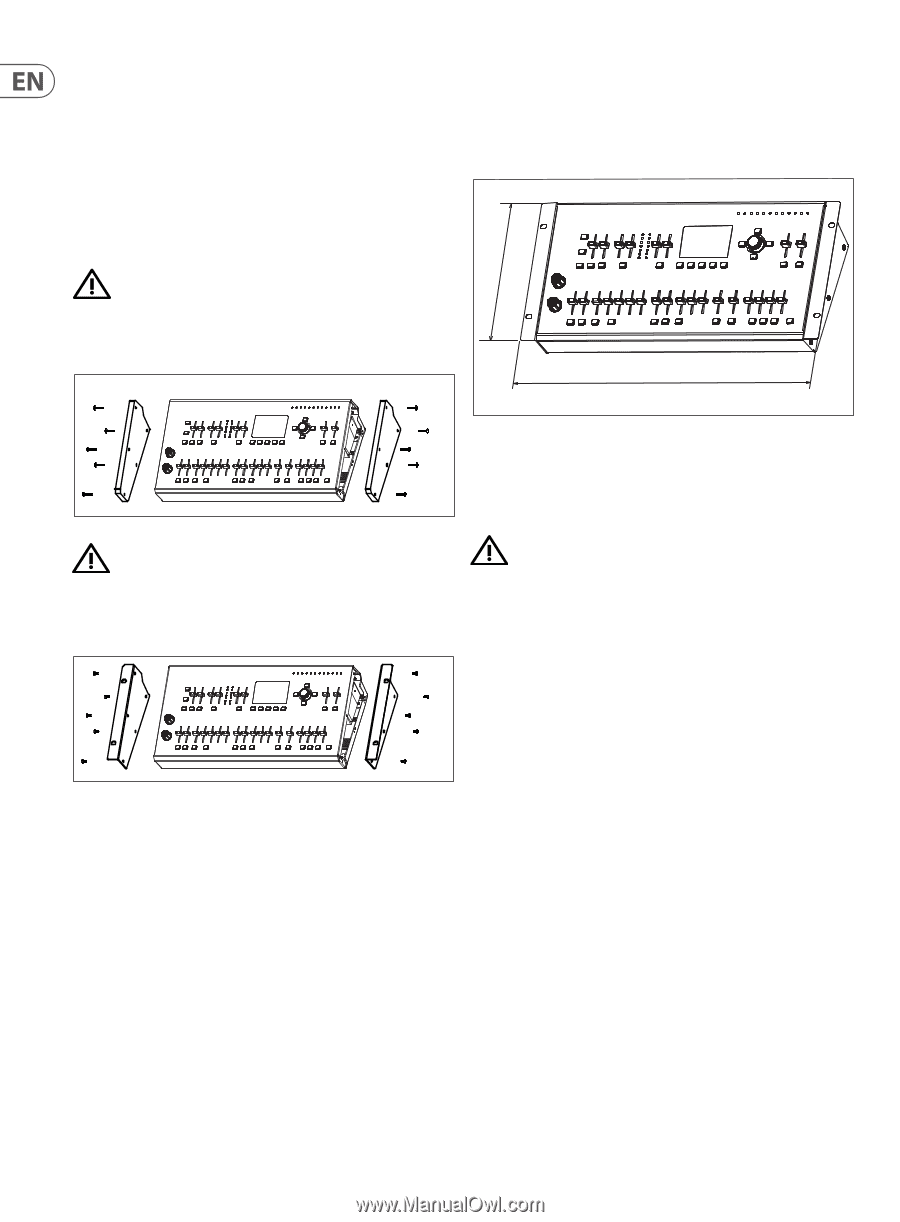
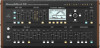
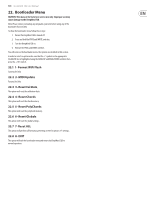
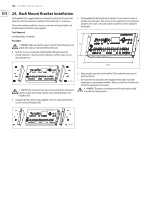
146 DeepMind 12D User Manual 24. Rack Mount Bracket Installation The DeepMind 12D is supplied with two rack mount brackets and 10 screws that allow the unit to be mounted in a standard 19 inch wide rack in 5 rack spaces. The wooden end pieces and their screws are removed, and replaced by the rack mount brackets and shorter screws supplied. Tools Required A medium philips screwdriver. Procedure 1. WARNING: Make sure that the power is turned off and the power cord and all other cables are disconnected from the unit. 2. Undo the 5 screws on each side of the DeepMind 12D and remove the wooden end pieces. Store the wooden end pieces and the screws in a safe place for future use. 5. The DeepMind 12D will now fit into a standard 19 inch wide rack, where it will take up 5 rack spaces. Rack screws are not supplied, but we recommend using the correct rack screws and washers to prevent cosmetic damage to the brackets. 5U 19.0 in M4 x 20mm 3. CAUTION: The removed screws must not be used with the rack mount brackets, as they are too long, and may cause internal damage to the DeepMind 12D. 4. Using only the M4 x 8 mm screws supplied, secure the rack mount brackets to each end of the DeepMind 12D. 6. Allow enough room above the DeepMind 12D to make the connections to and from the unit. 7. Do not position the unit above other equipment that might reach high temperatures, such as power amplifiers. Make sure that the ventilation slots and the fan opening are not covered. 8. WARNING: The power cord and power switch must remain readily accessible for safety purposes. M4 x 8mm
-
 1
1 -
2
-
3
-
4
-
5
-
6
-
7
-
8
-
9
-
10
-
11
-
12
-
13
-
14
-
15
-
16
-
17
-
18
-
19
-
20
-
21
-
22
-
23
-
24
-
25
-
26
-
27
-
28
-
29
-
30
-
31
-
32
-
33
-
34
-
35
-
36
-
37
-
38
-
39
-
40
-
41
-
42
-
43
-
44
-
45
-
46
-
47
-
48
-
49
-
50
-
51
-
52
-
53
-
54
-
55
-
56
-
57
-
58
-
59
-
60
-
61
-
62
-
63
-
64
-
65
-
66
-
67
-
68
-
69
-
70
-
71
-
72
-
73
-
74
-
75
-
76
-
77
-
78
-
79
-
80
-
81
-
82
-
83
-
84
-
85
-
86
-
87
-
88
-
89
-
90
-
91
-
92
-
93
-
94
-
95
-
96
-
97
-
98
-
99
-
100
-
101
-
102
-
103
-
104
-
105
-
106
-
107
-
108
-
109
-
110
-
111
-
112
-
113
-
114
-
115
-
116
-
117
-
118
-
119
-
120
-
121
-
122
-
123
-
124
-
125
-
126
-
127
-
128
-
129
-
130
-
131
-
132
-
133
-
134
-
135
-
136
-
137
-
138
-
139
-
140
-
 141
141 -
 142
142 -
 143
143 -
 144
144 -
 145
145 -
 146
146 -
 147
147 -
 148
148 -
 149
149 -
 150
150 -
 151
151 -
152
-
153
-
154
-
155
-
156
-
157
-
158
-
159
-
160
-
161
-
162
 |
 |