Behringer DEEPMIND 12D Manual - Page 27
NETWORK SETTINGS MENU, Client, Access Point, Client Mode, ENABLE, SSID and Password, Access Point
 |
View all Behringer DEEPMIND 12D manuals
Add to My Manuals
Save this manual to your list of manuals |
Page 27 highlights
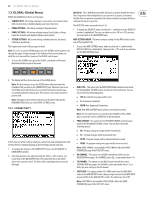
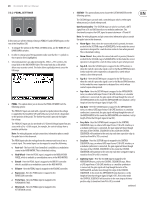
27 DeepMind 12D User Manual NETWORK SETTINGS MENU- This menu contains settings for the network connection of the DeepMind 12D. The DeepMind 12D supports the Real-Time MIDI (RTP) protocol for use with network devices/applications. 1. To access the NETWORK SETTINGS menu, make sure that the '
-
 1
1 -
2
-
3
-
4
-
5
-
6
-
7
-
8
-
9
-
10
-
11
-
12
-
13
-
14
-
15
-
16
-
17
-
18
-
19
-
20
-
21
-
 22
22 -
 23
23 -
 24
24 -
 25
25 -
 26
26 -
 27
27 -
 28
28 -
 29
29 -
 30
30 -
 31
31 -
 32
32 -
33
-
34
-
35
-
36
-
37
-
38
-
39
-
40
-
41
-
42
-
43
-
44
-
45
-
46
-
47
-
48
-
49
-
50
-
51
-
52
-
53
-
54
-
55
-
56
-
57
-
58
-
59
-
60
-
61
-
62
-
63
-
64
-
65
-
66
-
67
-
68
-
69
-
70
-
71
-
72
-
73
-
74
-
75
-
76
-
77
-
78
-
79
-
80
-
81
-
82
-
83
-
84
-
85
-
86
-
87
-
88
-
89
-
90
-
91
-
92
-
93
-
94
-
95
-
96
-
97
-
98
-
99
-
100
-
101
-
102
-
103
-
104
-
105
-
106
-
107
-
108
-
109
-
110
-
111
-
112
-
113
-
114
-
115
-
116
-
117
-
118
-
119
-
120
-
121
-
122
-
123
-
124
-
125
-
126
-
127
-
128
-
129
-
130
-
131
-
132
-
133
-
134
-
135
-
136
-
137
-
138
-
139
-
140
-
141
-
142
-
143
-
144
-
145
-
146
-
147
-
148
-
149
-
150
-
151
-
152
-
153
-
154
-
155
-
156
-
157
-
158
-
159
-
160
-
161
-
162
 |
 |
27
DeepMind 12D User Manual
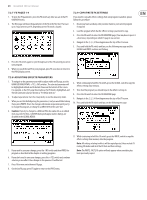
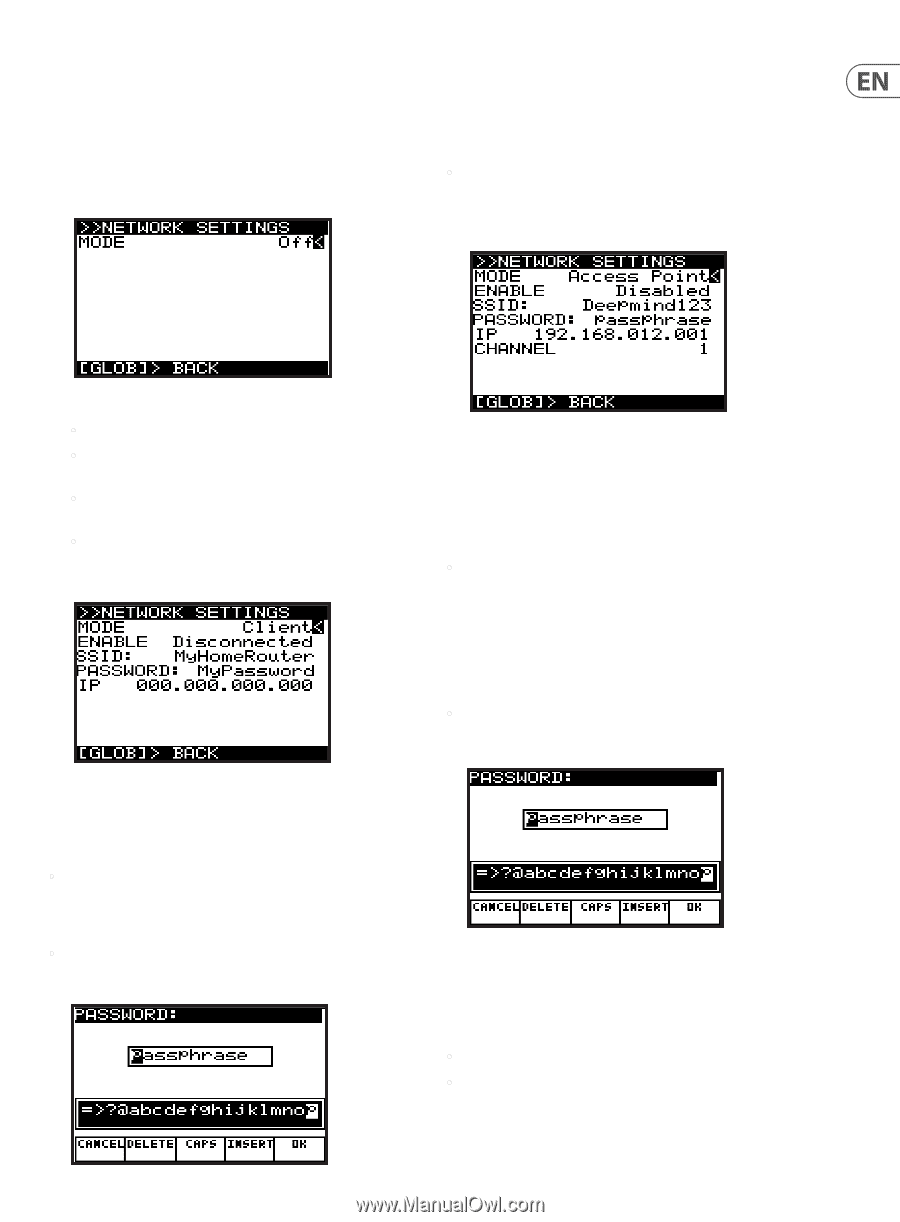
NETWORK SETTINGS MENU
- This menu contains settings for the network
connection of the DeepMind 12D.
The DeepMind 12D supports the Real-Time MIDI (RTP) protocol for use with
network devices/applications.
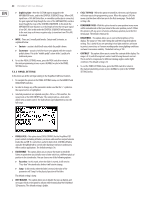
1.
To access the NETWORK SETTINGS menu, make sure that the '<' symbol on
the NETWORK SETTINGS line is highlighted. Then press the +/YES switch,
and the NETWORK SETTINGS menu will appear:
2.
There are three modes for the NETWORK connection:
•
Off
- Network connection is disabled.
•
Client
- This mode allows the DeepMind 12D to act as a client so that it
can connect to an access point.
•
Access Point
(Software Enabled Access Point) - The DeepMind 12D can
create an access point which will allow clients/devices to connect to it.
•
The default mode for the NETWORK connection is Off. The selected
mode persists across power cycles.
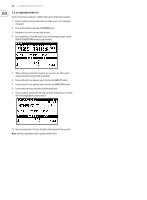
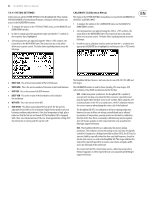
Client Mode
- When
Client
mode is selected, additional options are displayed:
1.
To navigate the options in Client mode, use the BANK/UP and
BANK/DOWN switches.
2.
In order to change any of the parameters, make sure that the '<' symbol is on
the respective line, and press the +/YES switch to edit.
•
ENABLE
- This shows the current state of the Client Mode connection - there
are 4 states: Disconnected, Connecting, Connected, and Disconnecting.
Initiate a connection using the +/YES switch, and cancel a connection using
the -/NO switch. The connection is disconnected after each power cycle.
•
SSID and Password
- These are the SSID and Password strings that the
DeepMind12 uses to connect to the desired network. Editing the values of
these strings will bring up a text editing pop up dialog.
When editing any of the details, the dialog allows you to enter alphanumeric
characters and also shows CANCEL, DELETE, CAPS LOCK and INSERT options.
Once you have changed the details to your requirements, press the OK switch
to confirm the settings.
Note:
These details cannot be editied while ENABLE
is "Connected."
•
IP
- Shows the IP address assigned to the DeepMind12 by the DHCP server
running on the Access Point it is connected to.
Access Point Mode
- When this mode is selected, additional options
are displayed:
In Access Point mode, you will need to enter the details of the access point you
wish to create.
1.
To navigate the options in Access Point mode, use the BANK/UP and BANK/
DOWN switches.
2.
In order to change any of the parameters make sure that the '<' symbol is on
the respective line, and press the +/YES switch to edit.
•
ENABLE
- This shows the current state of the Access Point connection.
There are 7 states: Disabled, Enabling, Enabled, Disabling, Connecting,
Connected, and Disconnecting. It is possible to enable the AP using
the +/YES switch, and disable the AP using the -/NO switch. Once the
AP is enabled, the connection status of any client that connects to
the DeepMind12 will be shown as either Connecting, Connected, or
Disconnecting. It is possible to reject a client that has already connected,
by pressing -/NO.
•
SSID and Password
- These are the SSID and Password strings the
DeepMind12 uses to create the Access Point network. Editing the values of
these strings will bring up a text editing pop up dialog.
When editing any of the details, the dialog allows you to enter alphanumeric
characters and also shows CANCEL, DELETE, CAPS LOCK and INSERT options.
Once you have changed the details to your requirements, press the OK switch
to confirm the settings.
Note:
These details cannot be editied while ENABLE
is "Connected."
•
IP
- Shows the IP address the DeepMind12 uses for the Access Point.
•
Channel
- This shows the Wireless channel used by the Access Point.