Belkin F1PI210ENau User Guide - Page 7
Connecting and Configuring your Router
 |
View all Belkin F1PI210ENau manuals
Add to My Manuals
Save this manual to your list of manuals |
Page 7 highlights
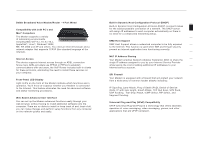
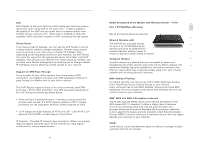
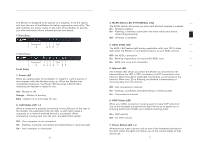
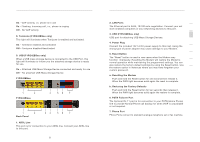
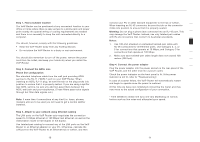
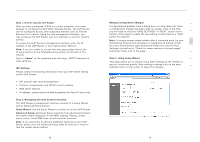
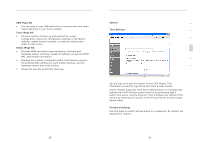
Connecting and Configuring your Router Step 1. Find a suitable location The VoIP Router can be positioned at any convenient location in your office or home where there is easy access to a phone jack and power point nearby. No special wiring or cooling requirements are needed and there is no necessity to keep the unit connected directly to a computer. You should, however, comply with the following guidelines: • Keep the VoIP Router away from any heating devices • Do not place the VoIP Router in a dusty or wet environment You should also remember to turn off the power, remove the power cord from the outlet, and keep your hands dry when you install the VoIP Router. Step 2. Connect the ADSL Line Phone line configuration Run standard telephone cable from the wall jack providing ADSL service to the RJ-11 ("ADSL") port on your VoIP Router. When inserting an ADSL RJ-11 plug, be sure the tab on the plug clicks into position to ensure that it is properly seated. If you are using a splitter less ADSL service, be sure you add low-pass filters between the ADSL wall jack and your telephones. (These filters pass voice signals through but filter data signals out.) Note: If more than 4 connections of any kind (i.e. faxes, phones, modems etc) are to be used you will need to get a central splitter installed. Step 3. Attach to your network using Ethernet cabling The LAN ports on the VoIP Router auto-negotiates the connection speed to 10 Mbps Ethernet or 100 Mbps Fast Ethernet, as well as the transmission mode to half duplex or full duplex. Use twisted-pair cabling to connect any of the LAN ports on the VoIP Router to an Ethernet adapter on your PC. Otherwise, cascade the LAN port on the VoIP Router to an Ethernet hub or switch, and then 10 Connecting and Configuring your Router 1 connect your PC or other network equipment to the hub or switch. When inserting an RJ-45 connector, be sure the tab on the connector clicks into position to ensure that it is properly seated. 2 Warning: Do not plug a phone jack connector into an RJ-45 port. This may damage the VoIP Router. Instead, use only twisted-pair cables 3 with RJ-45 connectors that conform to Australian standards. Notes: 4 1. Use 100-ohm shielded or unshielded twisted-pair cable with RJ-45 connectors for all Ethernet ports. Use Category 3, 4, or 5 for connections that operate at 10 Mbps, and Category 5 for 5 connections that operate at 100 Mbps. 2. Make sure each twisted-pair cable length does not exceed 100 6 meters (328 feet). 7 Step 4. Connect the power adapter Plug the power adapter into the power socket on the rear panel of the VoIP Router, and the other end into a power outlet. Check the power indicator on the front panel is lit. If the power indicator is not lit, refer to "Troubleshooting". In case of a power failure, the VoIP Router will automatically restart and begin to operate once the power is restored. At this time we have now completed connecting the router and may now move to the actual configuration of your connection. * Time needed to obtain line sync will vary depending on various factors such as line noise and attempted sync speed. 11 section
-
 1
1 -
 2
2 -
 3
3 -
 4
4 -
 5
5 -
 6
6 -
 7
7 -
 8
8 -
 9
9 -
 10
10 -
 11
11 -
 12
12 -
13
-
14
-
15
-
16
-
17
-
18
-
19
-
20
-
21
-
22
-
23
-
24
-
25
-
26
-
27
-
28
-
29
-
30
-
31
-
32
-
33
-
34
-
35
-
36
-
37
-
38
-
39
-
40
-
41
-
42
-
43
-
44
-
45
-
46
-
47
-
48
-
49
-
50
-
51
-
52
-
53
 |
 |