Belkin F5D6231-4 User Manual - Page 22
Using The Web-based Advanced User Interface - default ip
 |
UPC - 722868442968
View all Belkin F5D6231-4 manuals
Add to My Manuals
Save this manual to your list of manuals |
Page 22 highlights
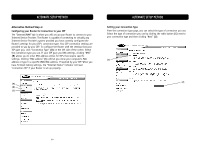
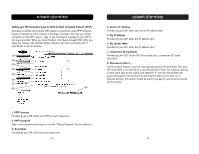
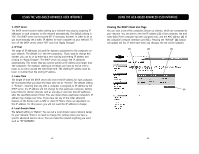
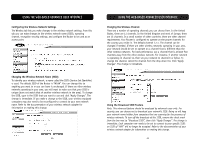
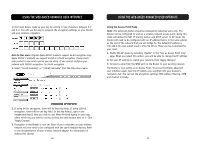
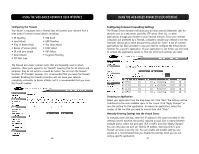
USING THE WEB-BASED ADVANCED USER INTERFACE Using your Internet browser, you can access the Router's Web-Based Advanced User Interface. In your browser, type "192.168.2.1" (do not type in anything else such as "http://" or "www") then press the "Enter" key. You will see the Router's home page in your browser window. Viewing the LAN Settings Clicking on the header of the LAN tab (A) will take you to the LAN tab's header page. A quick description of the functions can be found here. To view the settings or make changes to any of the LAN settings, click on "LAN Settings" (B) or to view the list of connected computers, click on "DHCP Client List" (C). (A) (B) (C) 40 USING THE WEB-BASED ADVANCED USER INTERFACE Changing LAN Settings All settings for the internal LAN setup of the Router can be viewed and changed here. (1) (2) (3) (4) (5) (6) 1. IP Address The "IP address" is the internal IP address of the Router. The default IP address is "192.168.2.1". To access the advanced setup interface, type this IP address into the address bar of your browser. This address can be changed if needed. To change the IP address, type in the new IP address and click "Apply Changes". The IP address you choose should be a non-routable IP. Examples of a non-routable IP are: 192.168.x.x (where x is anything between 0 and 255) 10.x.x.x (where x is anything between 0 and 255) 2. Subnet Mask There is no need to change the subnet mask. This is a unique, advanced feature of your Belkin Router. It is possible to change the subnet mask if necessary, however, do NOT make changes to the subnet mask unless you have a specific reason to do so. The default setting is "255.255.255.0". 41
-
 1
1 -
2
-
3
-
4
-
5
-
6
-
7
-
8
-
9
-
10
-
11
-
12
-
13
-
14
-
15
-
16
-
 17
17 -
 18
18 -
 19
19 -
 20
20 -
 21
21 -
 22
22 -
 23
23 -
 24
24 -
 25
25 -
 26
26 -
 27
27 -
28
-
29
-
30
-
31
-
32
-
33
-
34
-
35
-
36
-
37
-
38
-
39
-
40
-
41
-
42
-
43
-
44
 |
 |
