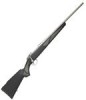
Beretta Sako 85 Finnlight ST Sako 85 User Manual - Page 18
Magazine, Standard Trigger Mechanism
 |
View all Beretta Sako 85 Finnlight ST manuals
Add to My Manuals
Save this manual to your list of manuals |
Page 18 highlights
FITTING SCOPE TO THE MOUNTS Loosen the rings crews. Carefully fit the insert ring around the scope tube. Position the scope in the mounts, so that the insert rings fit the ring bases, and the distance of the ocular bell is sufficient from the eye (face) of the shooter. Position the cut at the insert ring in a horizontal position. Refit the ring tops and tighten the ring screws finger-tight, give the final check for the eye relief and the reticle position (upright), and tighten the ring tops evenly with an 2.5 mm Allen key provided. REMOVAL OF THE SCOPE FROM THE RIFLE Loosen the base screws to loosen locking piece (C) and remove the scope. HOW TO REFIT THE SCOPE TO THE RIFLE Put the scope into position. By pushing the scope forward, the recoil stop (B) should fit firmly into the recoil stop groove. Tighten the base screws firmly with the Allen key provided. Do not over tighten. ZEROING IN THE SCOPED RIFLE When the scope has been securely mounted, the rifle should be sighted in with the cartridges you will be using. Notice that trajectory tables for cartridges are usable only, when the rifle is sighted-in as directed in the tables. Notice also, that differences between two different loads from the same rifle do not necessarily follow differences in the trajectory tables. That's why the rifle should always be sighted-in with a load that you are going to use. To start sighting in procedure, place the rifle solidly on the some kind of bench rest or other support, and remove the bolt. Look at the target through the bore at about 25 - 30 m (27 - 33 yards) distance. Then look, without moving the rifle, through the scope, and adjust windage and elevation so that reticle centers on target. (The same thing can be achieved also with a proprietary bore-sighter, which can be used to check the alignment of the bore and the scope.) After this preliminary bore-sighting, it is then time to proceed to final sighting-in by shooting at 100 or 150 m (100 or 150 yards) distance. The best way is to shoot from a good bench rest, supporting the rifle on, for example, sandbags either under the fore-end, or under both the fore-end and the stock. Never support your rifle under the barrel, or shoot by using a solid support, as grouping can be dramatically affected. Otherwise, follow adjustment directions given in Instruction Manual of telescopic sight to be used. MAGAZINE All SAKO Model 85 rifles are supplied with a detachable clip magazine. The magazine release is provided with a safety meachanism which prevents magazine being released accidentally. The magazine is released by pressing upwards on the front of the magazine base plate, while simultaneously pulling the magazine release backwards. AMMUNITION CAUTION! Make sure you have the correct caliber ammunition for this firearm. Use only high quality, factory-loaded ammunition. The use of reloaded, hand-loaded, remanufactured or other non-standard ammunition voids all warranties, and may cause severe damage to the firearm and serious injury to the shooter or others. Improperly loaded ammunition can be extremely dangerous. Always use ammunition that complies with Industry Performance Standards established by the Sporting Arms and Ammunition Manufacturers Institute, Inc. (SAAMI) or Commission Internationale Permanente pour l'Epreuve des Armes à Feu portatives (C.I.P.) Do not use cartridges that are dirty, wet, corroded, dented or damaged. Do not oil cartridges. Any of these things can make the ammunition dangerous, and can cause damage to the firearm or injury to the shooter. LOADING THE MAGAZINE The magazine can be loaded by pressing the cartridge down into the magazine, when the bolt is in the open position. The detachable magazine can also be loaded while it is separated from the rifle. CAUTION! Engaging the safety catch before closing the bolt is the safest method of handling the rifle. REMOVING THE CARTRIDGES FROM THE RIFLE For safety reasons, the safety should always be in the "ON" position when removing cartridges from the rifle. The magazine is removed by pressing upwards on the front of the magazine base plate, while simultaneously pulling the magazine release backwards. The release button is located in front of the magazine and allows the magazine to drop into your hand, when depressed with the forefinger. The magazine can then be unloaded, or transported as loaded. A cartridge can be removed from the chamber, with the safety still engaged, by pressing the bolt handle release button and opening the bolt, in which case it is easy to remove a cartridge held by the extractor. STANDARD TRIGGER MECHANISM - The trigger has no first pull and the trigger pressure is set at the factory to approx. 15 Newtons (3 lbs). - Both the sear engagement and safety are set at the factory and need no adjustment of any kind. CAUTION! The sear engagement, safety and other components of the action are precision mechanisms, which were properly adjusted at the factory. They should not be altered, modified or changed. Modifications to the firearm may decrease its safety and increase the risk of serious injury. - Should you wish to alter the trigger pressure, the safest way is to detach the stock first. To do this, remove the trigger guard fastening screws. Trigger pressure can also be adjusted, with a proper tool, through the magazine opening, as shown in Fig. 8. 18
-
 1
1 -
2
-
3
-
4
-
5
-
6
-
7
-
8
-
9
-
10
-
11
-
12
-
 13
13 -
 14
14 -
 15
15 -
 16
16 -
 17
17 -
 18
18 -
 19
19 -
 20
20 -
 21
21 -
 22
22 -
 23
23 -
24
-
25
-
26
-
27
-
28
-
29
-
30
-
31
-
32
-
33
-
34
-
35
-
36
-
37
-
38
-
39
-
40
-
41
-
42
-
43
-
44
-
45
-
46
-
47
-
48
-
49
-
50
-
51
-
52
-
53
-
54
-
55
-
56
-
57
-
58
-
59
-
60
 |
 |