Bosch WTVC5530UC User Guide - Page 14
Electrical, Connection
 |
View all Bosch WTVC5530UC manuals
Add to My Manuals
Save this manual to your list of manuals |
Page 14 highlights
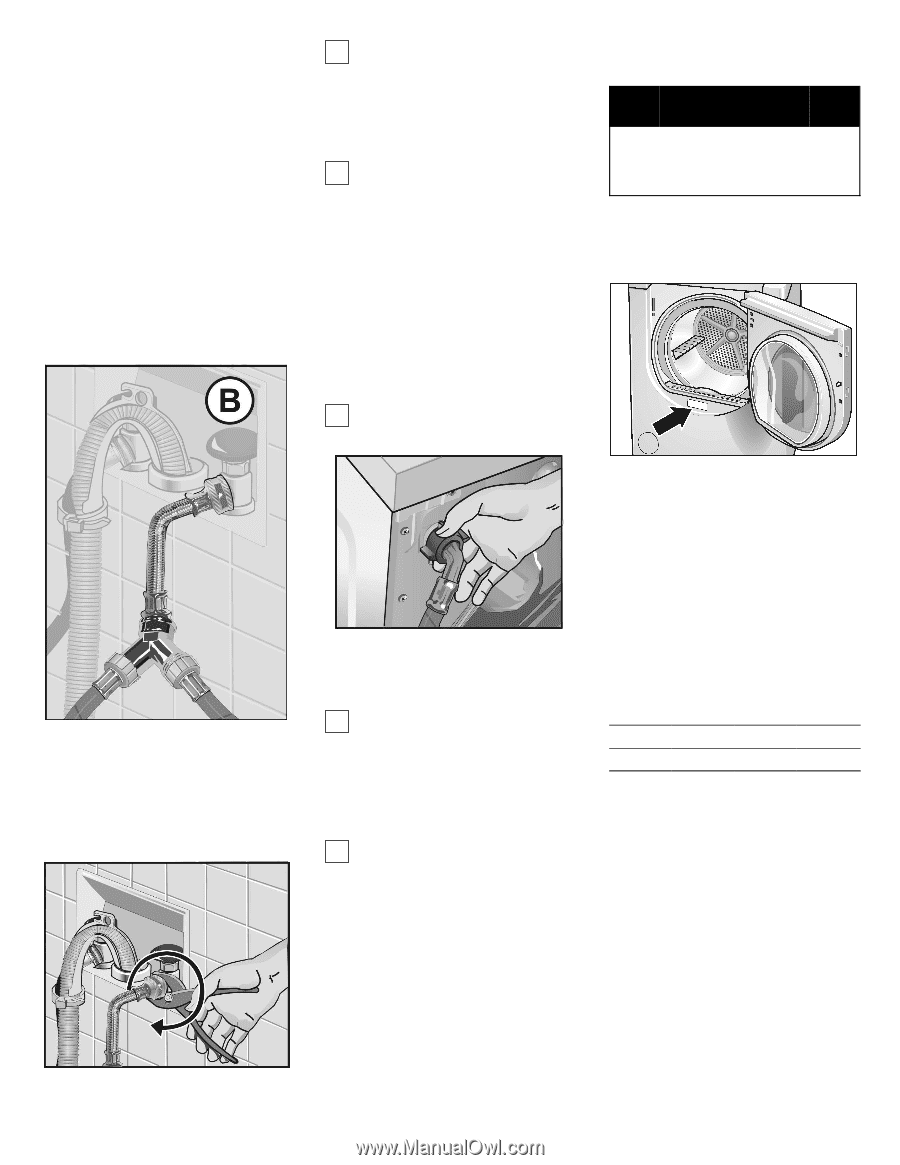
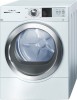
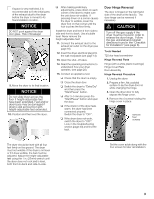
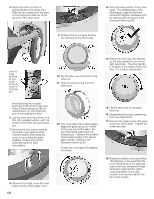
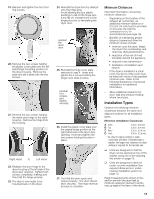
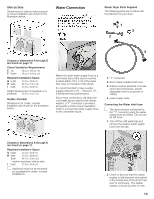
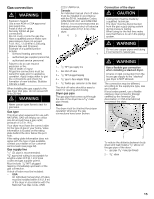
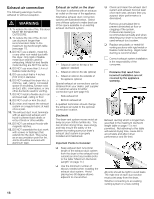
supplied parts illustration. It is illustrated separately from the hose for clarity. 3. If space permits, attach the internally threaded (female) end of the Y" connector directly to the cold water faucet (option A as shown in the illustration above) and continue to step 6 For optional Installation with Y Connector If the Y" connector cannot be attached directly, use the short hose provided to connect the Y" connector to the cold water faucet (option B as shown in the illustration below) , and continue with steps 4 through 5. 4. Attach the short hose to the cold water faucet. Tighten the connection by hand until the coupling is seated on the faucet. 5. Use pliers to tighten the connection an additional two-thirds turn. Use pliers only to finish tightening 2/3's turn for metal-to-metal connections i Do not overtighten. Damage to the coupling could result. 6. Attach the Y" adapter to the short hose. Tighten the coupling by hand until it is firmly seated on the hose. i Do not use pliers to tighten plastic threaded fittings onto plastic or metal threaded connections. 7. Attach the washer cold water supply hose to the Y" connector. Hand tighten only. 8. Attach the dryer water supply hose to the other coupling of the Y" connector. Hand tighten only. 9. Tighten only metal-to-metal couplings on the Y" connector and short hose an additional two-thirds turn using pliers. i Do not overtighten. Damage to the coupling could result. 10. Attach the right-angle connector on the water supply hose to the inlet valve located at the top left of the dryer. i Check to see that the rubber washer does not fall out, and is properly seated in the right-angle connector. 11. Hand tighten the coupling until it is seated on the connector. Do not use pliers, hand tighten only. i Do not overtighten. Damage to the coupling could result. 12. Turn on the water faucet. 13. Check for leaks around the Y" connector, faucet and all hoses. Electrical Connection GROUNDING INSTRUCTIONS d WARNING The dryer must only be connected to an individual branch circuit via a socket which has been properly installed and grounded. The household electrical voltage must correspond to the voltage specification on the dryer (rating plate). You will find the rating plate on the inside of the front panel. Connection specifications as well as the electrical requirements are stipulated on the appliance nameplate. Make sure that: - the power cord plug fits into the socket. - the power cord is acceptable for use in this application. - the grounding system is properly installed. The power cord may be replaced by a qualified technician or a licensed electrician only. Replacement power cords are available from Customer Service (see page 32). Volts Hertz Amperes Watts 110-120 60 9 1080 14
-
 1
1 -
2
-
3
-
4
-
5
-
6
-
7
-
8
-
 9
9 -
 10
10 -
 11
11 -
 12
12 -
 13
13 -
 14
14 -
 15
15 -
 16
16 -
 17
17 -
 18
18 -
 19
19 -
20
-
21
-
22
-
23
-
24
-
25
-
26
-
27
-
28
-
29
-
30
-
31
-
32
-
33
-
34
-
35
-
36
-
37
-
38
-
39
-
40
-
41
-
42
-
43
-
44
-
45
-
46
-
47
-
48
-
49
-
50
-
51
-
52
-
53
-
54
-
55
-
56
-
57
-
58
-
59
-
60
-
61
-
62
-
63
-
64
-
65
-
66
-
67
-
68
-
69
-
70
-
71
-
72
-
73
-
74
-
75
-
76
-
77
-
78
-
79
-
80
-
81
-
82
-
83
-
84
-
85
-
86
-
87
-
88
-
89
-
90
-
91
-
92
-
93
-
94
-
95
-
96
-
97
-
98
-
99
-
100
-
101
-
102
-
103
-
104
 |
 |