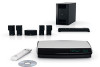
Bose Lifestyle 48 Series IV Owner's guide - Page 53
Finishing the process, Storing any parts you do not need
 |
View all Bose Lifestyle 48 Series IV manuals
Add to My Manuals
Save this manual to your list of manuals |
Page 53 highlights
English TAB 2 TAB 3 TAB 4 Finishing the process 1. With Disc 2 inserted in the media center disc drive, press the CD•DVD button on the remote control. 2. Listen for instructions for putting on the headset. The headset is designed to be worn above your ears for accurate acoustic measurements. 3. When the disc finishes, press the Open/Close button on the media center and remove the disc. 4. Unplug the headset cable from the rear of the media center. If you disconnected a device from the AUX Audio In connector, you can reconnect it now. 5. Return the headset and both discs to the kit carton for possible future use. TAB 5 TAB 6 TAB 7 TAB 8 COMPLETE SYSTEM CONNECTIONS Storing any parts you do not need We suggest you save any of the LIFESTYLE® carton contents that you are not using. These include: • The ADAPTiQ® kit If you rearrange your room or move your system speakers, we suggest running the ADAPTiQ audio calibration system again. • Video cables you did not use for initial setup When you purchase new video devices, you may need these cables to make the added connections. • This owner's guide when you have finished using it The operating instructions may be useful over the long term. If you move the system, you may need instructions to redo the connections. • The list of Bose® Customer Service addresses, your warranty card, and purchase receipt These are useful if you ever need assistance with your system or want to order accessories. Congratulations! With your system set up successfully, you can now move on to "Using and Enjoying Your System" on page 50. 49
-
 1
1 -
2
-
3
-
4
-
5
-
6
-
7
-
8
-
9
-
10
-
11
-
12
-
13
-
14
-
15
-
16
-
17
-
18
-
19
-
20
-
21
-
22
-
23
-
24
-
25
-
26
-
27
-
28
-
29
-
30
-
31
-
32
-
33
-
34
-
35
-
36
-
37
-
38
-
39
-
40
-
41
-
42
-
43
-
44
-
45
-
46
-
47
-
 48
48 -
 49
49 -
 50
50 -
 51
51 -
 52
52 -
 53
53 -
 54
54 -
 55
55 -
 56
56 -
 57
57 -
 58
58 -
59
-
60
-
61
-
62
-
63
-
64
-
65
-
66
-
67
-
68
-
69
-
70
-
71
-
72
-
73
-
74
-
75
-
76
-
77
-
78
-
79
-
80
-
81
-
82
-
83
-
84
-
85
-
86
-
87
-
88
-
89
-
90
-
91
-
92
-
93
-
94
-
95
-
96
-
97
-
98
-
99
-
100
-
101
-
102
-
103
-
104
-
105
-
106
-
107
-
108
-
109
-
110
-
111
-
112
-
113
-
114
-
115
-
116
-
117
-
118
-
119
-
120
-
121
-
122
-
123
-
124
-
125
-
126
-
127
-
128
-
129
-
130
-
131
-
132
-
133
-
134
-
135
-
136
-
137
-
138
-
139
-
140
-
141
-
142
-
143
-
144
-
145
-
146
-
147
-
148
-
149
-
150
-
151
-
152
-
153
-
154
-
155
-
156
-
157
-
158
-
159
-
160
-
161
-
162
-
163
-
164
-
165
-
166
-
167
-
168
-
169
-
170
-
171
-
172
-
173
-
174
-
175
-
176
-
177
-
178
-
179
-
180
-
181
-
182
-
183
-
184
-
185
-
186
-
187
-
188
-
189
-
190
-
191
-
192
-
193
-
194
-
195
-
196
-
197
-
198
-
199
-
200
-
201
-
202
-
203
-
204
-
205
-
206
-
207
-
208
-
209
-
210
-
211
-
212
-
213
-
214
-
215
-
216
-
217
-
218
-
219
-
220
-
221
-
222
-
223
-
224
-
225
-
226
-
227
-
228
-
229
-
230
-
231
-
232
-
233
-
234
-
235
-
236
-
237
-
238
-
239
-
240
-
241
-
242
-
243
-
244
-
245
-
246
-
247
-
248
-
249
-
250
-
251
-
252
-
253
-
254
-
255
-
256
-
257
-
258
-
259
-
260
 |
 |
