Brother International ™ QL-720NW Software Users Manual - English - Page 30
How to use P-touch Editor Lite (QL-700 only) (Windows® only
 |
View all Brother International ™ QL-720NW manuals
Add to My Manuals
Save this manual to your list of manuals |
Page 30 highlights
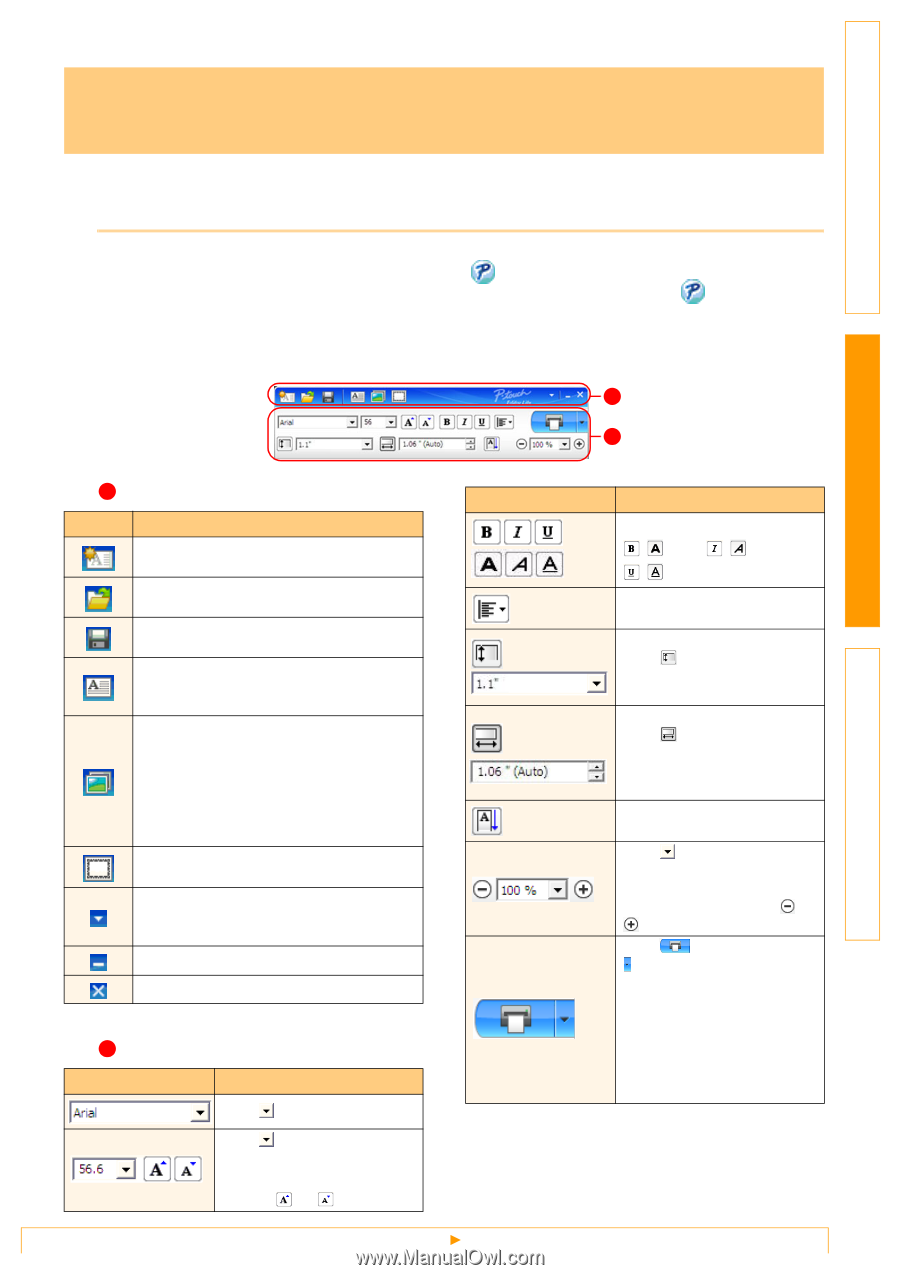
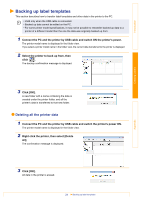
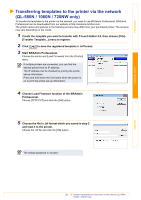
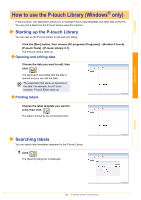
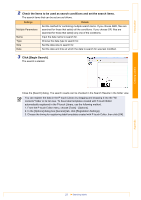
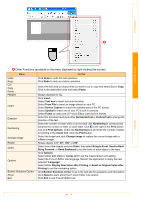
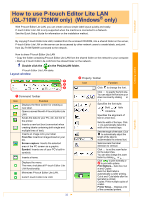
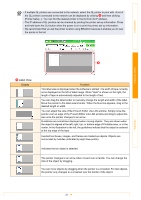
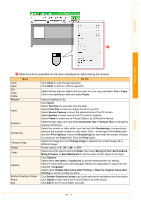
Introduction How to use P-touch Editor Lite (QL-700 only) (Windows® only) It is not necessary to install the driver or software for P-touch Editor Lite. With P-touch Editor Lite, you can create various simple label layouts quickly and easily. P-touch Editor Lite is only supported when connected using a USB cable. 1 After the USB cable is connected, a dialog box appears on the PC display. For Windows® XP/Windows Vista® , click (P-touch Editor Lite). For Windows® 7, click "Open folder to view files" then double-click (ptlite10). P-touch Editor Lite starts. * The printer must be set to P-touch Editor Lite mode. See the Quick Setup Guide for details. Layout window 1 2 Creating Labels Appendix 1 Command Toolbar Icon Function Displays the New screen for creating a new label. Opens a saved file with P-touch Editor Lite. Saves the data to your PC, etc, but not to the printer. Inserts a new text box (convenient when creating labels containing both single and multiple lines of text). Inserts an image onto your label. From file: Inserts an image stored on your PC. Screen capture: Inserts the selected area of the PC screen as a graphic. Symbol: Inserts one of your PC's built-in symbols. Inserts a frame. Displays the menu. The menu includes all P-touch Editor Lite functionality. Minimizes P-touch Editor Lite. Exits P-touch Editor Lite. 2 Property Toolbar Icon Function Click to change the font. Click to specify the font size. You can adjust the font size up or down one level by clicking or . 29 Icon / Function Specifies the font style: / Bold / Italic / Underline Specifies the alignment of text in a text box. Sets the width of the tape. Click to automatically detect the width of the inserted tape. Sets the length of the label. Click to automatically adjust the length of the label to accommodate the entered text. Sets/cancels the label direction to vertical. Click to set the zoom factor for the Label View. You can also change the zoom factor by clicking or . Click to print normally or to print with options. Auto Cut: Each label is automatically cut after printing. Cut at end: Cuts labels after the last label is printed. Copies: Prints multiple copies of a label.
-
 1
1 -
2
-
3
-
4
-
5
-
6
-
7
-
8
-
9
-
10
-
11
-
12
-
13
-
14
-
15
-
16
-
17
-
18
-
19
-
20
-
21
-
22
-
23
-
24
-
 25
25 -
 26
26 -
 27
27 -
 28
28 -
 29
29 -
 30
30 -
 31
31 -
 32
32 -
 33
33 -
 34
34 -
 35
35 -
36
-
37
-
38
-
39
-
40
-
41
-
42
-
43
-
44
-
45
-
46
-
47
-
48
 |
 |