Brother International ™ QL-720NW Software Users Manual - English - Page 7
How to use P-touch Editor for Windows®, Starting P-touch Editor
 |
View all Brother International ™ QL-720NW manuals
Add to My Manuals
Save this manual to your list of manuals |
Page 7 highlights
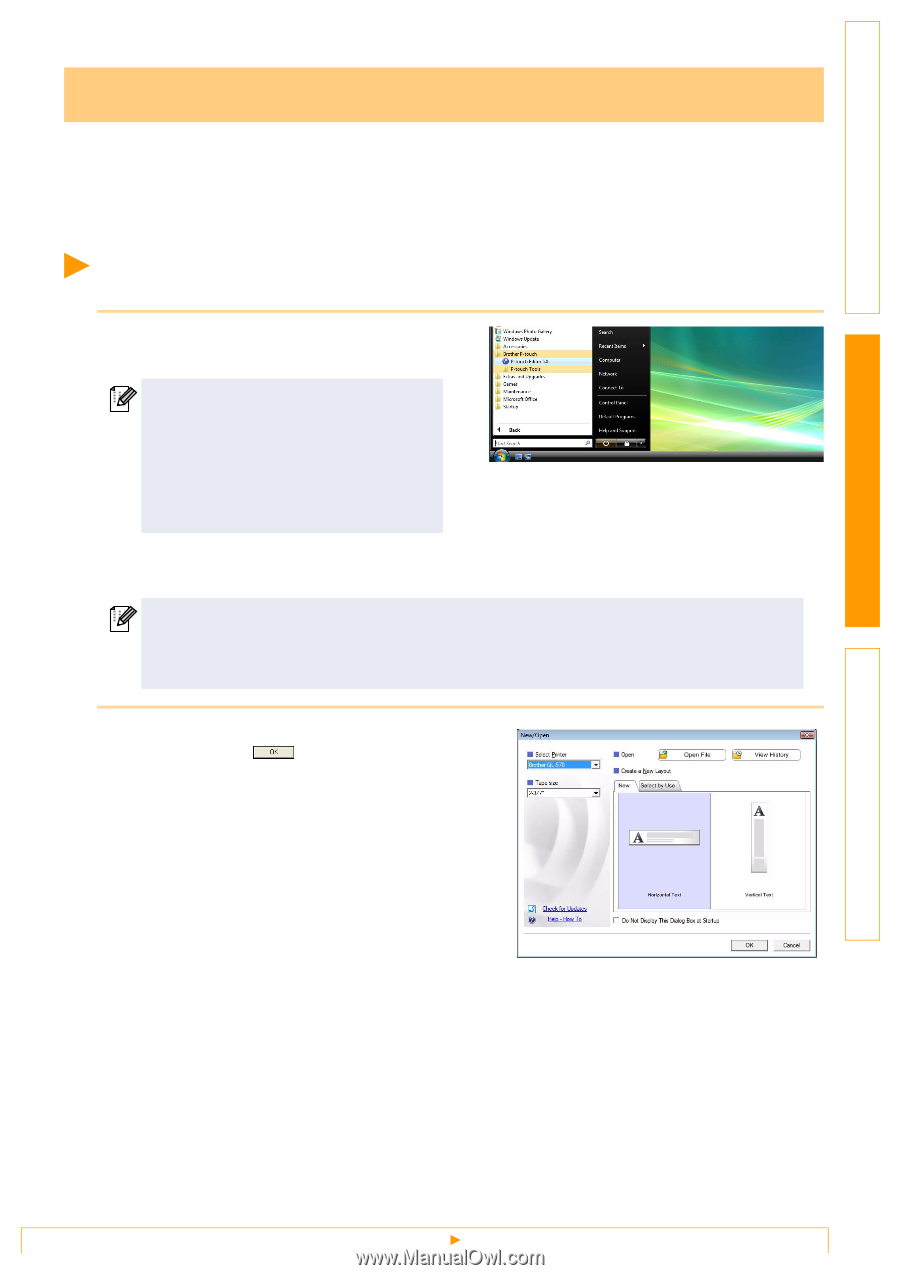
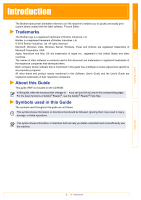
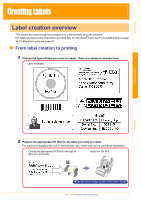
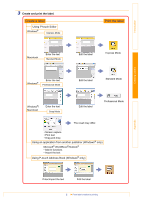
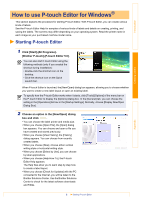
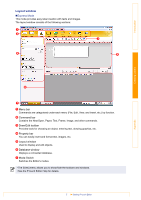
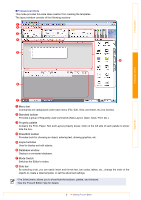
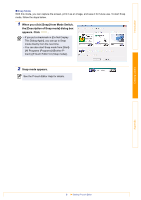
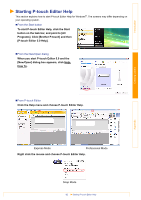
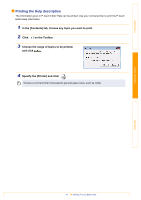
Introduction Creating Labels How to use P-touch Editor for Windows® This section explains the procedure for starting P-touch Editor. With P-touch Editor, you can create various kinds of labels. See the P-touch Editor Help for samples of various kinds of labels and details on creating, printing, and saving the labels. The screens may differ depending on your operating system. Read the printer name in each image as your purchased machine model name. Starting P-touch Editor 1 Click [Start]-[All Programs]- [Brother P-touch]-[P-touch Editor 5.0]. You can also start P-touch Editor using the following methods (only if you created the shortcut during installation): • Double-click the shortcut icon on the desktop. • Click the shortcut icon on the Quick Launch bar. When P-touch Editor is launched, the [New/Open] dialog box appears, allowing you to choose whether you want to create a new label layout or open an existing label. To specify how the P-touch Editor works when it starts, click [Tools]-[Options] of the menu bar on the P-touch Editor to display the [Options] dialog box. In the [General] tab, you can choose the setting in the [Operations] list box in the [Startup Settings]. Normally, choose [Display New/Open Dialog Box]. 2 Choose an option in the [New/Open] dialog box and click . • You can choose the label printer and media size. • When you choose [Open File], the [Open] dialog box appears. You can choose and open a file you have created and stored previously. • When you choose [View History], the [History] dialog appears. You can choose from recently created labels. • When you choose [New], choose either vertical writing style or horizontal writing style. • When you choose [Select by Use], you can choose by label applications. • When you choose [Help-How To], the P-touch Editor Help appears. The Help files allow you to learn step by step how to create a label layout. • When you choose [Check for Updates] with the PC connected to the Internet, you will be taken to the Brother Solutions Center. Use the Brother Solutions Center to check for the latest software downloads and FAQs. Appendix 6 Starting P-touch Editor
-
 1
1 -
 2
2 -
 3
3 -
 4
4 -
 5
5 -
 6
6 -
 7
7 -
 8
8 -
 9
9 -
 10
10 -
 11
11 -
 12
12 -
13
-
14
-
15
-
16
-
17
-
18
-
19
-
20
-
21
-
22
-
23
-
24
-
25
-
26
-
27
-
28
-
29
-
30
-
31
-
32
-
33
-
34
-
35
-
36
-
37
-
38
-
39
-
40
-
41
-
42
-
43
-
44
-
45
-
46
-
47
-
48
 |
 |