Brother International DCP 8040 Service Manual - Page 44
Local Interface, Standard, < For Windows, 98/98SE/Me Users Only >, Finish, Professional Users
 |
UPC - 012502610328
View all Brother International DCP 8040 manuals
Add to My Manuals
Save this manual to your list of manuals |
Page 44 highlights
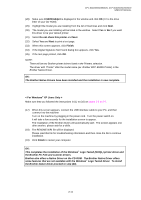
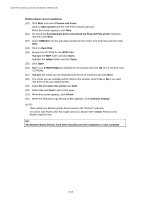
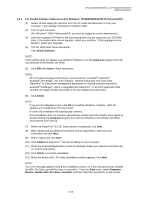
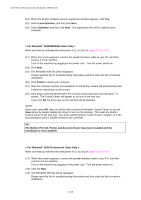
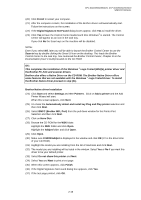
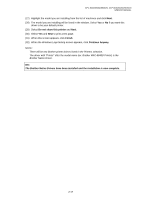
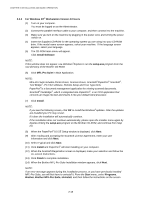
CHAPTER 2 INSTALLATION AND BASIC OPERATION (14) When the Brother Software License Agreement window appears, click Yes. (15) Select Local Interface, and then click Next. (16) Select Standard, and then click Next. The application files will be copied to your computer. < For Windows® 95/98/98SE/Me Users Only > Make sure that you followed the instructions in (1) to (16) on pages 2-13 to 2-14. (17) When this screen appears, connect the parallel interface cable to your PC, and then connect it to the machine. Turn on the machine by plugging in the power cord. Turn the power switch on. (18) Click Next. (19) The README.WRI file will be displayed. Please read this file for troubleshooting information and then close the file to continue installation. (20) Click Finish to restart your computer. (21) After the computer restarts, the installation of the Brother drivers will automatically start. Follow the instructions on the screen. (22) Click Yes to have the Brother MFL-Pro Control Center load each time Windows ® is started. The Control Center will appear as an icon in the task tray. If you click No the Scan keys on the machine will be disabled. NOTE: Even if you select NO, later you will be able to launch the Brother Control Center to use the Scan to key by double clicking the Smart UI icon on the desktop. This loads the Brother Control Center to the task tray. See AutoLoad the Brother Control Center, Chapter 15 in the Documentation (User's Guide) located on the CD-ROM. OK: The Brother PC-FAX, Printer and Scanner drivers have been installed and the installation is now complete. < For Windows® 2000 Professional Users Only > Make sure that you followed the instructions in (1) to (16) on pages 2-13 to 2-14. (17) When this screen appears, connect the parallel interface cable to your PC, and then connect it to the machine. Turn on the machine by plugging in the power cord. Turn the power switch on. (18) Click the Next. (19) The README.WRI file will be displayed. Please read this file for troubleshooting information and then close the file to continue installation. 2-14
-
 1
1 -
2
-
3
-
4
-
5
-
6
-
7
-
8
-
9
-
10
-
11
-
12
-
13
-
14
-
15
-
16
-
17
-
18
-
19
-
20
-
21
-
22
-
23
-
24
-
25
-
26
-
27
-
28
-
29
-
30
-
31
-
32
-
33
-
34
-
35
-
36
-
37
-
38
-
 39
39 -
 40
40 -
 41
41 -
 42
42 -
 43
43 -
 44
44 -
 45
45 -
 46
46 -
 47
47 -
 48
48 -
 49
49 -
50
-
51
-
52
-
53
-
54
-
55
-
56
-
57
-
58
-
59
-
60
-
61
-
62
-
63
-
64
-
65
-
66
-
67
-
68
-
69
-
70
-
71
-
72
-
73
-
74
-
75
-
76
-
77
-
78
-
79
-
80
-
81
-
82
-
83
-
84
-
85
-
86
-
87
-
88
-
89
-
90
-
91
-
92
-
93
-
94
-
95
-
96
-
97
-
98
-
99
-
100
-
101
-
102
-
103
-
104
-
105
-
106
-
107
-
108
-
109
-
110
-
111
-
112
-
113
-
114
-
115
-
116
-
117
-
118
-
119
-
120
-
121
-
122
-
123
-
124
-
125
-
126
-
127
-
128
-
129
-
130
-
131
-
132
-
133
-
134
-
135
-
136
-
137
-
138
-
139
-
140
-
141
-
142
-
143
-
144
-
145
-
146
-
147
-
148
-
149
-
150
-
151
-
152
-
153
-
154
-
155
-
156
-
157
-
158
-
159
-
160
-
161
-
162
-
163
-
164
-
165
-
166
-
167
-
168
-
169
-
170
-
171
-
172
-
173
-
174
-
175
-
176
-
177
-
178
-
179
-
180
-
181
-
182
-
183
-
184
-
185
-
186
-
187
-
188
-
189
-
190
-
191
-
192
-
193
-
194
-
195
-
196
-
197
-
198
-
199
-
200
-
201
-
202
-
203
-
204
-
205
-
206
-
207
-
208
-
209
-
210
-
211
-
212
-
213
-
214
-
215
-
216
-
217
-
218
-
219
-
220
-
221
-
222
-
223
-
224
-
225
-
226
-
227
-
228
-
229
-
230
-
231
-
232
-
233
-
234
-
235
-
236
-
237
-
238
-
239
-
240
-
241
-
242
-
243
-
244
-
245
-
246
-
247
-
248
-
249
-
250
-
251
-
252
-
253
-
254
-
255
-
256
-
257
-
258
-
259
-
260
-
261
-
262
-
263
-
264
-
265
-
266
-
267
-
268
-
269
-
270
-
271
-
272
-
273
-
274
-
275
-
276
-
277
-
278
-
279
-
280
-
281
-
282
-
283
-
284
-
285
-
286
-
287
-
288
-
289
-
290
-
291
-
292
-
293
-
294
-
295
-
296
-
297
-
298
-
299
-
300
-
301
-
302
-
303
-
304
-
305
-
306
-
307
-
308
-
309
-
310
-
311
-
312
-
313
-
314
-
315
-
316
-
317
-
318
-
319
-
320
-
321
-
322
-
323
-
324
-
325
-
326
-
327
-
328
-
329
-
330
-
331
-
332
-
333
-
334
-
335
-
336
-
337
-
338
-
339
-
340
-
341
-
342
-
343
-
344
-
345
-
346
-
347
-
348
-
349
-
350
-
351
-
352
-
353
-
354
-
355
-
356
-
357
-
358
-
359
-
360
-
361
-
362
 |
 |
