Brother International PT-7500 Users Manual - English and Spanish - Page 59
Adjusting the display contrast, Using the Auto Reduction function, Calibrating the label length
 |
UPC - 012502620365
View all Brother International PT-7500 manuals
Add to My Manuals
Save this manual to your list of manuals |
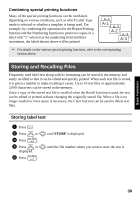
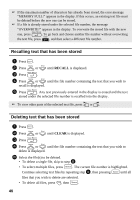
Page 59 highlights
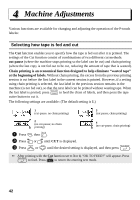
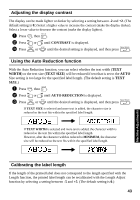
Adjusting the display contrast The display can be made lighter or darker by selecting a setting between -2 and +2. (The default setting is 0.) Select a higher value to increase the contrast (make the display darker). Select a lower value to decrease the contrast (make the display lighter). 1 Press g, then Z. 2 Press l or r until CONTRAST is displayed. 3 Press u or d until the desired setting is displayed, and then press n. Using the Auto Reduction function With the Auto Reduction function, you can select whether the text width (TEXT WIDTH) or the text size (TEXT SIZE) will be reduced if text that is set to the AUTO Size setting is too large for the specified label length. (The default setting is TEXT SIZE.) 1 Press g, then Z. 2 Press l or r until AUTO REDUCTION is displayed. 3 Press u or d until the desired setting is displayed, and then press n. If TEXT SIZE is selected and more text is added, the character size is reduced so the text fits within the specified label length. If TEXT WIDTH is selected and more text is added, the character width is reduced so the text fits within the specified label length. However, after the character width is reduced to MINIMUM, the character size will be reduced so the text fits within the specified label length. Calibrating the label length If the length of the printed label does not correspond to the length specified with the Length function, the printed label length can be recalibrated with the Length Adjust function by selecting a setting between -5 and +5. (The default setting is 0.) 43 Machine Adjustments
-
 1
1 -
2
-
3
-
4
-
5
-
6
-
7
-
8
-
9
-
10
-
11
-
12
-
13
-
14
-
15
-
16
-
17
-
18
-
19
-
20
-
21
-
22
-
23
-
24
-
25
-
26
-
27
-
28
-
29
-
30
-
31
-
32
-
33
-
34
-
35
-
36
-
37
-
38
-
39
-
40
-
41
-
42
-
43
-
44
-
45
-
46
-
47
-
48
-
49
-
50
-
51
-
52
-
53
-
 54
54 -
 55
55 -
 56
56 -
 57
57 -
 58
58 -
 59
59 -
 60
60 -
 61
61 -
 62
62 -
 63
63 -
 64
64 -
65
-
66
-
67
-
68
-
69
-
70
-
71
-
72
-
73
-
74
-
75
-
76
-
77
-
78
-
79
-
80
-
81
-
82
-
83
-
84
-
85
-
86
-
87
-
88
-
89
-
90
-
91
-
92
-
93
-
94
-
95
-
96
-
97
-
98
-
99
-
100
-
101
-
102
-
103
-
104
-
105
-
106
-
107
-
108
-
109
-
110
-
111
-
112
-
113
-
114
-
115
-
116
-
117
-
118
-
119
-
120
-
121
-
122
-
123
-
124
-
125
-
126
-
127
-
128
-
129
-
130
-
131
-
132
-
133
-
134
-
135
-
136
-
137
-
138
-
139
-
140
-
141
-
142
-
143
-
144
-
145
-
146
-
147
-
148
-
149
-
150
-
151
-
152
-
153
-
154
-
155
-
156
-
157
-
158
-
159
-
160
-
161
-
162
-
163
-
164
-
165
-
166
-
167
-
168
-
169
-
170
-
171
-
172
-
173
-
174
-
175
-
176
-
177
-
178
-
179
-
180
-
181
-
182
-
183
-
184
-
185
-
186
-
187
-
188
-
189
-
190
-
191
-
192
-
193
-
194
-
195
-
196
-
197
-
198
-
199
-
200
-
201
-
202
-
203
-
204
-
205
-
206
-
207
-
208
 |
 |
