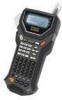
Brother International PT-7500 Users Manual - English and Spanish - Page 84
Using downloaded database data, Adding database data to a label
 |
UPC - 012502620365
View all Brother International PT-7500 manuals
Add to My Manuals
Save this manual to your list of manuals |
Page 84 highlights
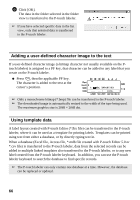
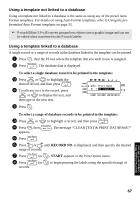
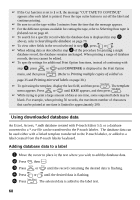
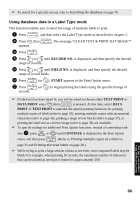
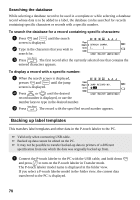
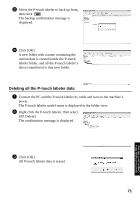
☞ If the Cut function is set to 1 or 3, the message "CUT TAPE TO CONTINUE" appears after each label is printed. Press the tape cutter button to cut off the label and continue printing. ☞ Be sure to cut the tape within 5 minutes from the time that the message appears. ☞ For the different options available for cutting the tape, refer to Selecting how tape is fed and cut on page 42. ☞ To search for a specific record while the database data is displayed (in step 2 above), refer to Searching the database on page 70. ☞ To view other fields in the record selected in step 3, press l or r. ☞ When editing data as described in step 4 of the procedure for printing a single database record, the database remains unchanged. When printing a range of database records, the text cannot be edited. ☞ To specify settings for additional Print Option functions, instead of continuing with step 8, press u or d until CONTINUE is displayed in the Print Option menu, and then press n. (Refer to Printing multiple copies of a label on page 35 and Printing mirrored labels on page 38.) ☞ To quit using the template, display the last field, and then press n. The template menu appears. Press u or d until EXIT appears, and then press n. ☞ While trying to print a large amount of data at one time, some outputted labels may be blank. For example, when printing 50 records, the maximum number of characters that can be printed at one time is limited to approximately 200. Using downloaded database data An Excel, Access, *.mdb database created with P-touch Editor 5.0, or a database converted to a *.csv file can be transferred to the P-touch labeler. The database data can be used either with a linked template transferred to the P-touch labeler, or added to a label created from the P-touch labeler keyboard. Adding database data to a label 1 Move the cursor to place in the text where you wish to add the database data. 2 Press g, then i. 3 Press u or d until the record containing the desired data is flashing. 4 Press l or r until the desired data is flashing. 5 Press n. The selected data is added to the label text. 68
-
 1
1 -
2
-
3
-
4
-
5
-
6
-
7
-
8
-
9
-
10
-
11
-
12
-
13
-
14
-
15
-
16
-
17
-
18
-
19
-
20
-
21
-
22
-
23
-
24
-
25
-
26
-
27
-
28
-
29
-
30
-
31
-
32
-
33
-
34
-
35
-
36
-
37
-
38
-
39
-
40
-
41
-
42
-
43
-
44
-
45
-
46
-
47
-
48
-
49
-
50
-
51
-
52
-
53
-
54
-
55
-
56
-
57
-
58
-
59
-
60
-
61
-
62
-
63
-
64
-
65
-
66
-
67
-
68
-
69
-
70
-
71
-
72
-
73
-
74
-
75
-
76
-
77
-
78
-
 79
79 -
 80
80 -
 81
81 -
 82
82 -
 83
83 -
 84
84 -
 85
85 -
 86
86 -
 87
87 -
 88
88 -
 89
89 -
90
-
91
-
92
-
93
-
94
-
95
-
96
-
97
-
98
-
99
-
100
-
101
-
102
-
103
-
104
-
105
-
106
-
107
-
108
-
109
-
110
-
111
-
112
-
113
-
114
-
115
-
116
-
117
-
118
-
119
-
120
-
121
-
122
-
123
-
124
-
125
-
126
-
127
-
128
-
129
-
130
-
131
-
132
-
133
-
134
-
135
-
136
-
137
-
138
-
139
-
140
-
141
-
142
-
143
-
144
-
145
-
146
-
147
-
148
-
149
-
150
-
151
-
152
-
153
-
154
-
155
-
156
-
157
-
158
-
159
-
160
-
161
-
162
-
163
-
164
-
165
-
166
-
167
-
168
-
169
-
170
-
171
-
172
-
173
-
174
-
175
-
176
-
177
-
178
-
179
-
180
-
181
-
182
-
183
-
184
-
185
-
186
-
187
-
188
-
189
-
190
-
191
-
192
-
193
-
194
-
195
-
196
-
197
-
198
-
199
-
200
-
201
-
202
-
203
-
204
-
205
-
206
-
207
-
208
 |
 |
