Brother International TD-4750TNWB Users Guide
Brother International TD-4750TNWB Manual
 |
View all Brother International TD-4750TNWB manuals
Add to My Manuals
Save this manual to your list of manuals |
Brother International TD-4750TNWB manual content summary:
- Brother International TD-4750TNWB | Users Guide - Page 1
User's Guide TD-4650TNWB/4650TNWBR/TD-4750TNWB/4750TNWBR TD-4650TNWB/4650TNWBR TD-4750TNWB/4750TNWBR User's Guide (English) User's Guide TD-4650TNWB/4650TNWBR/TD-4750TNWB/4750TNWBR © 2020 Brother Industries, Ltd. All rights reserved. Version 03 ENG - Brother International TD-4750TNWB | Users Guide - Page 2
, and firmware in the printer described therein are owned by Brother. All rights reserved. Information in this document is subject to change without notice and does not represent a commitment on the part of the company. No part of this manual may be reproduced or transmitted in any form or by any - Brother International TD-4750TNWB | Users Guide - Page 3
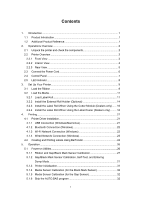
Contents 1. Introduction ...1 1.1 Product Introduction 1 1.2 Additional Product Reference 1 2. Operations Overview 2 2.1 Unpack the printer and check the components 2 2.2 Printer Overview 3 2.2.1 Front View 3 2.2.2 Interior View 4 2.2.3 Rear View 5 2.3 Connect the Power Cord 6 2.4 Control - Brother International TD-4750TNWB | Users Guide - Page 4
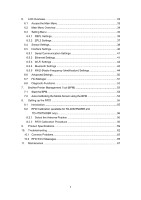
55 8.1 Introduction ...55 8.2 RFID Calibration (available for TD-4650TNWBR and TD-4750TNWBR only 56 8.2.1 Select the Antenna Position 56 8.2.2 RFID Calibration Procedure 56 9. Product Specifications 59 10. Troubleshooting 62 10.1 Common Problems 62 10.2 RFID Error Messages 65 11. Maintenance - Brother International TD-4750TNWB | Users Guide - Page 5
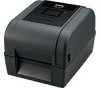
1. Introduction 1.1 Product Introduction The sleek design of the TD-4650TNWB/4650TNWBR/4750TNWB/4750TNWBR label printer can handle up to 984 ft (300 m) of ribbon and label rolls. Its internal 5" (127 mm) label capacity can be further expanded with - Brother International TD-4750TNWB | Users Guide - Page 6
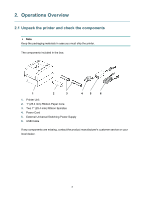
Core 3. Two 1" (25.4 mm) Ribbon Spindles 4. Power Cord 5. External Universal Switching Power Supply 6. USB Cable If any components are missing, contact the product manufacturer's customer service or your local dealer. 2 - Brother International TD-4750TNWB | Users Guide - Page 7
2.2 Printer Overview 2.2.1 Front View 7 1 6 2 3 5 4 1. LED Indicator 2. LCD 3. Feed/Pause Button (controls the icon on the right side of the LCD) 4. Roll Compartment Cover Open Tab 5. Label Output Slot 6. Navigation Buttons 7. Menu Button (controls the icon on the left side of the LCD) 3 - Brother International TD-4750TNWB | Users Guide - Page 8
6. Platen Roller 7. Ribbon Rewind Hub 8. Ribbon Supply Hub 9. Media Adapter 10. Gap Sensor 11. Media Guide Tips 12. Black Mark Sensor 13. RFID Antenna Slider (TD-4650TNWBR and TD-4750TNWBR only) WARNING DO NOT touch rotating parts. There is a risk of injury if your finger is caught in the rotating - Brother International TD-4750TNWB | Users Guide - Page 9
2.2.3 Rear View 1 2 34 5 6 1. Power Switch 2. Power Port 3. USB Port (USB 2.0/Hi-Speed mode) 4. USB Host Port 5. RS-232 Serial Port 6. Ethernet Port Note For more information, see 9. Product Specifications. 5 - Brother International TD-4750TNWB | Users Guide - Page 10
2.3 Connect the Power Cord Note Before you plug the Power Cord into the Power Port, make sure the printer's Power Switch is in the OFF position. Place the printer on a flat, secure surface. For more information, see 9. Product Specifications. 1. Plug the Power Cord into the Power Port at the - Brother International TD-4750TNWB | Users Guide - Page 11
2.4 Control Panel 1 2 No. Description Functionality Menu Button (Left): - Opens the LCD menu in Ready Mode. - Selects the left icon in the LCD footer. Feed/Pause Button (Right): 1 Soft Buttons - Ejects one label length of the media in Ready Mode. - Selects the right icon in the LCD - Brother International TD-4750TNWB | Users Guide - Page 12
to use. The printer is downloading data from a computer. The printer is paused. The printer is removing data. The Print Head is open. There is a problem with the Cutter Module. There is a memory error or printing error (for example: jammed paper, no paper, no ribbon). 8 - Brother International TD-4750TNWB | Users Guide - Page 13
3. Set Up Your Printer 3.1 Load the Ribbon 1. Press the tabs located on each side of the printer, and then lift the Roll Compartment Cover. 2. Use one of the following paper cores: For 1" (25.4 mm) and 0.5" (12.7 mm) paper cores with notches, you do not need to install the ribbon spindles. For - Brother International TD-4750TNWB | Users Guide - Page 14
3. a. First, insert the right side of the Ribbon Rewind Spindle (marked "R") into the Ribbon Rewind Hub. Then, insert the left side of the Ribbon Rewind Spindle into the hole on the left side of the Ribbon Rewind Hub. b. Insert the right side of the Ribbon Supply Spindle (marked "R") into the Ribbon - Brother International TD-4750TNWB | Users Guide - Page 15
the Media 3.2.1 Load Label Roll 1. Press the tabs located on each side of the printer, and then lift the Roll Compartment Cover. 2. Slide both Roll Guides outwards. 3. Insert the paper roll with the labels facing up, as shown in the illustration. Push down and slide the lock tab to lock the - Brother International TD-4750TNWB | Users Guide - Page 16
Guide Tips RFID Antenna Slide (TD-4650TNWBR and TD-4750TNWBR) Note For black mark media or media with notches or holes used to indicate the label length, the Black Mark sensor is moveable. Slide the Media Guide . 7. Use the LCD menu or the Brother Printer Management Tool (BPM) to set the - Brother International TD-4750TNWB | Users Guide - Page 17
mm) hex key (purchased separately) to remove the Media Adapter located on both sides of the Roll Guides. 2. Reverse the direction of the Media Adapter and align it with the Roll Guide. Note The Roll Guide can be converted from a 1" core to 1.5" core by reversing the Media Adapter. For 1" core For - Brother International TD-4750TNWB | Users Guide - Page 18
3.2.2 Install the External Roll Holder (Optional) 1. Tighten the screws on the metal fittings of the extended plate. 2. Attach the extended plate to the bottom of the printer. 3. Insert a 3" (76.2 mm) Label Spindle into a paper roll. Then, install it on the External Roll Holder. Note Make sure that - Brother International TD-4750TNWB | Users Guide - Page 19
6. Install the label roll as described in section 3.2.1 Load Label Roll. 7. Feed the media through the media sensor. Adjust the Media Guide Tips to fit the label width. 8. Use the Brother Printer Management Tool (BPM) or LCD menu to set the media sensor type and calibrate the selected sensor. Media - Brother International TD-4750TNWB | Users Guide - Page 20
label roll as described in section 3.2.1 Load Label Roll. 3. Use the Brother Printer Management Tool (BPM) to set the media sensor type and calibrate the sensor. 4. Feed the label roll through the media sensor. Adjust the Media Guide Tips to fit the label width. 5. Push the label roll through the - Brother International TD-4750TNWB | Users Guide - Page 21
6. Close the Roll Compartment Cover. 7. Use the Brother Printer Management Tool (BPM) to set the printer for Cutter Mode. a. Start the BPM. b. Click the Printer Configuration button. c. Click the FBPL tab. d. Click the - Brother International TD-4750TNWB | Users Guide - Page 22
label roll as described in section 3.2.1 Load Label Roll. 3. Use the Brother Printer Management Tool (BPM) to set the media sensor type and calibrate the sensor. 4. Feed the label roll through the media sensor. Adjust the Media Guide Tips to fit the label width. 5. Pull the media out of the printer - Brother International TD-4750TNWB | Users Guide - Page 23
6. Open the Label Peeler Cover. Feed the liner into the Label Peeler Cover Slot. 7. Close the Label Peeler Module. Label Peeler Cover Slot 8. Close the Roll Compartment Cover. 19 - Brother International TD-4750TNWB | Users Guide - Page 24
9. Use the Brother Printer Management Tool (BPM) to set Label Peeler Mode. a. Start the BPM. b. Click the Printer Configuration Click Set. f. Press the Feed/Pause button to test. Note The Label Peeler Module supports only plain paper labels. Printer settings can also be changed using the LCD. 20 - Brother International TD-4750TNWB | Users Guide - Page 25
see the driver installation guide provided with the driver. 1. Connect your printer to the computer using a USB cable. 2. Visit support.brother.com, go to 4. Follow the on-screen instructions. Note If you cannot install a printer driver: Install a printer driver manually: In the Seagull Driver - Brother International TD-4750TNWB | Users Guide - Page 26
. 5. Visit support.brother.com, go to your model's Downloads page, and download the latest printer driver and software. 6. Run the Seagull Driver Wizard application and select Install printer drivers and Bluetooth. 7. Follow the on-screen instructions or Internet service provider. - Brother International TD-4750TNWB | Users Guide - Page 27
Wi-Fi icon and printer's IP address appear on the LCD. 2. Visit support.brother.com, go to your model's Downloads page, and download the latest printer Port window and select the port you created. 9. Follow the on-screen instructions. Note If you cannot install a printer driver: Remove the printer - Brother International TD-4750TNWB | Users Guide - Page 28
and Printing Labels Using BarTender BarTender is a label creation tool, which can be downloaded for free from the product's page at support.brother.com. 1. Launch BarTender. • For Windows 10, Windows Server 2016, or Windows Server 2019: Start > BarTender 2016 R7 UltraLite > click BarTender UltraLite - Brother International TD-4750TNWB | Users Guide - Page 29
2. Follow the on-screen steps to create a label. Note For more information on using BarTender, click Help. 3. Click File > Print to print the label. Note When the Partial Cut setting is selected, a blank area of about 2.4" (60 mm) is added between the cut line and the print area, as illustrated. - Brother International TD-4750TNWB | Users Guide - Page 30
5. Operation 5.1 Power-on Utilities There are six power-on utilities to set up and test the printer's functions. To activate a power-on utility: 1. Turn off the printer. 2. Press and hold the Feed/Pause button, and then turn on the printer. 3. Release the button when the LED indicates the function - Brother International TD-4750TNWB | Users Guide - Page 31
Black Mark Sensor: send the BLINE command For more information about the available commands, see the FBPL Command Reference Manual on your model's Manuals page at support.brother.com. 5.1.2 Gap/Black Mark Sensor Calibration, Self-Test, and Entering Dump Mode Calibrate the Gap or Black Mark Sensor - Brother International TD-4750TNWB | Users Guide - Page 32
Black Mark Sensor: send the BLINE command For more information about the available commands, see the FBPL Command Reference Manual on your model's Manuals page at support.brother.com. Self-test Print the printer configuration after you run Gap/Black Mark Sensor calibration. The self-test printout - Brother International TD-4750TNWB | Users Guide - Page 33
Self-test printout Print darkness Print speed (inch/sec) Label size Control prefix Format prefix Delimiter prefix Printer power up motion Print Head close motion RS232 Serial Port configuration Bluetooth configuration Country of RFID frequency band Printer name Mac Address DHCP IP Address Subnet - Brother International TD-4750TNWB | Users Guide - Page 34
Self-test printout Number of downloaded files Total and available memory space Print Head check pattern Dump Mode Note Dump Mode requires 4" (101.5 mm) wide paper. To resume normal printing, turn the printer off and then on again. The printer enters Dump Mode after printing the printer - Brother International TD-4750TNWB | Users Guide - Page 35
5.1.3 Printer Initialization Printer initialization clears the printer's DRAM and restores its factory settings. 1. Turn off the printer. 2. Press and hold the Feed/Pause button, and then turn on the printer. 3. Release the button after the amber LED flashes five times and the LED is lit in green/ - Brother International TD-4750TNWB | Users Guide - Page 36
5.1.4 Media Sensor Calibration (for the Black Mark Sensor) 1. Turn off the printer. 2. Press and hold the Feed/Pause button, and then turn on the printer. 3. Release the button after the green/red LED flashes five times and the LED is lit in green. Note The LED color will change as follows: Amber ( - Brother International TD-4750TNWB | Users Guide - Page 37
6. LCD Overview 6.1 Access the Main Menu Make sure the printer's LCD displays "Ready". If not, select the Menu icon . Use the Navigation buttons to browse the Main menu options. - To select a highlighted icon, press the button under the icon. - To return to the previous screen, press the button - Brother International TD-4750TNWB | Users Guide - Page 38
's LCD, initialization, cutter type, or media low warning settings. File Manager Check or manage the available printer memory. Diagnostic Check the printer status to help troubleshoot any issues. 34 - Brother International TD-4750TNWB | Users Guide - Page 39
6.3 Setting Menu 1. In the Main menu, select Setting. 2. Press Command Set, and then select the programming language you want. 3. Select the icon. 6.3.1 FBPL Settings Available FBPL settings: Setting FBPL Speed Density Direction Print Mode Offset Shift X Shift Y Reference X Reference Y Code Page - Brother International TD-4750TNWB | Users Guide - Page 40
Setting Speed Density Direction Set up the print speed. Description Adjust the print darkness/lightness. Settings range from 0 to 15. You may need to adjust the print density based on the media. Specify print direction. DIRECTION 0 DIRECTION 1 FEED Print Mode Offset Shift X Shift Y Reference - Brother International TD-4750TNWB | Users Guide - Page 41
6.3.2 ZPL2 Settings Available ZPL2 settings: Menu ZPL2 Darkness Print Speed Tear Off Print Mode Print Width List Fonts List Images List Formats List Setup Control Prefix Format Prefix Delimiter Char Media Power Up Head Close Label Top Left Position Reprint Mode Format Convert Tear Off Peeler Off - Brother International TD-4750TNWB | Users Guide - Page 42
Setting Darkness Description Set up the print darkness. Settings range from 0 to 30. You may need to adjust the print density based on the selected media. Print Speed Tear Off Print Mode Set up the print speed. Settings range from: 2 to 8 for 203 dpi 2 to 6 for 300 dpi Fine-tune the media - Brother International TD-4750TNWB | Users Guide - Page 43
set from the LCD. 6.4 Sensor Settings We recommend calibrating the sensors every time you change the media. Menu Sensor Auto Calibration Manual Calibration Threshold Detect Maximum Length Gap/Bline Ref Rate Advanced Gap Black Mark Continuous Preprint Standard Auto Fixed Gap Ref Rate Bline Ref - Brother International TD-4750TNWB | Users Guide - Page 44
to calibrate the sensor sensitivity automatically. If "Automatic" cannot apply to the media, use the "Manual" function to set the paper length and gap/BLINE size, and then scan the backing/mark Menu Interface Ethernet Wi-Fi Bluetooth RFID* * Available for: TD-4650TNWBR and TD-4750TNWBR. 40 - Brother International TD-4750TNWB | Users Guide - Page 45
6.5.1 Serial Communication Settings Set the printer RS-232 settings. Baud Rate Menu Interface Serial Parity Data Bits Stop Bit(s) Setting Baud Rate Parity Data Bits Stop Bit(s) Set the RS-232 Baud rate. Description Set the RS-232 Parity. Set the RS-232 Data bits. Set the RS-232 Stop bits. - Brother International TD-4750TNWB | Users Guide - Page 46
For more information on setting Wi-Fi using BPM, see the Brother Printer Management Tool Quick Start Guide on your model's Manuals page at support.brother.com. When the Wi-Fi module is connected, the Wi-Fi contact the router manufacturer, your system administrator, or Internet service provider. 42 - Brother International TD-4750TNWB | Users Guide - Page 47
Menu Interface Wi-Fi Status Configure SSID Security Password Open WEP1 WEP2 WEP3 WEP4 WPA-PSK Item Status Description Check the Wi-Fi IP address and Mac address setting status. Configure DHCP: Enable (On) or disable (Off) the Dynamic Host Configuration Protocol (DHCP) network protocol. - Brother International TD-4750TNWB | Users Guide - Page 48
, see section 4.1.2 Bluetooth Connection (Windows). 6.5.5 RFID (Radio Frequency Identification) Settings Set the printer RFID settings. (Available for TD-4650TNWBR and TD-4750TNWBR only) Menu Interface RFID Control Tag Calibration Calibration Param RFID Chip Param Diagnostics Statistics 44 - Brother International TD-4750TNWB | Users Guide - Page 49
position to be printed. Label Retry Specifies the number of label retries that the RFID encoder will attempt before declaring a fault. This may indicate a problem with the RFID encoder, the printer setup, or the label stock. Minimum Maximum 1 10 (Default) Max Retry Error EPC Write Ctrl Non-RFID - Brother International TD-4750TNWB | Users Guide - Page 50
RFID calibration, but it should not be increased to a value greater than the maximum EPC length that the current Tag Type can support. Minimum 16 Maximum 256 Default 96 Calibration Param Contains the settings used for optimal tag encoding. These parameters can be obtained automatically through - Brother International TD-4750TNWB | Users Guide - Page 51
Item Description These settings are used to configure the system when custom RFID tags are required. USR Size Specifies the USR block bytes size within the RFID tag memory. Normally, this value is set automatically by the RFID calibration process and should not be changed. Minimum Maximum 0 ( - Brother International TD-4750TNWB | Users Guide - Page 52
not be changed. Minimum 0 Maximum 32 Default 8 These settings are used to run test procedures to help determine the accuracy of the RFID system and troubleshoot it. Read Tag Reads the tag in range of the internal RFID coupler and reports the tag data to the debug port and displays it - Brother International TD-4750TNWB | Users Guide - Page 53
Item Description Read USR Reads the User Memory bank of the tag in range of the internal RFID coupler and reports the data to the debug port and displays it on the LCD. It is primarily intended for development verification by checking that the system is working. Note This menu item does not - Brother International TD-4750TNWB | Users Guide - Page 54
the RFID firmware version installed in the encoder. (Available for TD-4650TNWBR and TD-4750TNWBR) Displays the RFID hardware version installed in the encoder. (Available for TD-4650TNWBR and TD-4750TNWBR) 6.6 Advanced Settings Menu Advanced Language Printer Information Initialization Display - Brother International TD-4750TNWB | Users Guide - Page 55
default setting is 1 km. Key Sound Enable or disable the button press sound. Contact us Display a QR code to access the Brother Support website at support.brother.com using a mobile device. 6.7 File Manager Check the printer's available memory, show the files list, delete the files, or run the - Brother International TD-4750TNWB | Users Guide - Page 56
6.8 Diagnostic Functions Menu Diagnostic Print Config. Dump Mode Print Head Display Sensor Diag Gap Diag Black Mark Item Description Print Config. Print the current printer configuration. On the configuration printout, there is a Print Head test pattern, which is useful for checking if there - Brother International TD-4750TNWB | Users Guide - Page 57
, you can also review your printer's status and settings to troubleshoot any problems. 7.1 Start the BPM Double-click the BPM icon to start Bitmap Font Manager For more information, see the Brother Printer Management Tool Quick Start Guide on your model's Manuals page at support.brother.com. 53 - Brother International TD-4750TNWB | Users Guide - Page 58
7.2 Auto-Calibrating the Media Sensor using the BPM Use the BPM to set the media sensor type (Gap Sensor or Black Mark Sensor) and calibrate the selected sensor. Gap Sensor Black Mark Sensor The Gap Sensor (transmissive sensor) detects the beginning of the label and feeds the label to the correct - Brother International TD-4750TNWB | Users Guide - Page 59
8. Setting up the RFID 8.1 Introduction When printing smart labels that use an EEPROM technology, the printer may need to write and verify some RFID tags more than once before accepting them. This additional processing may result in a short pause between each printed label, but is necessary to - Brother International TD-4750TNWB | Users Guide - Page 60
8.2 RFID Calibration (available for TD-4650TNWBR and TD-4750TNWBR only) 8.2.1 Select the Antenna Position Check the label to determine the best position for the antenna, locating the antenna loop within the tag. In most - Brother International TD-4750TNWB | Users Guide - Page 61
and height in the FBPL tab are set correctly. Using the AUTODETECT command: Note For more information, see the FBPL Command Reference Manual on your model's Manuals page at support.brother.com. 2. Check that the RFID antenna is set at the center of the RFID chip or the antenna loop on the tag. For - Brother International TD-4750TNWB | Users Guide - Page 62
RFID (Radio Frequency Identification) Settings. Using the RFIDDETECT command: Note For more information, see the FBPL Command Reference Manual on your model's Manuals page at support.brother.com. 4. Depending on the tag type and tag length, the calibration can take several minutes. At the end of - Brother International TD-4750TNWB | Users Guide - Page 63
. (TD-4750TNWB, TD-4750TNWBR) 1000" (25,400 mm) (TD-4650TNWB, TD-4650TNWBR) 450" (11,430 mm) (TD-4750TNWB, TD-4750TNWBR) 8" (203.2 mm) / second (TD-4650TNWB, TD-4650TNWBR) 6" (152.4 mm) / second (TD-4750TNWB, TD-4750TNWBR) 203 dpi (TD-4650TNWB, TD-4650TNWBR) 300 dpi (TD-4750TNWB, TD-4750TNWBR) Size - Brother International TD-4750TNWB | Users Guide - Page 64
24 V, 3.75 A, 90 W Paper Specification Media Type Continuous, die-cut, black mark, fan-fold, notch, punched hole media, Gen2 RFID tag (TD-4650TNWBR, TD-4750TNWBR) Wound Type Outside wound Media Width 0.8" - 4.4" (20 mm - 112 mm) Media Thickness 2.36 mil - 7.48 mil (0.06 mm - 0.19 mm) Roll - Brother International TD-4750TNWB | Users Guide - Page 65
in Fonts 8 alphanumeric bitmap fonts Monotype Imaging® TrueType font engine with one CG Triumvirate Bold Condensed scalable font *1 Not compatible with RFID tags. *2 Only authorized Brother Dealers should perform accessory replacements. 61 - Brother International TD-4750TNWB | Users Guide - Page 66
the following tasks correctly. If you still have problems, contact the product manufacturer's customer service or your local dealer. Problem The LED Indicator is not lit. Possible Cause The Power Cord is not correctly connected. - The Brother Printer Management Tool shows Head Open. - The LED - Brother International TD-4750TNWB | Users Guide - Page 67
Problem I cannot print. Memory full (FLASH/DRAM). Poor Print Quality. Labels are skipped when printing. Possible Cause The media. Check if the label size is set up correctly. Calibrate the sensor using the Auto Gap or Manual Gap options. Clean the Gap/Black Mark Sensor using a blower brush. 63 - Brother International TD-4750TNWB | Users Guide - Page 68
Problem The printing position of small labels is incorrect. Possible Cause The Load the Media. Adjust the print density to improve the print quality. Make sure the label guide touches the edge of the Media Guide Tips. Clean the Print Head. Clean the Platen Roller. Turn the printer on and off to - Brother International TD-4750TNWB | Users Guide - Page 69
10.2 RFID Error Messages The RFID encoder can detect several errors. When these errors occur, the RFID encoder alerts the printer and the LCD displays the appropriate error message. Error Message Possible Cause Solution RFID Is Disabled The RFID function is not Select RFID > Control > RFID - Brother International TD-4750TNWB | Users Guide - Page 70
Error Message RFID TAG FAILED RFID ERROR No Tag Found Remove Label or No Paper Possible Cause Solution The tag cannot be written. The label could be misaligned. Perform the Sensor > Auto Calibration procedure to ensure the label is at top-of-form. Select RFID > Control > Tag Calibration > - Brother International TD-4750TNWB | Users Guide - Page 71
11. Maintenance We recommend cleaning your printer on a regular basis to maintain its correct performance. Recommended cleaning materials: Cotton swab Lint-free cloth Vacuum / Blower brush Compressed air Isopropyl alcohol or ethanol Printer Part Cleaning Method Interval 1. Turn the - Brother International TD-4750TNWB | Users Guide - Page 72
Printer Part Exterior Interior Cleaning Method Wipe the printer exterior with a lint-free cloth dipped in water. Use a brush or vacuum. As needed. Interval As needed. Note Do not touch the Print Head. If you have touched it, clean it as described above. Do not use medical alcohol as it may - Brother International TD-4750TNWB | Users Guide - Page 73
-
 1
1 -
 2
2 -
 3
3 -
 4
4 -
 5
5 -
 6
6 -
 7
7 -
8
-
9
-
10
-
11
-
12
-
13
-
14
-
15
-
16
-
17
-
18
-
19
-
20
-
21
-
22
-
23
-
24
-
25
-
26
-
27
-
28
-
29
-
30
-
31
-
32
-
33
-
34
-
35
-
36
-
37
-
38
-
39
-
40
-
41
-
42
-
43
-
44
-
45
-
46
-
47
-
48
-
49
-
50
-
51
-
52
-
53
-
54
-
55
-
56
-
57
-
58
-
59
-
60
-
61
-
62
-
63
-
64
-
65
-
66
-
67
-
68
-
69
-
70
-
71
-
72
-
73
 |
 |

User's Guide
TD-4650TNWB/4650TNWBR/TD-4750TNWB/4750TNWBR
TD-4650TNWB/4650TNWBR
TD-4750TNWB/4750TNWBR
User's Guide (English)
User's Guide TD-4650TNWB/4650TNWBR/TD-4750TNWB/4750TNWBR
© 2020 Brother Industries, Ltd. All rights reserved.
Version 03
ENG