Canon PIXMA MX922 User Manual - Page 16
Setting the Sender Information - how to send a fax
 |
View all Canon PIXMA MX922 manuals
Add to My Manuals
Save this manual to your list of manuals |
Page 16 highlights
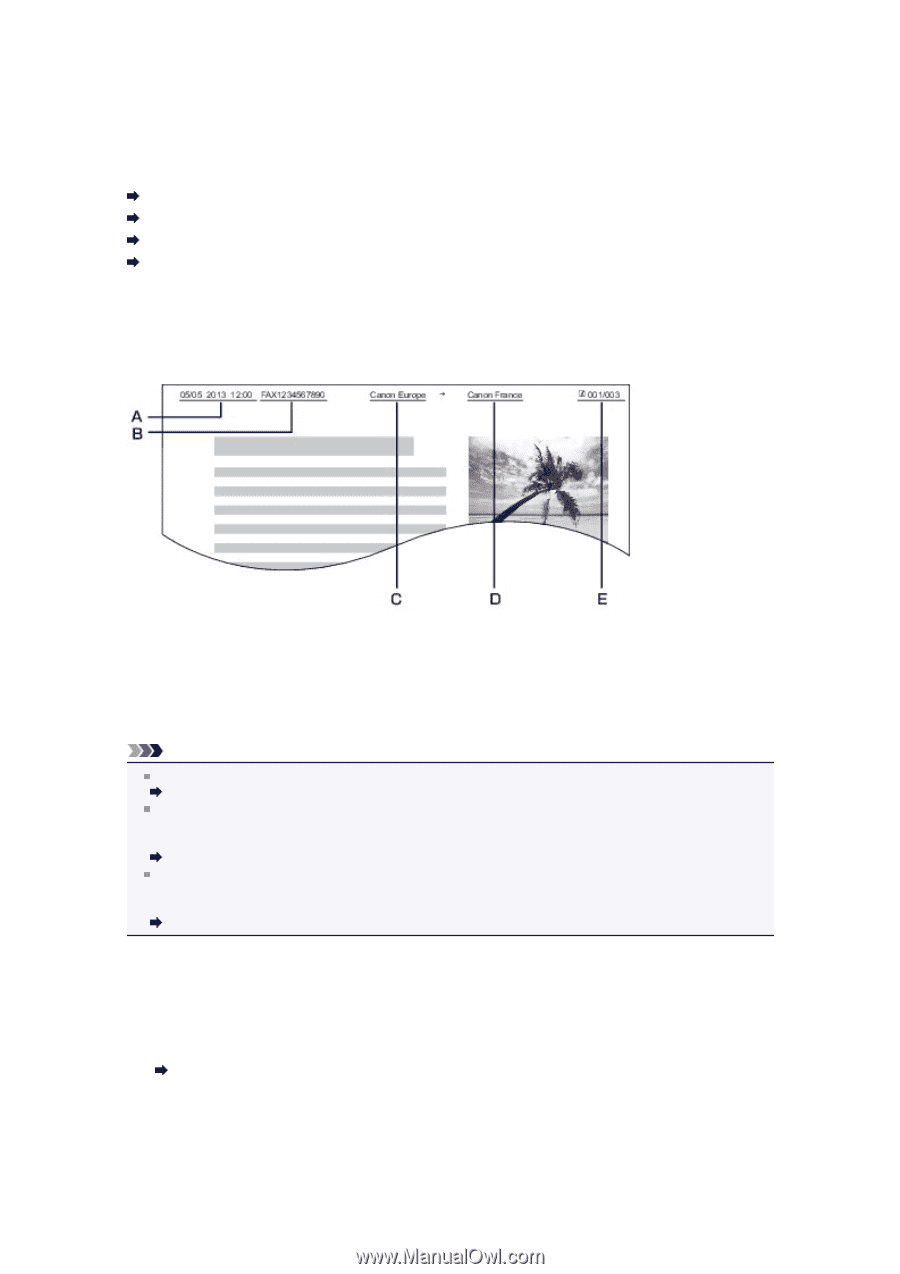
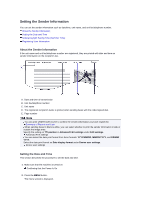
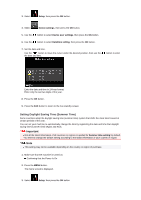
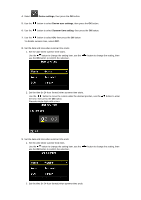
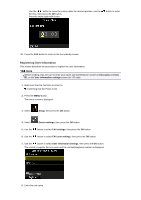
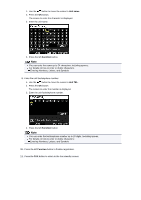
Setting the Sender Information You can set the sender information such as date/time, unit name, and unit fax/telephone number. About the Sender Information Setting the Date and Time Setting Daylight Saving Time (Summer Time) Registering User Information About the Sender Information If the unit name and unit fax/telephone number are registered, they are printed with date and time as sender information on the recipient's fax. A. Date and time of transmission B. Unit fax/telephone number C. Unit name D. The registered recipient's name is printed when sending faxes with the coded speed dial. E. Page number Note You can print USER'S DATA LIST to confirm the sender information you have registered. Summary of Reports and Lists When sending faxes in black & white, you can select whether to print the sender information inside or outside the image area. Specify the setting on TTI position in Advanced FAX settings under FAX settings. Advanced FAX settings You can select the date print format from three formats: YYYY/MM/DD, MM/DD/YYYY, and DD/MM/ YYYY. Select the date print format on Date display format under Device user settings. Device user settings Setting the Date and Time This section describes the procedure to set the date and time. 1. Make sure that the machine is turned on. Confirming that the Power Is On 2. Press the MENU button. The menu screen is displayed.
-
 1
1 -
2
-
3
-
4
-
5
-
6
-
7
-
8
-
9
-
10
-
 11
11 -
 12
12 -
 13
13 -
 14
14 -
 15
15 -
 16
16 -
 17
17 -
 18
18 -
 19
19 -
 20
20 -
 21
21 -
22
-
23
-
24
-
25
-
26
-
27
-
28
-
29
-
30
-
31
-
32
-
33
-
34
-
35
-
36
-
37
-
38
-
39
-
40
-
41
-
42
-
43
-
44
-
45
-
46
-
47
-
48
-
49
-
50
-
51
-
52
-
53
-
54
-
55
-
56
-
57
-
58
-
59
-
60
-
61
-
62
-
63
-
64
-
65
-
66
-
67
-
68
-
69
-
70
-
71
-
72
-
73
-
74
-
75
-
76
-
77
-
78
-
79
-
80
-
81
-
82
-
83
-
84
-
85
-
86
-
87
-
88
-
89
-
90
-
91
-
92
-
93
-
94
-
95
-
96
-
97
-
98
-
99
-
100
-
101
-
102
-
103
-
104
-
105
-
106
-
107
-
108
-
109
-
110
-
111
-
112
-
113
-
114
-
115
-
116
 |
 |