Canon PIXMA mini260 Photo Printing Guide - Page 10
Select the menu., Easy-Scroll Wheel, Special photo, print, Select and print, Layout print - printers
 |
View all Canon PIXMA mini260 manuals
Add to My Manuals
Save this manual to your list of manuals |
Page 10 highlights
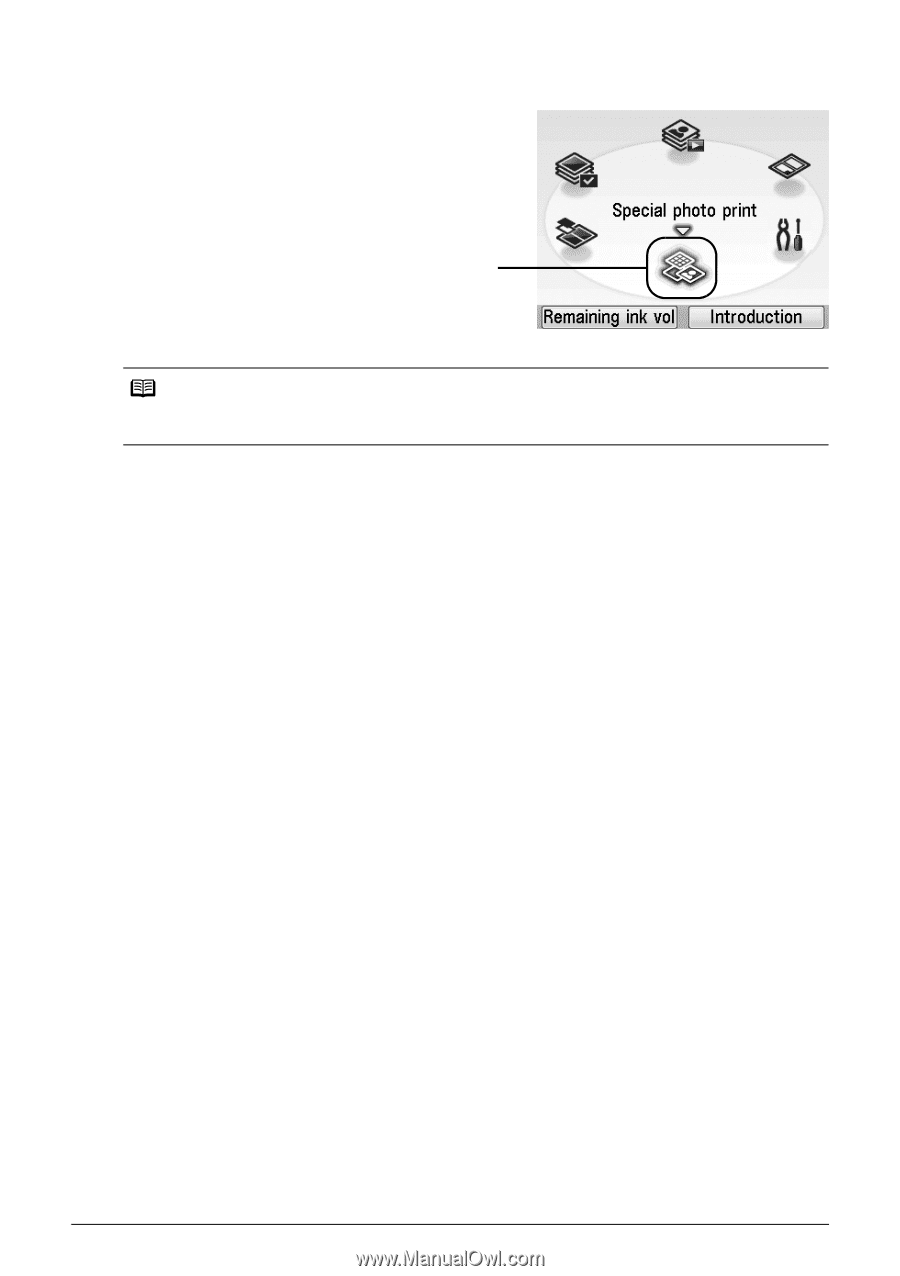
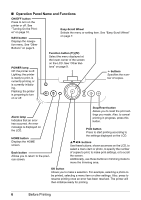
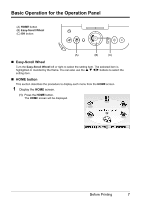
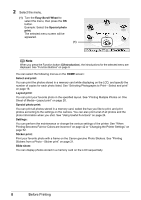
2 Select the menu. (1) Turn the Easy-Scroll Wheel to select the menu, then press the OK button. Example: Select the Special photo print. The selected menu screen will be appeared. (1) Note When you press the Function button (f2/Introduction), the introductions for the selected menu are displayed. See "Function Buttons" on page 9. You can select the following menus on the HOME screen: Select and print: You can print the photos stored in a memory card while displaying on the LCD, and specify the number of copies for each photo listed. See "Selecting Photographs to Print-Select and print" on page 18. Layout print: You can print your favorite photo in the specified layout. See "Printing Multiple Photos on One Sheet of Media-Layout print" on page 20. Special photo print: You can print all photos stored in a memory card, select the hue you like to print, and print photos according to the settings on the camera. You can also print a list of all photos and the photo information when you shot. See "Using Useful Functions" on page 24. Settings: You can perform the maintenance or change the various settings of the printer. See "When Printing Becomes Faint or Colors are Incorrect" on page 42 or "Changing the Printer Settings" on page 52. Sticker print: Print your favorite photo with a frame on the Canon genuine Photo Stickers. See "Printing Stickers from a Photo-Sticker print" on page 21. Slide show: You can display photos stored in a memory card on the LCD sequentially. 8 Before Printing
-
 1
1 -
2
-
3
-
4
-
 5
5 -
 6
6 -
 7
7 -
 8
8 -
 9
9 -
 10
10 -
 11
11 -
 12
12 -
 13
13 -
 14
14 -
 15
15 -
16
-
17
-
18
-
19
-
20
-
21
-
22
-
23
-
24
-
25
-
26
-
27
-
28
-
29
-
30
-
31
-
32
-
33
-
34
-
35
-
36
-
37
-
38
-
39
-
40
-
41
-
42
-
43
-
44
-
45
-
46
-
47
-
48
-
49
-
50
-
51
-
52
-
53
-
54
-
55
-
56
-
57
-
58
-
59
-
60
-
61
-
62
-
63
-
64
-
65
-
66
-
67
-
68
-
69
-
70
-
71
-
72
-
73
-
74
-
75
-
76
-
77
-
78
-
79
-
80
-
81
-
82
-
83
-
84
-
85
-
86
-
87
-
88
-
89
-
90
-
91
-
92
 |
 |