Canon PIXMA mini260 Photo Printing Guide - Page 36
About Image optimize, About Date/File No. print
 |
View all Canon PIXMA mini260 manuals
Add to My Manuals
Save this manual to your list of manuals |
Page 36 highlights
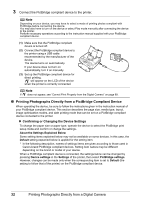
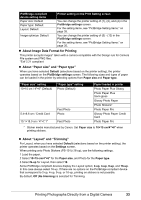
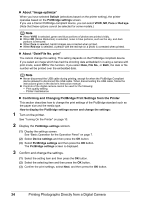
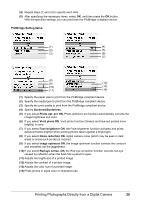
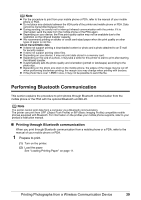
About "Image optimize" When you have selected Default (selections based on the printer setting), the printer operates based on the PictBridge settings screen. If you use a Canon PictBridge-compliant device, you can select VIVID, NR, Face or Red eye. (Note that these options cannot be selected for some models.) Note When VIVID is selected, green and blue portions of photos are printed vividly. When NR (Noise Reduction) is selected, noise in blue portions, such as the sky, and dark portions is removed. When Face is selected, backlit images are corrected when printed. When Red eye is selected, a person with the red eye on a photo is corrected when printed. About "Date/File No. print" You cannot change this setting. This setting depends on the PictBridge compliant device. If you select an image which has had the shooting date embedded in it using a camera with print mode, select Off for this function. If you select Date, File No., or Both, the date or file number will be printed over the embedded date. Note Never disconnect the USB cable during printing, except for when the PictBridge Compliant device allowed to disconnect the USB cable. When disconnecting the USB cable, follow the instructions given in the device's Instruction manual. Controls of the digital camera cannot be used for the following: - Print quality setting - Printer maintenance Confirming and Changing PictBridge Print Settings from the Printer This section describes how to change the print settings of the PictBridge standard such as the paper size and the media type. How to display the PictBridge settings screen and change the settings: 1 Turn on the printer. See "Turning On the Printer" on page 10. 2 Display the PictBridge settings screen. (1) Display the settings screen. See "Basic Operation for the Operation Panel" on page 7. (2) Select Device settings and then press the OK button. (3) Select PictBridge settings and then press the OK button. The PictBridge settings screen is displayed. 3 Confirm and change the settings. (1) Select the setting item and then press the OK button. (2) Select the selecting item and then press the OK button. (3) Confirm the print settings, select Next, and then press the OK button. 34 Printing Photographs Directly from a Digital Camera
-
 1
1 -
2
-
3
-
4
-
5
-
6
-
7
-
8
-
9
-
10
-
11
-
12
-
13
-
14
-
15
-
16
-
17
-
18
-
19
-
20
-
21
-
22
-
23
-
24
-
25
-
26
-
27
-
28
-
29
-
30
-
 31
31 -
 32
32 -
 33
33 -
 34
34 -
 35
35 -
 36
36 -
 37
37 -
 38
38 -
 39
39 -
 40
40 -
 41
41 -
42
-
43
-
44
-
45
-
46
-
47
-
48
-
49
-
50
-
51
-
52
-
53
-
54
-
55
-
56
-
57
-
58
-
59
-
60
-
61
-
62
-
63
-
64
-
65
-
66
-
67
-
68
-
69
-
70
-
71
-
72
-
73
-
74
-
75
-
76
-
77
-
78
-
79
-
80
-
81
-
82
-
83
-
84
-
85
-
86
-
87
-
88
-
89
-
90
-
91
-
92
 |
 |