Canon S4500 Utility Guide - Page 28
Using the customised scanning mode, Open the IS Scan Main dialogue box.
 |
View all Canon S4500 manuals
Add to My Manuals
Save this manual to your list of manuals |
Page 28 highlights
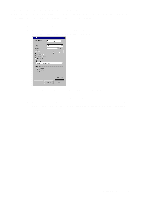
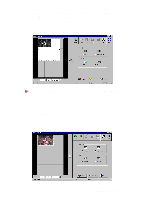
Using the customised scanning mode When you select Custom for Scanning Mode in the Main dialogue box, the Custom Settings dialogue box opens and allows you to adjust the scanning settings for special scanning jobs. 1 Open the IS Scan Main dialogue box. 2 Click the Custom button in the Scanning Mode box. 3 Specify the settings in the Custom Settings dialogue box. For more details on how to select the settings, refer to the on-line Help. 4 Click the OK button to return to the Main dialogue box. 5 Make sure that the image you wish to scan is inserted into the scanning holder properly and is loaded in the auto sheet feeder of the printer, then click the Scan or Prescan button. Using IS Scan 28
-
 1
1 -
2
-
3
-
4
-
5
-
6
-
7
-
8
-
9
-
10
-
11
-
12
-
13
-
14
-
15
-
16
-
17
-
18
-
19
-
20
-
21
-
22
-
 23
23 -
 24
24 -
 25
25 -
 26
26 -
 27
27 -
 28
28 -
 29
29 -
 30
30 -
 31
31 -
 32
32 -
 33
33 -
34
-
35
-
36
-
37
-
38
-
39
-
40
-
41
-
42
-
43
-
44
-
45
-
46
 |
 |

Using IS Scan
28
Using the customised scanning mode
When you select Custom for Scanning Mode in the Main dialogue box, the Custom Settings dialogue box
opens and allows you to adjust the scanning settings for special scanning jobs.
1
Open the IS Scan Main dialogue box.
2
Click the Custom button in the Scanning Mode box.
3
Specify the settings in the Custom Settings dialogue box.
For more details on how to select the settings, refer to the on-line Help.
4
Click the OK button to return to the Main dialogue box.
5
Make sure that the image you wish to scan is inserted into the scanning holder properly and
is loaded in the auto sheet feeder of the printer, then click the Scan or Prescan button.