Canon S4500 Utility Guide - Page 36
Capture Image screen buttons, Editing a Scanned Image
 |
View all Canon S4500 manuals
Add to My Manuals
Save this manual to your list of manuals |
Page 36 highlights
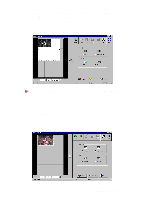
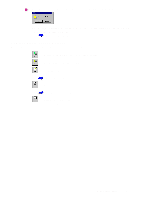
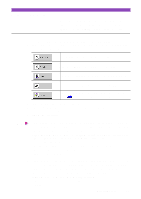
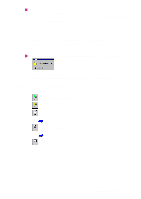
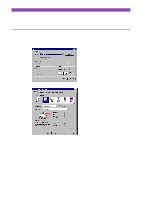
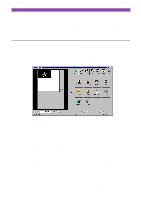
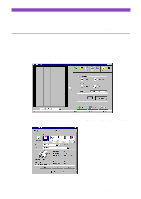
Note • To move the selection box, place the mouse pointer within the selection box and drag the mouse to the desired position. • To resize the selection box, move the mouse pointer to one of the eight points around the selection box and then drag the mouse. • You can confirm the dimensions of the selection box on the lower left corner of the screen. • The minimum size of the selection box is 25.4 mm × 25.4 mm (1" × 1"). 7 Load the image you wish to scan in the auto sheet feeder again. 8 Click the Scan button. (If you specified a selection box in Step 6, only a portion of the entire image is scanned.) Note When you click the Prescan or Scan button, the following message may appear. Load the white calibration sheet in the auto sheet feeder of the printer, and click the OK button. White level calibration begins. Refer to Reference Guide for details. Capture Image screen buttons The following buttons can also be used in the Capture Image screen. : Returns to the Main menu screen of IS Scan Plus. : Moves back to the previous screen. : Displays the Edit screen. Editing a Scanned Image : Prints a scanned image. Printing a Scanned Image : Saves a scanned image. Refer to Reference Guide for details. Using Capture Image 36
-
 1
1 -
2
-
3
-
4
-
5
-
6
-
7
-
8
-
9
-
10
-
11
-
12
-
13
-
14
-
15
-
16
-
17
-
18
-
19
-
20
-
21
-
22
-
23
-
24
-
25
-
26
-
27
-
28
-
29
-
30
-
 31
31 -
 32
32 -
 33
33 -
 34
34 -
 35
35 -
 36
36 -
 37
37 -
 38
38 -
 39
39 -
 40
40 -
 41
41 -
42
-
43
-
44
-
45
-
46
 |
 |
