Canon S4500 Utility Guide - Page 35
Using Capture Image, Use the Capture Image feature when you wish to scan an
 |
View all Canon S4500 manuals
Add to My Manuals
Save this manual to your list of manuals |
Page 35 highlights
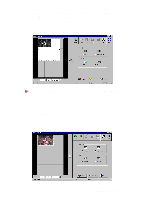
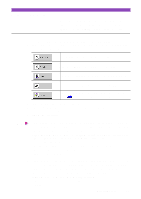
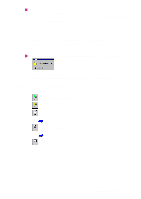
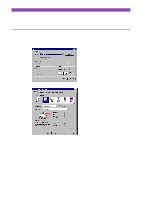
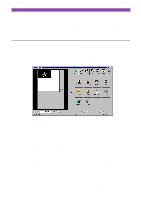
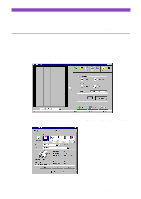
Using Capture Image Use the Capture Image feature when you wish to scan an image other than a photographic print. You can also edit, enhance, save and print the scanned image as desired. 1 Click the Capture Image button in the Main menu screen of IS Scan Plus. 2 Select the most appropriate icon in the Scanning Mode box of the Capture Image screen, according to the scanning job content. Standard setting for scanning a colour image. Standard setting for scanning a monochrome image. Suitable for scanning a photographic print such as a snapshot. Suitable for scanning an image that consists mostly of text. Used for customizing the settings for special scanning jobs. Using the customised scanning mode 3 Select the paper size in the Paper Size box. 4 Insert the image you wish to scan in the scanning holder correctly, and then load it in the auto sheet feeder of the printer. 5 Click the Prescan button. Note • Prescanning is a simplified trial scan before you actually scan the image. Normally prescanning is used to determine whether or not the image can be scanned properly, or when you wish to test the effects of image adjustments. • If a portion of the image is slanted or cut off in the preview area after prescanning is completed, follow the procedure below to perform prescanning again. 1) Click the Clear button. 2) Insert the image you wish to scan into the scanning holder correctly. 3) Load the image in the auto sheet feeder of the printer again. 4) Click the Prescan button. 6 When you wish to scan only a portion of the entire image, drag the mouse to specify the portion. (The specified portion is called a "selection box" and only the area in the selection box will be scanned.) To specify the selection box, follow the procedure below. 1) Point to a corner of the rectangular area of the image that you want to select. 2) Drag the mouse to the opposite corner of the rectangle. 3) Release the mouse button. The specified rectangle (the selection box) appears on the image. Using Capture Image 35
-
 1
1 -
2
-
3
-
4
-
5
-
6
-
7
-
8
-
9
-
10
-
11
-
12
-
13
-
14
-
15
-
16
-
17
-
18
-
19
-
20
-
21
-
22
-
23
-
24
-
25
-
26
-
27
-
28
-
29
-
 30
30 -
 31
31 -
 32
32 -
 33
33 -
 34
34 -
 35
35 -
 36
36 -
 37
37 -
 38
38 -
 39
39 -
 40
40 -
41
-
42
-
43
-
44
-
45
-
46
 |
 |
