Canon S9000 S9000 Quick Start Guide - Page 21
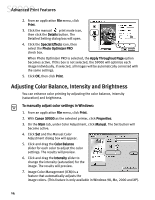
Adjusting Color Balance, Intensity and Brightness
 |
View all Canon S9000 manuals
Add to My Manuals
Save this manual to your list of manuals |
Page 21 highlights
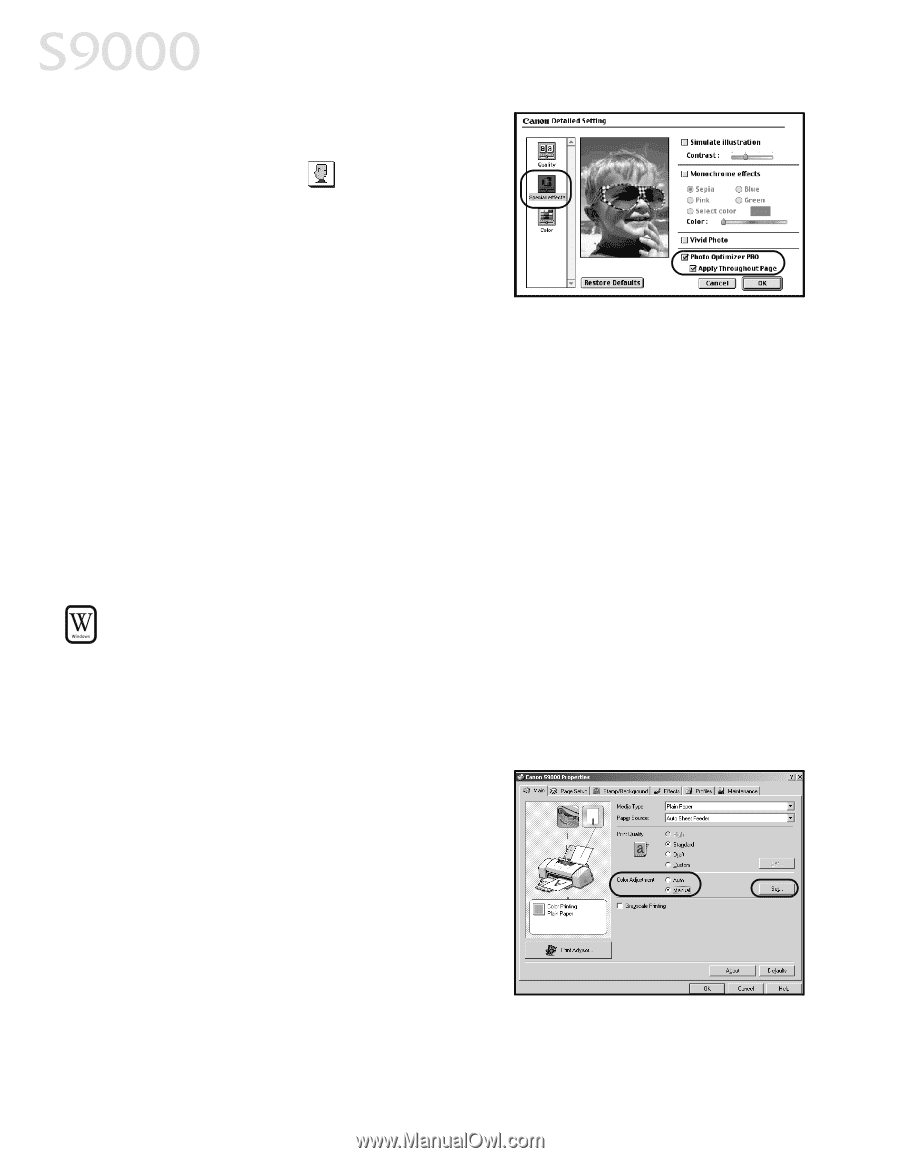
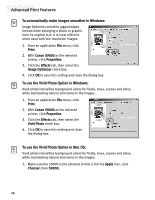
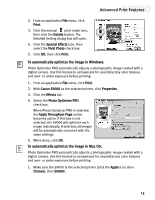
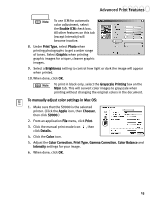
Advanced Print Features 2. From an application File menu, click Print. 3. Click the manual print mode icon, then click the Details button. The Detailed Setting dialog box will open. 4. Click the Special Effects icon, then select the Photo Optimizer PRO check box. When Photo Optimizer PRO is selected, the Apply Throughout Page option becomes active. If this box is not selected, the S9000 will optimize each image individually. If selected, all images will be automatically corrected with the same settings. 5. Click OK, then click Print. Adjusting Color Balance, Intensity and Brightness You can enhance color printing by adjusting the color balance, intensity (saturation) and brightness. To manually adjust color settings in Windows: 1. From an application File menu, click Print. 2. With Canon S9000 as the selected printer, click Properties. 3. On the Main tab, under Color Adjustment, click Manual. The Set button will become active. 4. Click Set and the Manual Color Adjustment dialog box will appear. 5. Click and drag the Color Balance slider for each color to adjust the color settings. The results will preview. 6. Click and drag the Intensity slider to change the intensity (saturation) for the image. The results will preview. 7. Image Color Management (ICM) is a feature that automatically adjusts the image colors. (This feature is only available in Windows 98, Me, 2000 and XP). 14
-
 1
1 -
2
-
3
-
4
-
5
-
6
-
7
-
8
-
9
-
10
-
11
-
12
-
13
-
14
-
15
-
 16
16 -
 17
17 -
 18
18 -
 19
19 -
 20
20 -
 21
21 -
 22
22 -
 23
23 -
 24
24 -
 25
25 -
 26
26 -
27
-
28
-
29
-
30
-
31
-
32
-
33
-
34
-
35
-
36
-
37
-
38
-
39
-
40
-
41
-
42
-
43
-
44
-
45
-
46
-
47
-
48
-
49
-
50
-
51
-
52
-
53
-
54
-
55
-
56
-
57
-
58
-
59
-
60
-
61
-
62
-
63
-
64
-
65
 |
 |