Cisco 7600 SIP 200 Hardware Installation Guide - Page 151
Installing a SPA in a SIP, Removing a SPA from a SIP, Online Insertion and Removal
 |
UPC - 746320961286
View all Cisco 7600 SIP 200 manuals
Add to My Manuals
Save this manual to your list of manuals |
Page 151 highlights
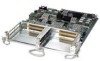
Chapter 6 Installing and Removing a Shared Port Adapter Online Insertion and Removal Installing a SPA in a SIP To install a SPA in a SIP, refer to Figure 6-2 and do the following: Step 1 Step 2 Step 3 Step 4 To insert the SPA in the SIP, locate the guide rails inside the SIP that hold the SPA in place. They are at the top left and top right of the SPA slot and are recessed about an inch, as shown in Figure 6-2. Carefully slide the SPA all the way in the SIP until the SPA is firmly seated in the SPA interface connector. When fully seated, the SPA might be slightly behind the SIP faceplate. After the SPA is properly seated, fasten the SPA in place with the captive installation screws. Tighten the screws to a torque of between 8.3 and 11 inch-pounds (94 to 124 N-cm). Do not overtighten. Caution Overtightening the captive installation screws may result in malfunction or damage. Removing a SPA from a SIP To remove a SPA from a SIP, refer to Figure 6-2 and do the following: Step 1 Step 2 Step 3 If attached, remove any cables from the SPA. To remove the SPA from the SIP, unfasten the captive installation screws on the SPA. Grasp the handles of the SPA and pull the SPA from the SIP. (You have already disconnected the cables from the SPA when removing the SIP). Online Insertion and Removal Cisco 7600 series router SIPs and SPAs support online insertion and removal (OIR). SPAs can be inserted or removed independently from the SIP. OIR of a SIP with installed SPAs is also supported. For more information about performing OIR, refer to the "Preparing for Online Removal of a SPA" section on page 5-4. Optical Device Maintenance Any contamination of the fiber connection can cause failure of the component or failure of the whole system. A particle that partially or completely blocks the core generates strong back reflections, which can cause instability in the laser system. Inspection, cleaning, and reinspection are critical steps to take before making fiber-optic connections. Cleaning Optical Devices See Inspection and Cleaning Procedures for Fiber-Optic Connections for information on cleaning optical devices. OL-5052-14 Cisco 7600 Series Router SIP, SSC, and SPA Hardware Installation Guide 6-3
-
 1
1 -
2
-
3
-
4
-
5
-
6
-
7
-
8
-
9
-
10
-
11
-
12
-
13
-
14
-
15
-
16
-
17
-
18
-
19
-
20
-
21
-
22
-
23
-
24
-
25
-
26
-
27
-
28
-
29
-
30
-
31
-
32
-
33
-
34
-
35
-
36
-
37
-
38
-
39
-
40
-
41
-
42
-
43
-
44
-
45
-
46
-
47
-
48
-
49
-
50
-
51
-
52
-
53
-
54
-
55
-
56
-
57
-
58
-
59
-
60
-
61
-
62
-
63
-
64
-
65
-
66
-
67
-
68
-
69
-
70
-
71
-
72
-
73
-
74
-
75
-
76
-
77
-
78
-
79
-
80
-
81
-
82
-
83
-
84
-
85
-
86
-
87
-
88
-
89
-
90
-
91
-
92
-
93
-
94
-
95
-
96
-
97
-
98
-
99
-
100
-
101
-
102
-
103
-
104
-
105
-
106
-
107
-
108
-
109
-
110
-
111
-
112
-
113
-
114
-
115
-
116
-
117
-
118
-
119
-
120
-
121
-
122
-
123
-
124
-
125
-
126
-
127
-
128
-
129
-
130
-
131
-
132
-
133
-
134
-
135
-
136
-
137
-
138
-
139
-
140
-
141
-
142
-
143
-
144
-
145
-
 146
146 -
 147
147 -
 148
148 -
 149
149 -
 150
150 -
 151
151 -
 152
152 -
 153
153 -
 154
154 -
 155
155 -
 156
156 -
157
-
158
-
159
-
160
-
161
-
162
-
163
-
164
-
165
-
166
-
167
-
168
-
169
-
170
-
171
-
172
 |
 |
