Craftsman 536.270320 Operation Manual - Page 29
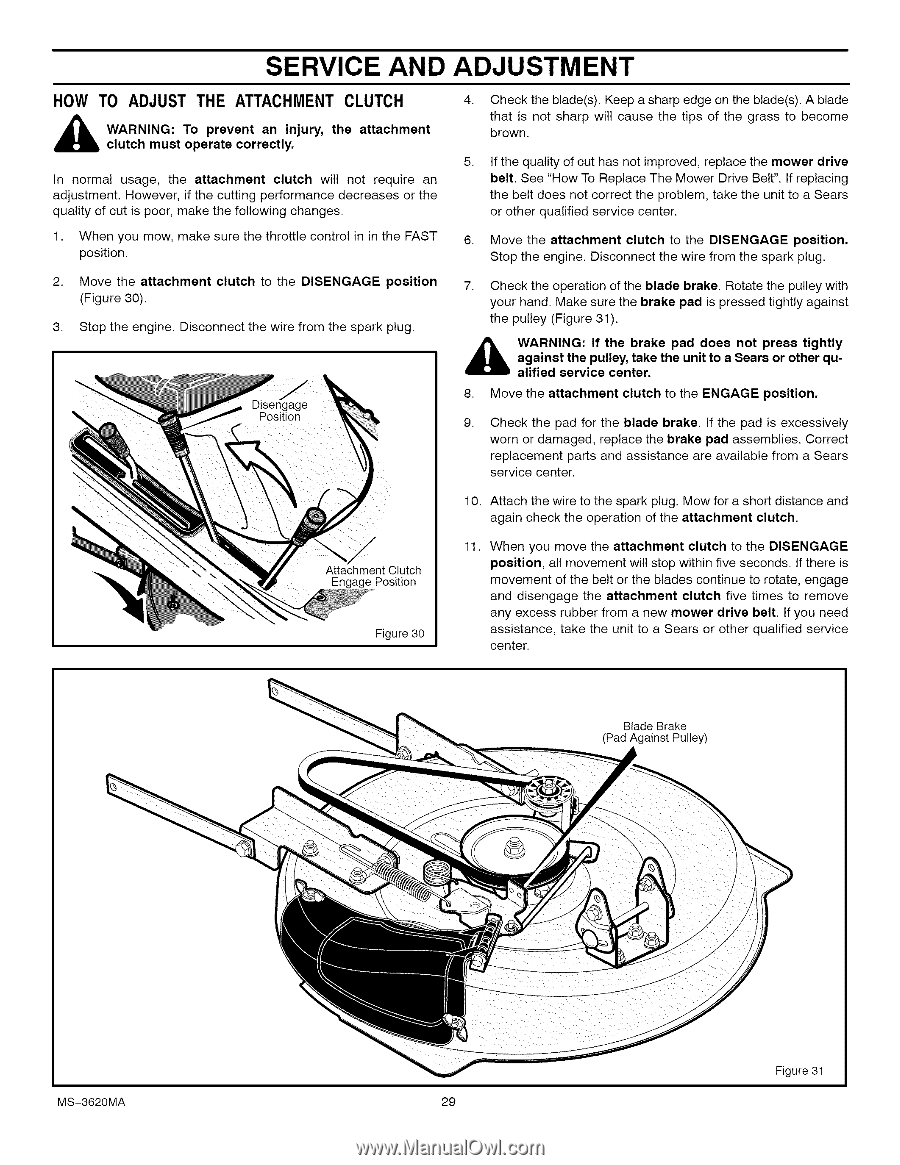
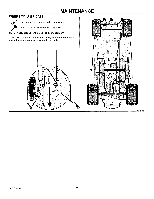
How To Adjust The Attachment Clutch
 |
View all Craftsman 536.270320 manuals
Add to My Manuals
Save this manual to your list of manuals |
Page 29 highlights
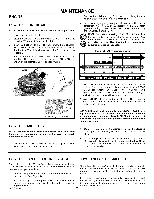
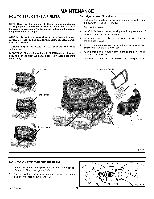
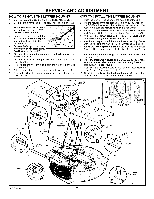
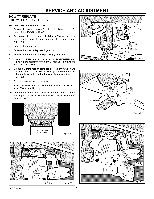
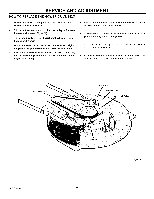
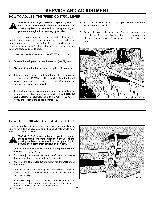
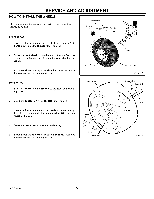
SERVICE AND ADJUSTMENT HOW TO ADJUST THE ATTACHMENT CLUTCH _ cluAtRchNINmGu:st Tooperparteevecnotrreacntly.injury, the attachment In normal usage, the attachment clutch will not require an adjustment. However, if the cutting performance decreases or the quality of cut is poor, make the following changes. 1. When you mow, make sure the throttle control in in the FAST position. 2. Move the attachment clutch to the DISENGAGE position (Figure 30). 3. Stop the engine. Disconnect the wire from the spark plug. 4. Check the blade(s). Keep a sharp edge on the blade(s). A blade that is not sharp will cause the tips of the grass to become brown. If the quality of cut has not improved, replace the mower drive belt. See "How To Replace The Mower Drive Belt". If replacing the belt does not correct the problem, take the unit to a Sears or other qualified service center. Move the attachment clutch to the DISENGAGE position, Stop the engine. Disconnect the wire from the spark plug. 7. Check the operation of the blade brake, Rotate the pulley with your hand. Make sure the brake pad is pressed tightly against the pulley (Figure 31 ). _ agAaRinNsItNGth:e pIfultlheey, btarakkeethepaudnitdotoesa Sneoatrsproerssothteigrhqtluy- alified service center. 8. Move the attachment clutch to the ENGAGE position. Check the pad for the blade brake, If the pad is excessively worn or damaged, replace the brake pad assemblies. Correct replacement parts and assistance are available from a Sears service center. Attachment Clutch Engage Position Figure 30 10. Attach the wire to the spark plug. Mow for a short distance and again check the operation of the attachment clutch. 11. When you move the attachment clutch to the DISENGAGE position, all movement will stop within five seconds. If there is movement of the belt or the blades continue to rotate, engage and disengage the attachment clutch five times to remove any excess rubber from a new mower drive belt, If you need assistance, take the unit to a Sears or other qualified service center. Blade Brake (Pad Against Pulley) MS-3620MA Figure 31 29
-
 1
1 -
2
-
3
-
4
-
5
-
6
-
7
-
8
-
9
-
10
-
11
-
12
-
13
-
14
-
15
-
16
-
17
-
18
-
19
-
20
-
21
-
22
-
23
-
 24
24 -
 25
25 -
 26
26 -
 27
27 -
 28
28 -
 29
29 -
 30
30 -
 31
31 -
 32
32 -
 33
33 -
 34
34 -
35
-
36
-
37
-
38
-
39
-
40
-
41
-
42
-
43
-
44
-
45
-
46
-
47
-
48
-
49
-
50
-
51
-
52
-
53
-
54
-
55
-
56
-
57
-
58
-
59
-
60
-
61
-
62
-
63
-
64
-
65
-
66
-
67
-
68
-
69
-
70
-
71
-
72
-
73
-
74
-
75
-
76
-
77
-
78
-
79
-
80
-
81
-
82
-
83
-
84
-
85
-
86
-
87
-
88
-
89
-
90
-
91
-
92
-
93
-
94
-
95
-
96
-
97
-
98
-
99
-
100
-
101
-
102
-
103
-
104
-
105
-
106
-
107
-
108
 |
 |