Cub Cadet CC30H Riding Lawn Mower Operation Manual - Page 10
Caution
 |
View all Cub Cadet CC30H Riding Lawn Mower manuals
Add to My Manuals
Save this manual to your list of manuals |
Page 10 highlights
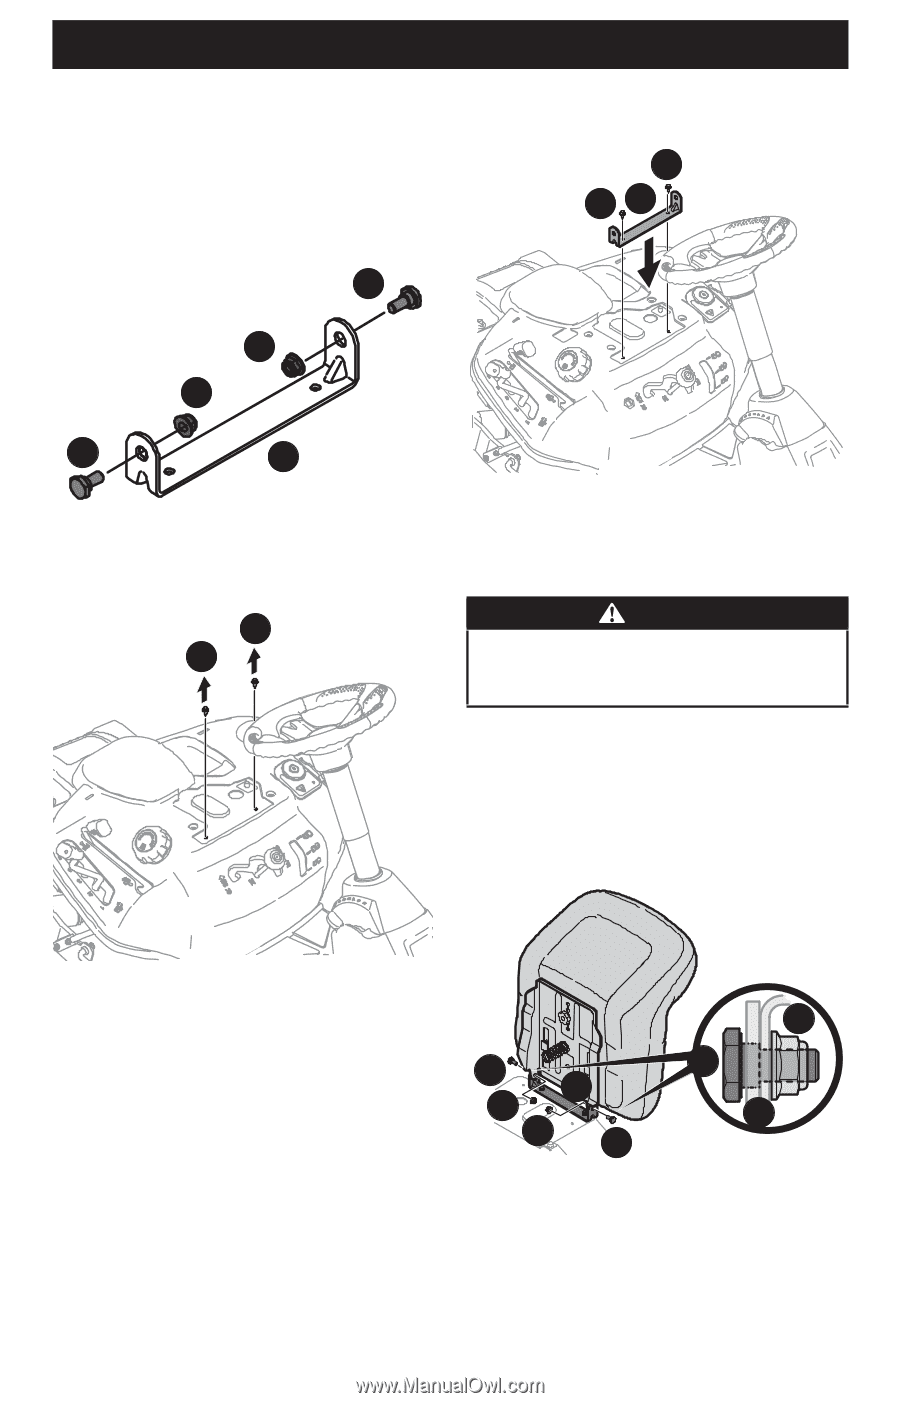
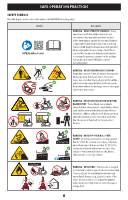
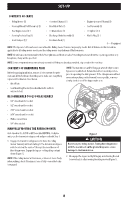
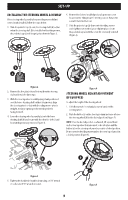
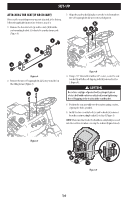
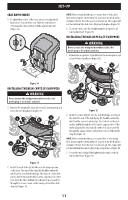
SET-UP ATTACHING THE SEAT (IF NECESSARY) If the seat for your riding mower was not attached at the factory, follow the applicable instructions below to attach it. 1. Remove the shoulder bolts (a) and lock nuts (b) from the seat mounting bracket (c) included in your hardware pack (Figure 6). 3. Align the seat bracket (a) in place over the holes from where the self-tapping bolts (b) were removed (Figure 8). b ba a b b a c Figure 6 2. Remove the two self-tapping bolts (a) factory-installed on the riding mower (Figure 7). a a Figure 8 4. Using a 1/4" drive ratchet with a 3/8" socket, secure the seat bracket (a) with the self-tapping bolts (b) removed in Step 2 (Figure 8). CAUTION Do not use any type of power tool (e.g. impact gun or electric drill with nut driver attached) when tightening the self-tapping bolts to attach the seat bracket. 5. Position the seat assembly over the seat mounting bracket, aligning the holes provided. 6. Install the two shoulder bolts (a) and lock nuts (b) removed from the seat mounting bracket (c) in Step 1 (Figure 9). NOTE: Make sure that the bolt's shoulder is completely recessed into the seat bracket when securing the lock nut (Figure 9 inset). Figure 7 a a c b b a Figure 9 b c 10
-
 1
1 -
2
-
3
-
4
-
 5
5 -
 6
6 -
 7
7 -
 8
8 -
 9
9 -
 10
10 -
 11
11 -
 12
12 -
 13
13 -
 14
14 -
 15
15 -
16
-
17
-
18
-
19
-
20
-
21
-
22
-
23
-
24
-
25
-
26
-
27
-
28
-
29
-
30
-
31
-
32
-
33
-
34
-
35
-
36
-
37
-
38
-
39
-
40
-
41
-
42
-
43
-
44
-
45
-
46
-
47
-
48
-
49
-
50
-
51
-
52
-
53
-
54
-
55
-
56
-
57
-
58
-
59
-
60
-
61
-
62
-
63
-
64
-
65
-
66
-
67
-
68
-
69
-
70
-
71
-
72
-
73
-
74
-
75
-
76
-
77
-
78
-
79
-
80
-
81
-
82
-
83
-
84
-
85
-
86
-
87
-
88
-
89
-
90
-
91
-
92
-
93
-
94
-
95
-
96
 |
 |