Cub Cadet CC30H Riding Lawn Mower Operation Manual - Page 13
Tire Pressure, Gas And Oil Fill-up
 |
View all Cub Cadet CC30H Riding Lawn Mower manuals
Add to My Manuals
Save this manual to your list of manuals |
Page 13 highlights
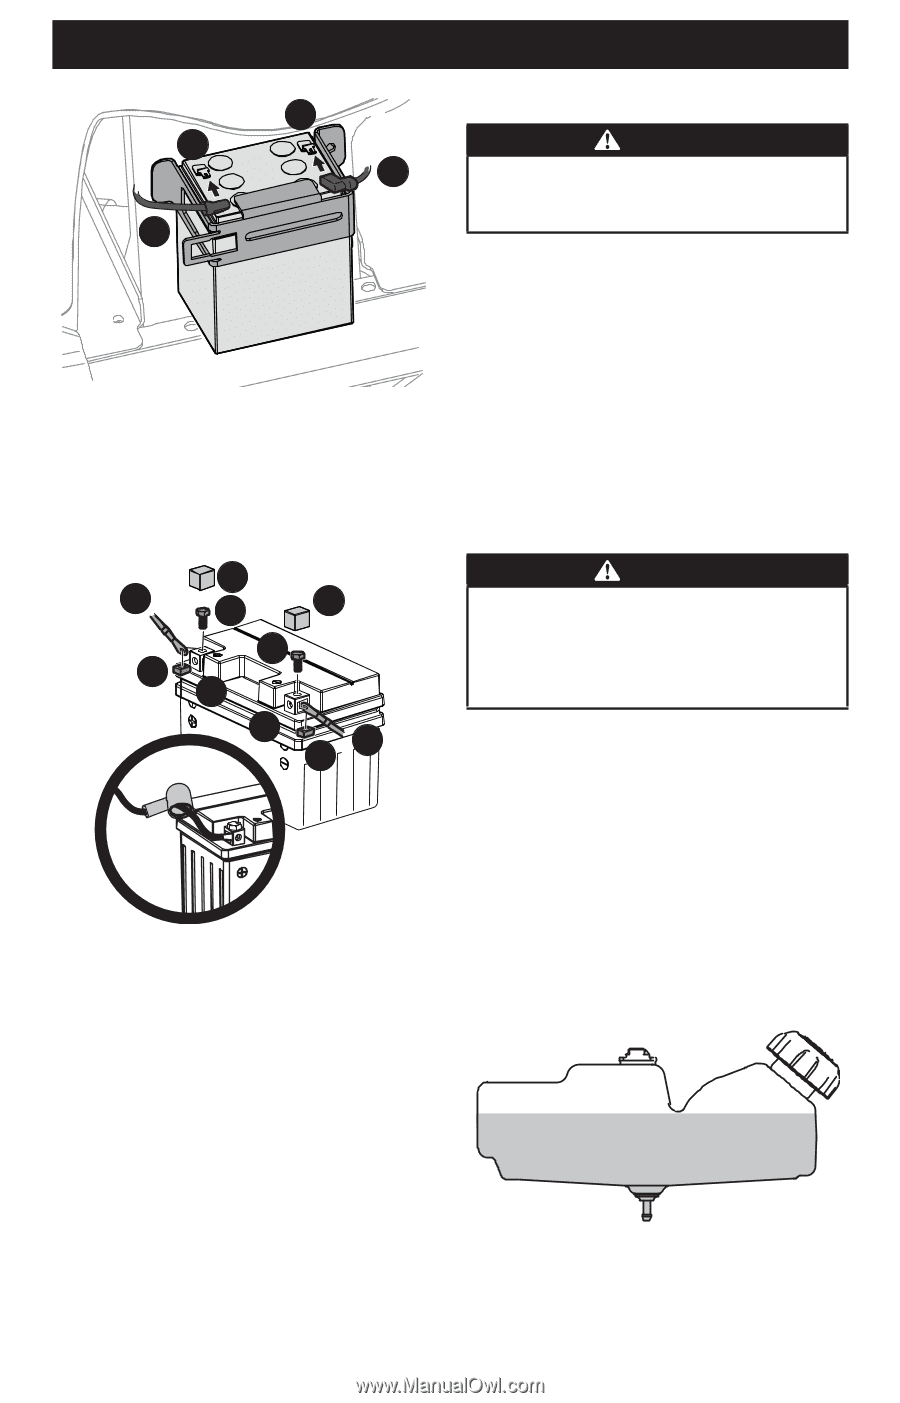
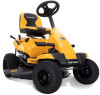
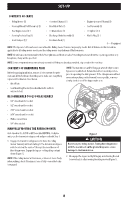
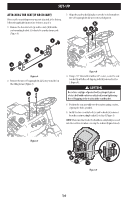
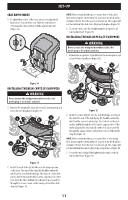
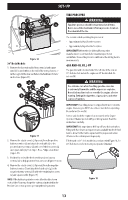
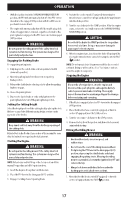
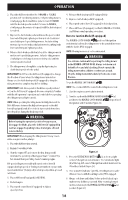
SET-UP d c b a Figure 16 30" Deck Models 1. Remove the factory installed hex screws (a) and square nuts (b) located either on the end of the wiring harness or in the bag with this manual. Retain the hardware for later instructions (Figure 17). c e a c a b d f g b Figure 17 2. Remove the plastic cover (c), if present, from the positive battery terminal (d) and attach the red cable (e) to the positive battery terminal (d) with one of the hex screws (a) and square nuts (b), from Step 1. Use a Philips screw driver (Figure 17). 3. Position the red rubber boot over the positive battery terminal (d) to help protect it from corrosion (Figure 17 inset). 4. Remove the plastic cover (c), if present, from the negative battery terminal (f) and attach the black cable (g) to the negative battery terminal (f) with the remaining hex screw (a) and square nut (b) (Figure 17). NOTE: If the battery is put into service after the date shown on top/side of battery, charge the battery as instructed in the Product Care section prior to operating the riding mower. TIRE PRESSURE WARNING Equal tire pressure should be maintained at all times. Never exceed the maximum inflation pressure shown on the sidewall of the tire. The recommended operating tire pressure is: • Approximately 10 psi for the rear tires • Approximately 14 psi for the front tires IMPORTANT! Refer to the tire sidewall for exact tire manufacturer's recommended or maximum psi. Do not overinflate. Uneven tire pressure could cause the cutting deck to mow unevenly. GAS AND OIL FILL-UP The gasoline tank is located under the left side of the seat on 30" deck models and on the engine on 24" deck models. Do not overfill. WARNING Use extreme care when handling gasoline. Gasoline is extremely flammable and the vapors are explosive. Never fuel machine indoors or while the engine is hot or running. Extinguish cigarettes, cigars, pipes, and other sources of ignition. IMPORTANT! Your riding mower is shipped with motor oil in the engine. However, you MUST check the oil level before operating. Be careful not to overfill. Service and check the engine oil as instructed in the Engine Operator's Manual packed with your riding mower. Read the instructions carefully. IMPORTANT! It is important to NOT top off your fuel tank when filling with fuel. Leave an expansion area available inside the fuel tank to allow for the fuel to expand and for proper ventilation. Otherwise the unit may not run properly. Fill the tank on 30" deck models in accordance with Figure 18, for 24" deck models refer to the Engine Operator's Manual. Figure 18 13
-
 1
1 -
2
-
3
-
4
-
5
-
6
-
7
-
 8
8 -
 9
9 -
 10
10 -
 11
11 -
 12
12 -
 13
13 -
 14
14 -
 15
15 -
 16
16 -
 17
17 -
 18
18 -
19
-
20
-
21
-
22
-
23
-
24
-
25
-
26
-
27
-
28
-
29
-
30
-
31
-
32
-
33
-
34
-
35
-
36
-
37
-
38
-
39
-
40
-
41
-
42
-
43
-
44
-
45
-
46
-
47
-
48
-
49
-
50
-
51
-
52
-
53
-
54
-
55
-
56
-
57
-
58
-
59
-
60
-
61
-
62
-
63
-
64
-
65
-
66
-
67
-
68
-
69
-
70
-
71
-
72
-
73
-
74
-
75
-
76
-
77
-
78
-
79
-
80
-
81
-
82
-
83
-
84
-
85
-
86
-
87
-
88
-
89
-
90
-
91
-
92
-
93
-
94
-
95
-
96
 |
 |