D-Link DSM-520 Product Manual - Page 40
Current Network Settings
 |
UPC - 790069283451
View all D-Link DSM-520 manuals
Add to My Manuals
Save this manual to your list of manuals |
Page 40 highlights
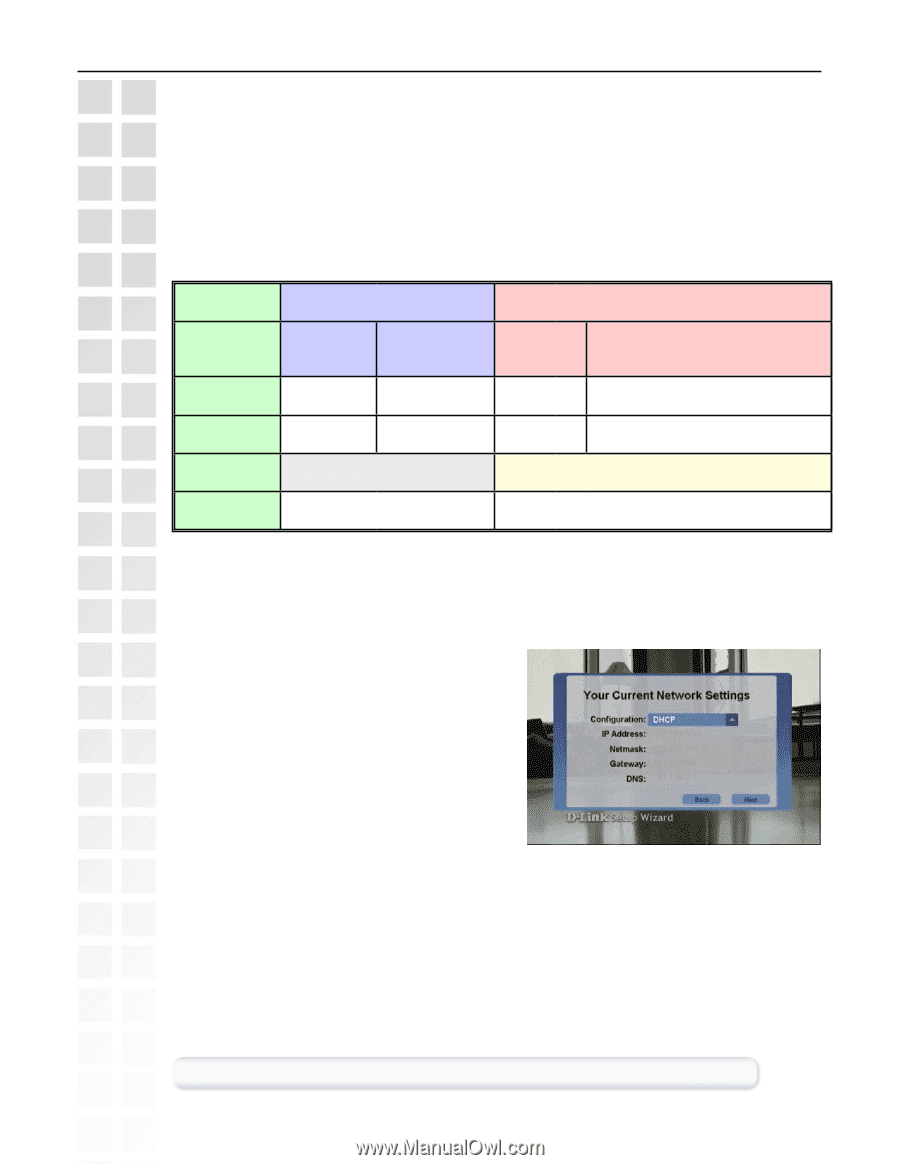
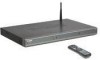
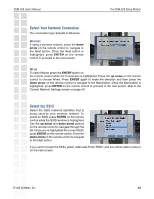
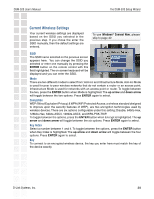
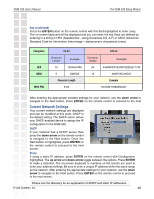
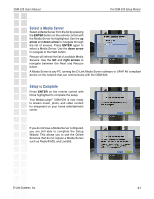
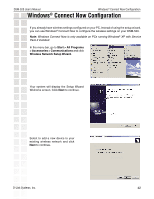
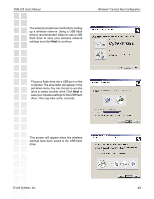
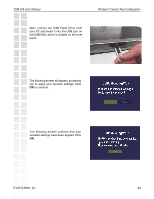
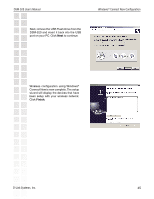
DSM-520 User's Manual The DSM-520 Setup Wizard Key (continued) Press the ENTER button on the remote control with this field highlighted to enter a key. The on-screen keyboard will be displayed and you can enter the key. Keys are defined by entering in a string in HEX (hexadecimal - using characters 0-9, A-F) or ASCII (American Standard Code for Information Interchange - alphanumeric characters) format. Encryption HEX ASCII WPA-PSK 64-bit Character Length Example 10 12345678FA 5 DMODE Character Length 8-63 128-bit Character Length Example 26 456FBCDF123400122225271730 13 2005PIECAKES1 Example SCOOBY7892SNACK After entering the appropriate wireless settings for your network, use the down arrow to navigate to the Next button. Press ENTER on the remote control to proceed to the next Current Network Settings Your current network settings are displayed and can be modified at this point. DHCP is the default setting. The DHCP option allows your DHCP enabled device to assign the IP configuration to the DSM-520. DHCP If your network has a DHCP server then press the down arrow on the remote control to navigate to the Next button. Once the Next button is highlighted, press ENTER on the remote control to proceed to the next screen. Static If using a static IP address, press ENTER on the remote control with Configuration highlighted. The up arrow and down arrow toggle between the options. Press ENTER to make a selection. The on-screen keyboard or numbers on the remote are used to enter your address settings. Be sure to enter a unique IP address within the same range as the network. After entering the appropriate settings for your network, use the down arrow to navigate to the Next button. Press ENTER on the remote control to proceed to the next screen. Please see the Glossary for an explanation of DHCP and static IP addresses. D-Link Systems, Inc. 40
-
 1
1 -
2
-
3
-
4
-
5
-
6
-
7
-
8
-
9
-
10
-
11
-
12
-
13
-
14
-
15
-
16
-
17
-
18
-
19
-
20
-
21
-
22
-
23
-
24
-
25
-
26
-
27
-
28
-
29
-
30
-
31
-
32
-
33
-
34
-
 35
35 -
 36
36 -
 37
37 -
 38
38 -
 39
39 -
 40
40 -
 41
41 -
 42
42 -
 43
43 -
 44
44 -
 45
45 -
46
-
47
-
48
-
49
-
50
-
51
-
52
-
53
-
54
-
55
-
56
-
57
-
58
-
59
-
60
-
61
-
62
-
63
-
64
-
65
-
66
-
67
-
68
-
69
-
70
-
71
-
72
-
73
-
74
-
75
-
76
-
77
-
78
-
79
-
80
-
81
-
82
-
83
-
84
-
85
-
86
-
87
-
88
-
89
-
90
-
91
-
92
-
93
-
94
-
95
-
96
-
97
-
98
-
99
-
100
-
101
-
102
-
103
-
104
-
105
-
106
-
107
-
108
-
109
-
110
-
111
-
112
-
113
-
114
-
115
-
116
-
117
-
118
-
119
-
120
-
121
-
122
-
123
-
124
-
125
-
126
-
127
 |
 |