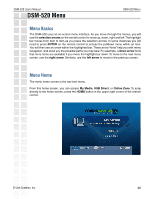
D-Link DSM-520 Product Manual - Page 44
Next, remove the USB Flash Drive
 |
UPC - 790069283451
View all D-Link DSM-520 manuals
Add to My Manuals
Save this manual to your list of manuals |
Page 44 highlights
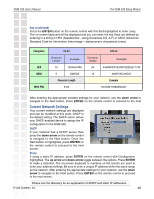
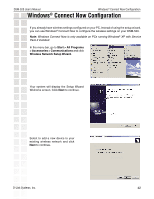
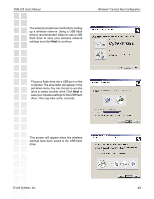
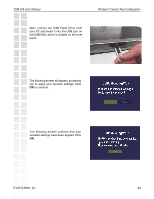
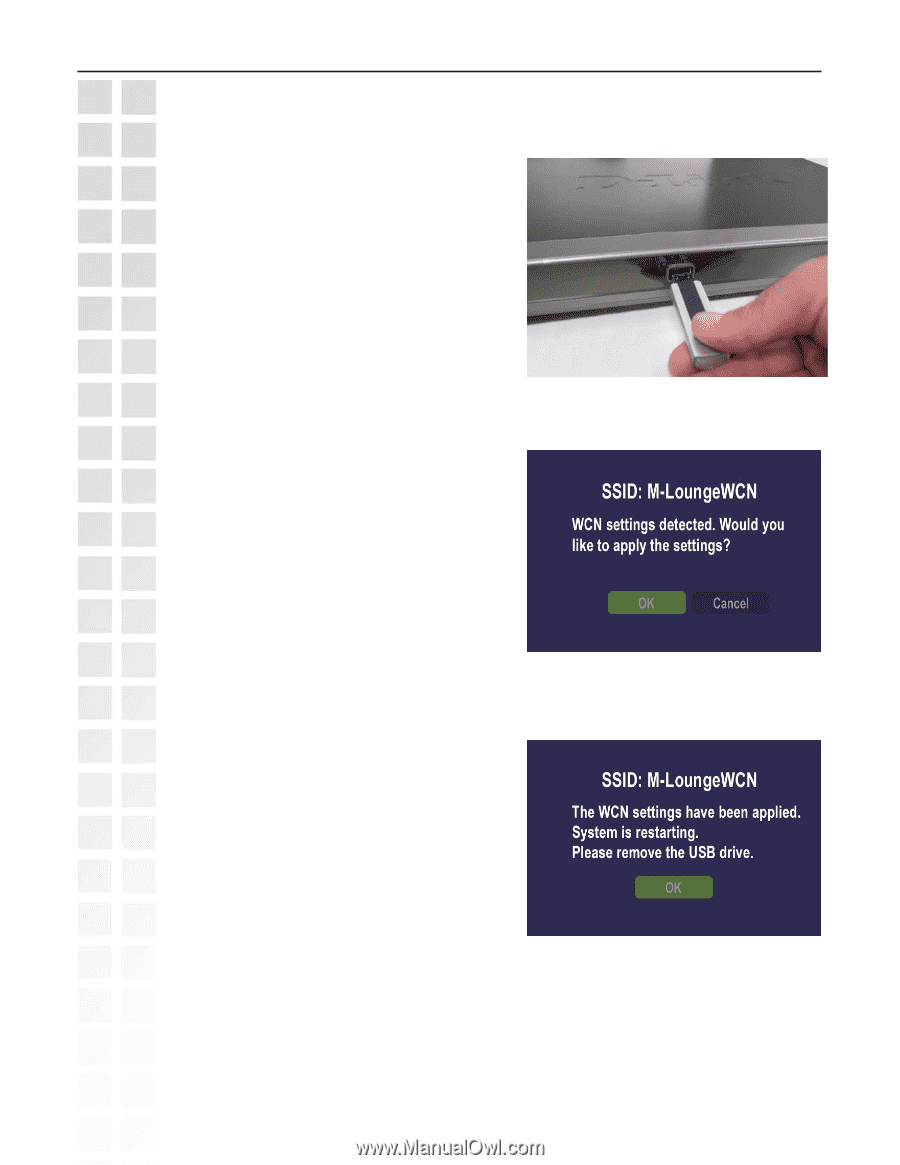
DSM-520 User's Manual Windows® Connect Now Configuration Next, remove the USB Flash Drive from your PC and insert it into the USB port on the DSM-520, which is located on the front panel. The following screen will appear, prompting you to apply your wireless settings. Click OK to continue. The following screen confirms that your wireless settings have been applied. Click OK. D-Link Systems, Inc. 44
-
 1
1 -
2
-
3
-
4
-
5
-
6
-
7
-
8
-
9
-
10
-
11
-
12
-
13
-
14
-
15
-
16
-
17
-
18
-
19
-
20
-
21
-
22
-
23
-
24
-
25
-
26
-
27
-
28
-
29
-
30
-
31
-
32
-
33
-
34
-
35
-
36
-
37
-
38
-
 39
39 -
 40
40 -
 41
41 -
 42
42 -
 43
43 -
 44
44 -
 45
45 -
 46
46 -
 47
47 -
 48
48 -
 49
49 -
50
-
51
-
52
-
53
-
54
-
55
-
56
-
57
-
58
-
59
-
60
-
61
-
62
-
63
-
64
-
65
-
66
-
67
-
68
-
69
-
70
-
71
-
72
-
73
-
74
-
75
-
76
-
77
-
78
-
79
-
80
-
81
-
82
-
83
-
84
-
85
-
86
-
87
-
88
-
89
-
90
-
91
-
92
-
93
-
94
-
95
-
96
-
97
-
98
-
99
-
100
-
101
-
102
-
103
-
104
-
105
-
106
-
107
-
108
-
109
-
110
-
111
-
112
-
113
-
114
-
115
-
116
-
117
-
118
-
119
-
120
-
121
-
122
-
123
-
124
-
125
-
126
-
127
 |
 |
44
DSM-520 User’s Manual
D-Link Systems, Inc.
Windows
®
Connect Now Configuration
Next, remove the USB Flash Drive from
your PC and insert it into the USB port on
the DSM-520, which is located on the front
panel.
The following screen will appear, prompting
you to apply your wireless settings. Click
OK
to continue.
The following screen confirms that your
wireless settings have been applied. Click
OK
.