Dell 3000cn Color Laser Printer User's Guide - Page 104
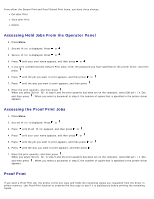
Accessing Held Jobs From the Operator Panel, Accessing the Proof Print Jobs, Proof Print, Stored Print
 |
View all Dell 3000cn Color Laser Printer manuals
Add to My Manuals
Save this manual to your list of manuals |
Page 104 highlights
From either the Secure Print and Proof Stored Print items, you have three choices: Del after Print Save after Print Delete Accessing Held Jobs From the Operator Panel 1. Press Menu. 2. Stored Print is displayed. Press or . 3. Secure Print is displayed. Press or . 4. Press until your user name appears, and then press or . 5. If you print confidential jobs (Secure Print jobs), enter the password you have specified on the printer driver, and then press . 6. Press until the job you want to print appears, and then press or . 7. Press until the way you want to print appears, and then press . 8. Enter the print quantity, and then press . When you select Select All in step 6 and the print quantity has been set on the computer, select Default in Doc, and then press . When you select a document in step 6, the number of copies that is specified in the printer driver appears. Accessing the Proof Print Jobs 1. Press Menu. 2. Stored Print is displayed. Press or . 3. Press until Proof Print appears, and then press or . 4. Press until your user name appears, and then press or . 5. Press until the job you want to print appears, and then press or . 6. Press until the way you want to print appears, and then press . 7. Enter the print quantity, and then press . When you select Select All in step 5 and the print quantity has been set on the computer, select Default in Doc, and then press . When you select a document in step 5, the number of copies that is specified in the printer driver appears. Proof Print If you send a Proof Print job, the printer prints one copy and holds the remaining copies you requested from the driver in printer memory. Use Proof Print function to examine the first copy to see if it is satisfactory before printing the remaining copies.
-
 1
1 -
2
-
3
-
4
-
5
-
6
-
7
-
8
-
9
-
10
-
11
-
12
-
13
-
14
-
15
-
16
-
17
-
18
-
19
-
20
-
21
-
22
-
23
-
24
-
25
-
26
-
27
-
28
-
29
-
30
-
31
-
32
-
33
-
34
-
35
-
36
-
37
-
38
-
39
-
40
-
41
-
42
-
43
-
44
-
45
-
46
-
47
-
48
-
49
-
50
-
51
-
52
-
53
-
54
-
55
-
56
-
57
-
58
-
59
-
60
-
61
-
62
-
63
-
64
-
65
-
66
-
67
-
68
-
69
-
70
-
71
-
72
-
73
-
74
-
75
-
76
-
77
-
78
-
79
-
80
-
81
-
82
-
83
-
84
-
85
-
86
-
87
-
88
-
89
-
90
-
91
-
92
-
93
-
94
-
95
-
96
-
97
-
98
-
 99
99 -
 100
100 -
 101
101 -
 102
102 -
 103
103 -
 104
104 -
 105
105 -
 106
106 -
 107
107 -
 108
108 -
 109
109 -
110
-
111
-
112
-
113
-
114
-
115
-
116
-
117
-
118
-
119
-
120
-
121
-
122
-
123
-
124
-
125
-
126
-
127
-
128
-
129
-
130
-
131
-
132
-
133
-
134
-
135
-
136
-
137
-
138
-
139
-
140
-
141
-
142
-
143
-
144
-
145
-
146
-
147
-
148
-
149
-
150
-
151
-
152
-
153
-
154
-
155
-
156
-
157
-
158
-
159
-
160
-
161
-
162
-
163
-
164
-
165
-
166
-
167
-
168
-
169
-
170
-
171
-
172
-
173
-
174
-
175
-
176
-
177
-
178
-
179
-
180
-
181
-
182
-
183
-
184
-
185
-
186
-
187
-
188
-
189
-
190
-
191
-
192
-
193
-
194
 |
 |