Dell 3000cn Color Laser Printer User's Guide - Page 43
Installing the Optional Tray Module
 |
View all Dell 3000cn Color Laser Printer manuals
Add to My Manuals
Save this manual to your list of manuals |
Page 43 highlights
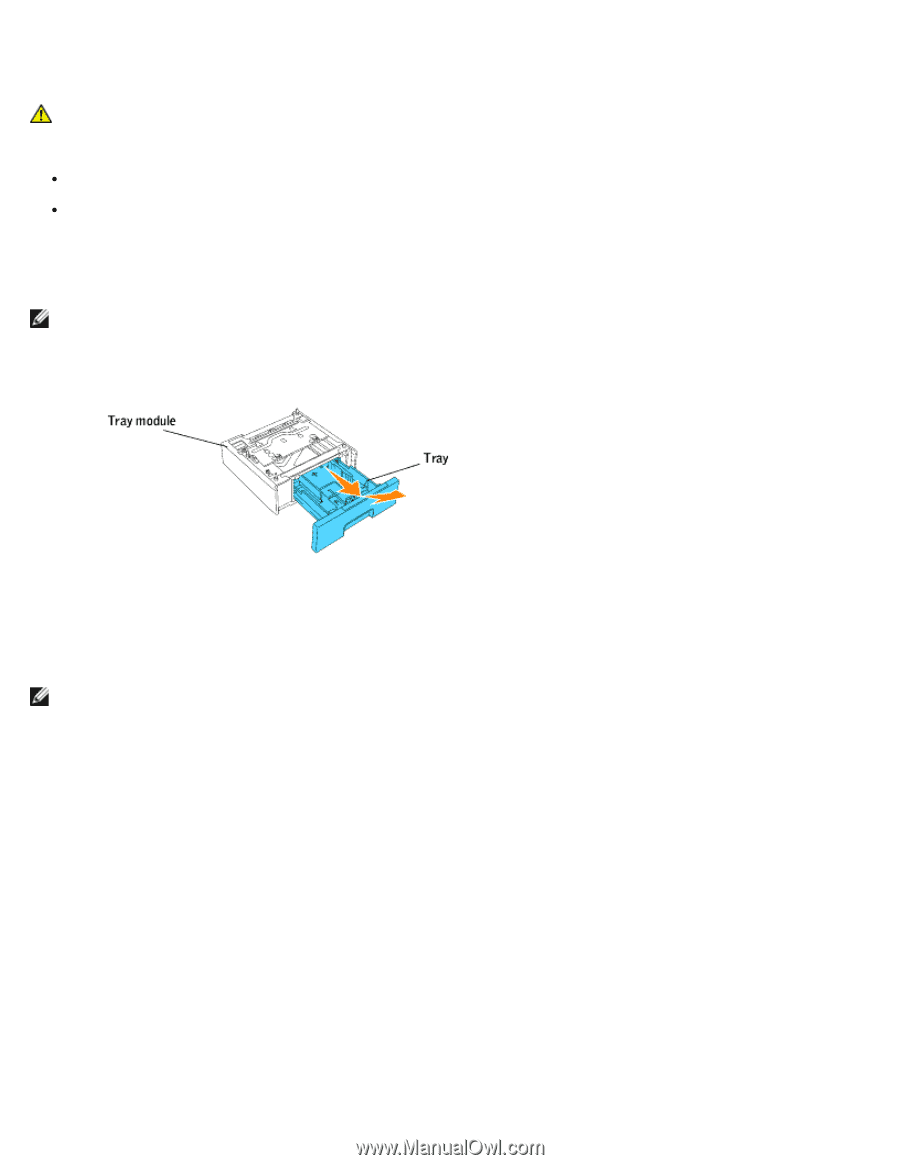
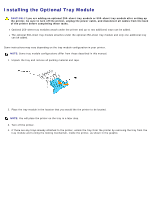
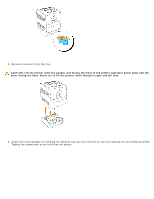
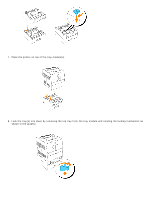
Installing the Optional Tray Module CAUTION: If you are adding an optional 250-sheet tray module or 500-sheet tray module after setting up the printer, be sure to turn off the printer, unplug the power cable, and disconnect all cables from the back of the printer before completing these tasks. Optional 250-sheet tray modules attach under the printer and up to two additional trays can be added. The optional 500-sheet tray module attaches under the optional 250-sheet tray module and only one additional tray can be added. Some instructions may vary depending on the tray module configuration in your printer. NOTE: Some tray module configurations differ from those described in this manual. 1. Unpack the tray and remove all packing material and tape. 2. Place the tray module in the location that you would like the printer to be located. NOTE: You will place the printer on the tray in a later step. 3. Turn off the printer. 4. If there are any trays already attached to the printer, unlock the tray from the printer by removing the tray from the tray module and turning the locking mechanism, inside the printer, as shown in the graphic.
-
 1
1 -
2
-
3
-
4
-
5
-
6
-
7
-
8
-
9
-
10
-
11
-
12
-
13
-
14
-
15
-
16
-
17
-
18
-
19
-
20
-
21
-
22
-
23
-
24
-
25
-
26
-
27
-
28
-
29
-
30
-
31
-
32
-
33
-
34
-
35
-
36
-
37
-
 38
38 -
 39
39 -
 40
40 -
 41
41 -
 42
42 -
 43
43 -
 44
44 -
 45
45 -
 46
46 -
 47
47 -
 48
48 -
49
-
50
-
51
-
52
-
53
-
54
-
55
-
56
-
57
-
58
-
59
-
60
-
61
-
62
-
63
-
64
-
65
-
66
-
67
-
68
-
69
-
70
-
71
-
72
-
73
-
74
-
75
-
76
-
77
-
78
-
79
-
80
-
81
-
82
-
83
-
84
-
85
-
86
-
87
-
88
-
89
-
90
-
91
-
92
-
93
-
94
-
95
-
96
-
97
-
98
-
99
-
100
-
101
-
102
-
103
-
104
-
105
-
106
-
107
-
108
-
109
-
110
-
111
-
112
-
113
-
114
-
115
-
116
-
117
-
118
-
119
-
120
-
121
-
122
-
123
-
124
-
125
-
126
-
127
-
128
-
129
-
130
-
131
-
132
-
133
-
134
-
135
-
136
-
137
-
138
-
139
-
140
-
141
-
142
-
143
-
144
-
145
-
146
-
147
-
148
-
149
-
150
-
151
-
152
-
153
-
154
-
155
-
156
-
157
-
158
-
159
-
160
-
161
-
162
-
163
-
164
-
165
-
166
-
167
-
168
-
169
-
170
-
171
-
172
-
173
-
174
-
175
-
176
-
177
-
178
-
179
-
180
-
181
-
182
-
183
-
184
-
185
-
186
-
187
-
188
-
189
-
190
-
191
-
192
-
193
-
194
 |
 |