Dell 3000cn Color Laser Printer User's Guide - Page 151
USB Printing, Connecting the Printer to the Computer Before Inserting the Drivers and Utilities CD
 |
View all Dell 3000cn Color Laser Printer manuals
Add to My Manuals
Save this manual to your list of manuals |
Page 151 highlights
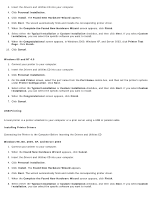
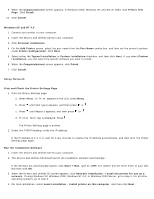
3. Insert the Drivers and Utilities CD into your computer. 4. Click Personal Installation. 5. Click Install. The Found New Hardware Wizard appears. 6. Click Next. The wizard automatically finds and installs the corresponding printer driver. 7. When the Complete the Found New Hardware Wizard screen appears, click Finish. 8. Select either the Typical Installation or Custom Installation checkbox, and then click Next. If you select Custom Installation, you can select the specific software you want to install. 9. When the Congratulations! screen appears, in Windows 2000, Windows XP, and Server 2003, click Printer Test Page. Click Finish. 10. Click Cancel. Windows 95 and NT 4.0 1. Connect your printer to your computer. 2. Insert the Drivers and Utilities CD into your computer. 3. Click Personal Installation. 4. On the Add Printer screen, select the port name from the Port Name combo box, and then set the printer's options under Printer Configuration. Click Next. 5. Select either the Typical Installation or Custom Installation checkbox, and then click Next. If you select Custom Installation, you can select the specific software you want to install. 6. When the Congratulations! screen appears, click Finish. 7. Click Cancel. USB Printing A local printer is a printer attached to your computer or a print server using a USB or parallel cable. Installing Printer Drivers Connecting the Printer to the Computer Before Inserting the Drivers and Utilities CD Windows 98, Me, 2000, XP, and Server 2003 1. Connect your printer to your computer. 2. When the Found New Hardware Wizard appears, click Cancel. 3. Insert the Drivers and Utilities CD into your computer. 4. Click Personal Installation. 5. Click Install. The Found New Hardware Wizard appears. 6. Click Next. The wizard automatically finds and installs the corresponding printer driver. 7. When the Complete the Found New Hardware Wizard screen appears, click Finish. 8. Select either the Typical Installation or Custom Installation checkbox, and then click Next. If you select Custom Installation, you can select the specific software you want to install.
-
 1
1 -
2
-
3
-
4
-
5
-
6
-
7
-
8
-
9
-
10
-
11
-
12
-
13
-
14
-
15
-
16
-
17
-
18
-
19
-
20
-
21
-
22
-
23
-
24
-
25
-
26
-
27
-
28
-
29
-
30
-
31
-
32
-
33
-
34
-
35
-
36
-
37
-
38
-
39
-
40
-
41
-
42
-
43
-
44
-
45
-
46
-
47
-
48
-
49
-
50
-
51
-
52
-
53
-
54
-
55
-
56
-
57
-
58
-
59
-
60
-
61
-
62
-
63
-
64
-
65
-
66
-
67
-
68
-
69
-
70
-
71
-
72
-
73
-
74
-
75
-
76
-
77
-
78
-
79
-
80
-
81
-
82
-
83
-
84
-
85
-
86
-
87
-
88
-
89
-
90
-
91
-
92
-
93
-
94
-
95
-
96
-
97
-
98
-
99
-
100
-
101
-
102
-
103
-
104
-
105
-
106
-
107
-
108
-
109
-
110
-
111
-
112
-
113
-
114
-
115
-
116
-
117
-
118
-
119
-
120
-
121
-
122
-
123
-
124
-
125
-
126
-
127
-
128
-
129
-
130
-
131
-
132
-
133
-
134
-
135
-
136
-
137
-
138
-
139
-
140
-
141
-
142
-
143
-
144
-
145
-
 146
146 -
 147
147 -
 148
148 -
 149
149 -
 150
150 -
 151
151 -
 152
152 -
 153
153 -
 154
154 -
 155
155 -
 156
156 -
157
-
158
-
159
-
160
-
161
-
162
-
163
-
164
-
165
-
166
-
167
-
168
-
169
-
170
-
171
-
172
-
173
-
174
-
175
-
176
-
177
-
178
-
179
-
180
-
181
-
182
-
183
-
184
-
185
-
186
-
187
-
188
-
189
-
190
-
191
-
192
-
193
-
194
 |
 |